By industry definition, a seal weld is a non-structural fusion joint engineered strictly to eliminate leakage pathways or seal cavities against internal pressure and oxidation. Designed to supplement mechanical fasteners or structural welds, it ensures zero-fluid migration in piping systems and sheet metal enclosures without compromising the base metal’s pre-calculated load-bearing limits.
In real production work, designers often call for full continuous seal welds “just to be safe.” This choice creates a gap between the CAD design and the actual shop process. The intent is safety, but the result is often extra work on the floor.
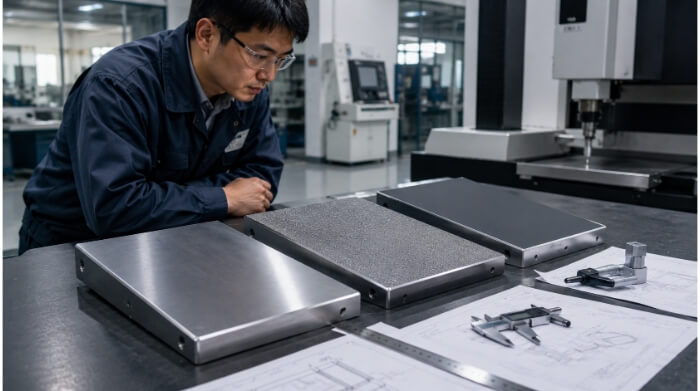
We review many drawings every week and see the same pattern. Extra welds often lead to hidden cost and production issues. This guide will explain when seal welding is truly needed. It will also show what defects can appear.
Why Seal Welds Are Used?
When specified correctly, seal welding solves specific environmental and functional problems. It works well for parts that face fluid exposure, chemical processing, or strict hygiene requirements.
Leak Prevention
The most direct application is containing fluids or gases. For tanks, enclosures, or low-pressure piping systems, seal welding creates a continuous physical barrier along the joint to prevent internal contents from leaking.
This is essential for electrical enclosures requiring IP65, IP67, or specific NEMA ratings. It is usually used in conjunction with structural welds to ensure the joint is both strong and leak-proof.
Crevice Corrosion
When two metal plates overlap, the resulting crevice can trap moisture and oxygen. Over time, this leads to crevice corrosion or “rust bleeding,” particularly in outdoor steel structures.
A seal weld closes this gap, isolating the internal surfaces from the environment. This physical barrier prevents moisture buildup and significantly extends the lifespan of the metal.
Powder Coating Preparation
Before powder coating, sheet metal parts typically go through chemical washing and rinsing. If joints are left unsealed, acidic wash solutions can get trapped in the overlapping seams.
When the part enters the curing oven (typically around 200°C), these trapped liquids boil out, which may cause the fresh powder coat to blister. A proper seal weld prevents liquid ingress during this pre-treatment stage.
Hygienic Surfaces
For medical equipment and food processing machinery, exposed crevices are unacceptable because they harbor bacteria and are difficult to clean. Seal welding is commonly used here for stainless steel assemblies (such as 304 or 316 grades).
After welding, the bead is ground and polished to create a continuous, smooth surface. This finishing process—often requiring specific Ra (surface roughness) values—ensures the part meets strict sanitation standards.
Manufacturing Problems Caused by Seal Welds
While seal welds solve environmental issues, they introduce direct challenges to the fabrication process. Designers must weigh the necessity of sealing against the production risks, especially on thin sheet metal components.
Heat Distortion
Continuous welding puts significant and concentrated heat into the metal. On thin sheet metal parts (like 1.5mm or 2mm steel), this thermal stress often causes warpage and bowing.
Fixing this distortion requires manual leveling and thermal straightening after welding. This not only adds direct labor hours but also makes it extremely difficult to maintain tight geometric tolerances (GD&T), which may lead to assembly failures down the line.
Weld Porosity
When sealing a closed joint or a hollow section, the air inside expands rapidly due to the heat of the welding arc. This expanding gas forces its way out through the molten weld pool.
As the gas escapes, it may cause porosity (pinholes) along the bead. These microscopic defects compromise the sealing function and often require additional rework and inspection to fix.
Grinding Rework
A continuous seal weld leaves a raised bead along the entire joint. If the part requires a flat surface for mechanical assembly or a smooth finish for aesthetic reasons, the entire weld line must be ground flush.
In many cases, this manual grinding and blending process takes significantly longer than the welding itself. This extra post-processing time directly drives up the unit price of the part.
Trapped Gas Risks
If a sealed enclosure is sent for hot-dip galvanizing, it presents a severe shop floor hazard. The trapped internal air and moisture will expand violently when submerged in molten zinc (around 450°C).
This rapid expansion can deform the part or even cause it to rupture. If a joint must be fully seal welded before galvanizing, specific vent holes are required by fabrication standards to relieve the internal pressure.
Coating Failures
If a seal weld is applied poorly and contains micro-cracks, it fails its primary purpose. Moisture or pretreatment chemicals can still enter the joint but struggle to evaporate.
This trapped moisture will eventually push outward through the surface. Over time, this causes the paint or powder coating to lift, flake, or fail prematurely in the field.
When Seal Welds Become Over-Engineering
Seal welds should not be the default choice for every joint. Applying them without evaluating the actual physical environment often leads to over-engineering. This unnecessary requirement increases labor costs, heat input, and production time without adding functional value.
Large Thin Panels
Welding a continuous seam on large sheet metal enclosures (such as equipment cabinets made of 1.5mm steel) introduces massive amounts of heat. The thermal expansion forces the large flat surfaces to buckle or “oil can.”
Fixing this severe distortion requires extensive thermal straightening or mechanical leveling. This rework often ruins the surface finish and adds significant labor cost that could have been avoided with a different joint design.
Full-Length Welds
Designers sometimes specify a full-length continuous weld when an intermittent structural weld—such as a 2-10 stitch weld (2 inches of weld every 10 inches)—would easily handle the mechanical load.
If the environment does not strictly require blocking moisture, pressurized gases, or hygiene control, continuous welding is unnecessary. Upgrading a stitch weld to a full-length seal weld can multiply the welding labor cost by five times without adding any actual structural strength.
Cosmetic Requirements
Using a continuous weld simply to close a visible gap for cosmetic reasons is a very expensive approach. Achieving a flawless, seamless cosmetic finish requires the welder to lay a consistent bead, followed by extensive manual grinding, blending, and polishing.
On the shop floor, it is common to spend 5 minutes welding and 30 minutes grinding. In many cases, this manual finishing process can account for 40% to 60% of the total manufacturing cost for that specific part.
High-Volume Production
During the prototyping stage, adding a manual seal weld might only increase the build time by a few minutes. However, in mass manufacturing runs, those extra minutes per part create severe bottlenecks on the welding line.
Unnecessary continuous welding scales up inspection difficulty and labor costs exponentially. Designing out the seal weld becomes much more cost-effective as production volumes increase.
Better Alternatives for Sealing
Good sheet metal design minimizes welding wherever possible. Depending on the application, there are often more efficient and cost-effective ways to seal a joint without introducing heat.
Bent Corners
The most reliable way to prevent a weld leak is to eliminate the welded seam entirely. Through Design for Manufacturing (DFM) analysis, engineers can often adjust the sheet metal flat pattern to use bent corners instead of welded edges.
A CNC press brake operation takes seconds and introduces zero heat or distortion. This approach fundamentally removes the risk of weld porosity and drastically reduces manual labor costs.
Adhesive Sealing
For joints that already have structural welds but fail a leak test due to microscopic pinholes, low-viscosity anaerobic adhesives often work well. Capillary action draws the liquid sealant deep into the pores where it cures, providing a reliable, zero-heat seal.
However, this chemical method has specific limits. It is generally used for low-pressure fluid systems and is not suitable for assemblies exposed to high pressure, severe vibration, or extreme heat.
Gaskets
If a joint connects two separate components, a bolted flange with a rubber or EPDM gasket is a highly repeatable sealing method. Gaskets provide a consistent compression seal that easily meets IP65 or IP67 ratings.
They also absorb vibration and accommodate thermal expansion. Installing a gasket is usually much more predictable and faster on an assembly line than relying on manual welding consistency.
Silicone Sealants
For architectural enclosures or outdoor cabinets that simply need to shed rain and prevent crevice corrosion, industrial sealants are highly effective. Applying a bead of sealant provides a strong waterproof barrier much faster than welding, and requires zero grinding.
However, there is a critical shop-floor rule: never use standard silicone sealants if the sheet metal part requires powder coating. Silicone oils will contaminate the metal surface and cause the powder coat to fail entirely (creating “fish-eyes” or peeling). For painted parts, designers must specify paintable polyurethane seam sealers instead.
Design Rules for Easier Fabrication
If a seal weld is strictly necessary, the part must be designed to make the welding process as predictable as possible. Better joint design improves manufacturability, reduces the risk of porosity, and helps control thermal distortion.
Weld Access
A perfect seal weld is impossible if the welding torch cannot physically reach the joint at the correct angle. A standard manual MIG torch nozzle is typically 15mm to 20mm in diameter.
However, if the part is slated for automation, a robot welder requires an even larger clearance envelope to accommodate its bulky torch package and anti-collision sensors. If the joint is buried deep inside a narrow 20mm U-channel or positioned behind a tall flange, a robot welder will likely trigger a collision error or fail to maintain the required 45-degree torch angle. This cuts off shielding gas coverage, guaranteeing porosity and a failed leak test.
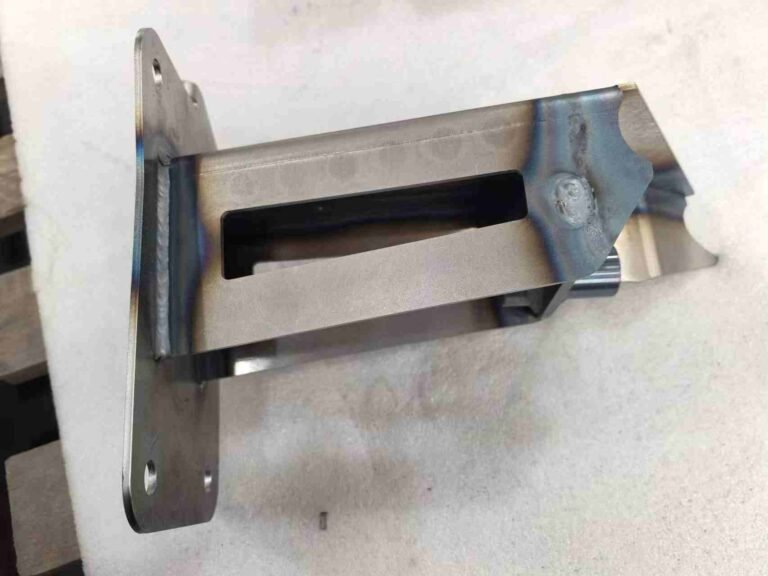
Joint Types
The geometry of the sheet metal joint heavily influences sealing success. On thin materials (under 2mm), outside corner joints are prone to burn-through, making continuous sealing difficult and risky.
Lap joints or flanged edges are much more forgiving for seal welding. The overlapping material absorbs more heat and provides a larger surface area, making it easier for the welder to lay a watertight bead without melting away the edge.
Vent Holes
When welding a fully enclosed box, tube, or tank, the trapped air expands rapidly as the metal heats up. If there is no exit path, this pressurized gas will blow out through the final molten weld pool, causing severe porosity right at the end of the weld.
Designers must specify small vent holes (weep holes) to allow gas to escape during welding. Once the part cools down and the internal pressure normalizes, these small holes are easily closed with a quick tack weld, a blind rivet, or industrial sealant to restore full watertightness.
Heat Control
To prevent thin materials from warping, designers and fabricators must plan for heat management. Fabricators often use copper backing bars (chill bars) behind the joint to pull heat away from the sheet metal quickly.
Engineers can assist this process by keeping continuous welds as short as functionally possible. Allowing slightly looser dimensional tolerances around sealed assemblies also helps absorb the natural thermal expansion that occurs during production.
Load Paths
Even if a drawing explicitly labels a seam as “seal weld only,” the physical weld metal will still transfer mechanical forces between the parts. The physics of the assembly do not read the drawing notes.
If a structure undergoes vibration or heavy dynamic loads, these continuous seal welds can unexpectedly become rigid stress risers. Engineers must analyze the entire load path to ensure the seal weld does not accidentally carry loads it was never sized to handle, which may cause premature fatigue cracking.
Seal Weld Requirements on Drawings
Ambiguous welding notes cause confusion on the shop floor and lead to unpredictable pricing. Clear, standardized drawing requirements help both the engineering and purchasing teams avoid unnecessary costs.
Weld Symbols
Notes like “weld all seams solid” are poor engineering practice. Engineers should use standardized AWS (American Welding Society) or ISO 2553 weld symbols to specify the exact joint type, size, and location. Adding the specific text “SEAL WELD” in the tail of the welding symbol clarifies the design intent.
Furthermore, it is critical to specify the maximum allowable weld size (e.g., a 2mm or 3mm fillet). Without this size limit, operators might fall back on structural habits and lay down a massive 5mm bead, introducing unnecessary heat and severe distortion into the thin panel.
Continuous vs Intermittent
Drawings often show conflicting information, such as an intermittent stitch weld symbol (e.g., 2-10) accompanied by a text note requiring a watertight seal. This forces the fabricator to guess the actual requirement.
If a joint needs both structural strength and environmental sealing, the drawing must be explicit. It should clearly define whether a single continuous pass is sufficient, or if a structural stitch weld covered by a continuous polyurethane sealant is preferred.
RFQ Review
For purchasing managers, the Request for Quote (RFQ) stage is the best time to catch over-engineered welds. If a sheet metal assembly comes back with a surprisingly high unit price, check the drawing for continuous weld symbols.
Asking the manufacturing partner to review the joint can uncover significant savings. Proposing a change from a full seal weld to a stitch weld, bent corner, or adhesive alternative can immediately reduce the labor cost.
Conclusion
Seal welds are highly effective for preventing fluid leaks, stopping crevice corrosion, and meeting strict hygiene standards. However, applying them blindly across an entire sheet metal assembly drives up labor costs and introduces severe risks of heat distortion.
Good fabrication design limits continuous welding to where it is truly functional. By applying DFM principles, adjusting joint types, and exploring alternative sealing methods like structural adhesives or gaskets, manufacturing teams can maintain product quality while keeping production costs under control.
Looking to optimize your sheet metal costs? At Shengen, our engineering team has over 10 years of experience in sheet metal fabrication, from rapid prototyping to mass production. If you are struggling with sheet metal distortion, high welding costs, or tricky sealing requirements, contact us today for a reliable DFM review and competitive quotation.
FAQs
Are seal welds considered structural?
No. According to AWS standards, a seal weld is only intended to prevent leakage. However, in physical reality, any continuous weld will transfer stress between parts. If structural strength is required, the weld must be sized and specified as a structural weld first, which inherently acts as a seal.
How do manufacturers test a seal weld?
Common non-destructive testing (NDT) methods include dye penetrant testing (PT) to find surface micro-cracks, and air pressure tests where soapy water is applied to check for bubbles. For critical fluid tanks, hydrostatic testing (filling with water under pressure) is used.
Can I specify grinding a seal weld perfectly flat?
Yes, but it is expensive and risky on thin sheet metal. Grinding a weld flush removes the “throat thickness” of the weld bead, which may expose subsurface porosity and cause leaks. It also adds significant manual labor time to the part’s cost.
Can I seal weld galvanized steel directly?
Technically yes, but it is highly problematic. The intense heat of the welding arc vaporizes the zinc coating, creating toxic fumes and causing severe porosity in the weld pool. To do it correctly, the shop must manually grind away the zinc coating around the joint before welding, and then apply cold galvanizing spray afterward.
Hey, I'm Kevin Lee

For the past 10 years, I’ve been immersed in various forms of sheet metal fabrication, sharing cool insights here from my experiences across diverse workshops.
Get in touch
Kevin Lee
I have over ten years of professional experience in sheet metal fabrication, specializing in laser cutting, bending, welding, and surface treatment techniques. As the Technical Director at Shengen, I am committed to solving complex manufacturing challenges and driving innovation and quality in each project.