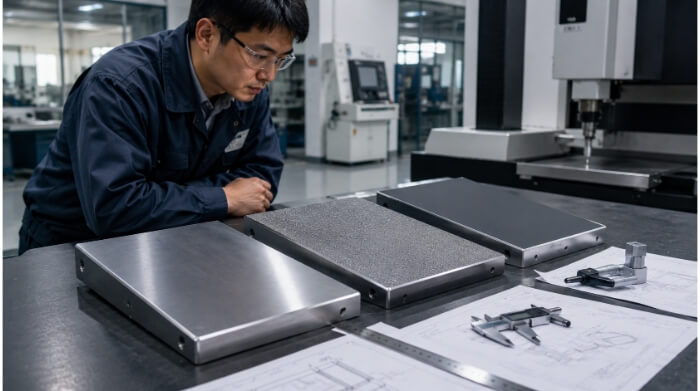
In precision manufacturing, one of the most expensive and frustrating scenarios occurs when a machined component passes every dimensional check on a coordinate report, yet still fails to fit on the assembly line. This discrepancy almost always stems from a reliance on traditional linear (plus/minus) tolerancing, which fails to account for the three-dimensional physics of how mating parts interact.
True Position, a core concept within Geometric Dimensioning and Tolerancing (GD&T), provides a scientific language to bridge this gap between theoretical math and shop floor reality. Rather than just measuring linear distance, position tolerance defines a functional boundary.
This article explores the engineering logic behind True Position, its impact on manufacturing repeatability, and how it systematically eliminates assembly failures.

The Relationship Between Position and Assembly Fit
The primary goal of any location tolerance is to ensure that mating components—such as a bolt pattern and a set of clearance holes—align without interference. Understanding why traditional methods fail is the first step toward mastering True Position.
The Problem with Coordinate Tolerancing and Stack-Up
Traditional coordinate dimensioning uses linear X and Y ranges to establish a square tolerance zone. This method has two critical flaws. First, it leads to tolerance stack-up, especially in multi-hole patterns. Because dimensions are often chained, the error from one hole cascades to the next, quickly pushing the entire pattern out of alignment.
Second, if a hole is drilled at the extreme corner of that ± square, the actual diagonal distance from the target center is greater than the allowed linear deviation. A CMM using coordinate math might reject this part, even if a bolt could perfectly pass through it.
The Functional Boundary (Virtual Condition)
Assembly fit is ultimately about physical clearance, not just center points. True Position acknowledges this by defining a Functional Boundary (closely related to the concept of Virtual Condition).
Instead of merely asking “where is the exact center of this hole?”, True Position asks, “does the physical surface of this hole intrude into the space the fastener needs?” As long as the actual produced hole does not violate this cylindrical boundary, the assembly is guaranteed to succeed.
The Geometric Advantage
Because bolts and pins are round, the tolerance zone they require should also be round. By shifting from a square coordinate zone to a circular position tolerance zone, the available area for acceptable manufacturing deviation increases by approximately 57%.
This gives machinists more freedom in the X or Y direction, as long as the total offset stays within the circular limit. It helps reduce scrap while still keeping the part fit and reliable.

Defining True Position in GD&T
True Position is not a direct measurement of distance. It is a tolerance that controls the location of a feature relative to an exact, mathematically perfect coordinate system.
Theoretical vs. Actual Location
On a modern engineering drawing, the “True Position” is the ideal target, defined by Basic Dimensions. These dimensions are enclosed in rectangular frames (e.g., | 15.0 |) and carry no tolerance of their own.
They tell the manufacturer exactly where the feature should be in a perfect world. The position control symbol (⊕) then dictates how far the actual machined feature is allowed to deviate from that perfect target.
What Position Controls?
Position is specifically used to locate “features of size”—such as drilled holes, dowel pins, or milled slots. It controls the center point, axis, or center plane of these features. It does not control the location of planar surfaces (which is the job of Profile tolerance).
Degrees of Freedom and Assembly Logic
To ensure a part is manufactured and inspected consistently, it must be “immobilized” in 3D space. This is achieved by referencing a Datum Reference Frame (DRF) in the feature control frame. The primary, secondary, and tertiary datums constrain the part’s six degrees of freedom (translation and rotation).
Crucially, datums should never be selected arbitrarily to make CMM programming easier. They must reflect the physical reality of the final assembly.
If a sheet metal bracket is bolted flat against a chassis (Primary Datum A), pushed up against a mounting rail (Secondary Datum B), and aligned to a specific dowel pin (Tertiary Datum C), those exact features must be your datums.
Interpreting the Feature Control Frame
The Feature Control Frame (FCF) is not just a geometry instruction. It is a binding legal contract between the design team and the manufacturer.
The Diameter Symbol
A frequent and expensive mistake on engineering drawings is omitting the diameter symbol (⌀) in front of the position tolerance value. When applied to a cylindrical feature like a drilled hole, the diameter symbol specifies that the tolerance zone is a three-dimensional cylinder.
If this symbol is missing, the GD&T standard dictates that the tolerance zone consists of two parallel planes (effectively a slot). For a round bolt passing through a round hole, a planar tolerance zone is physically illogical and legally restricts the manufacturer to an unnecessarily tight boundary.
Material Modifiers
Following the tolerance value, you will often see a modifier symbol, most commonly an M in a circle, representing Maximum Material Condition (MMC). MMC refers to the condition where the part contains the largest amount of material within its size limits (e.g., the smallest allowable clearance hole).
Conversely, an L represents Least Material Condition (LMC), which is typically used to protect critical wall thicknesses rather than assembly fit. If no symbol is present, the tolerance defaults to Regardless of Feature Size (RFS), meaning the position tolerance remains strictly fixed, no matter the actual size of the hole.
Datum Sequence
The datums listed at the end of the frame (e.g., A, B, C) are not arranged alphabetically; they dictate a strict physical setup sequence. The primary datum establishes the first point of contact (restricting three degrees of freedom), the secondary datum establishes orientation, and the tertiary datum locks the final axis.
Changing the order from A-B-C to A-C-B completely changes how the part is clamped during inspection. To avoid assembly failures, the datum sequence on the drawing must perfectly mirror how the part is physically constrained in its final application.
Maximum Material Condition (MMC) and Bonus Tolerance
For procurement managers and production engineers, applying the MMC modifier is one of the most effective ways to lower part costs and increase yield without sacrificing functional quality.
The Logic of Bonus Tolerance
The concept of MMC relies on the physical reality of clearance. If a hole is drilled exactly at its smallest allowable limit (MMC), the fastener has very little room to wiggle; therefore, the hole’s center must be positioned almost perfectly. However, if the machinist drills the hole closer to its upper size limit (making the hole larger), the fastener now has more clearance.
Because of this extra clearance, the hole’s center can drift further from its True Position, and the bolt will still pass through smoothly. This additional allowable drift is called Bonus Tolerance.
Calculating Total Tolerance and Cost Impact
The calculation is straightforward:
Total Position Tolerance = Specified Tolerance + (Actual Hole Size – MMC Size)
For example, consider a hole dimensioned at 10.0 mm to 10.2 mm, with a position tolerance of ⌀ 0.1 mm at MMC.
- If the hole is drilled at 10.0 mm (MMC), the position tolerance is strict: 0.1 mm.
- If the hole is drilled at 10.1 mm, the manufacturer earns a bonus tolerance of 0.1 mm. The new allowable position tolerance is 0.2 mm.
In high-volume production, this extra 0.1 mm of bonus tolerance can be the difference between a 2% scrap rate and a 15% scrap rate. You are essentially getting manufacturing tolerance for free, converting what would mathematically be a “rejected” part into a highly functional, passing part.
Virtual Condition & When to Avoid MMC
To verify this rapidly on the shop floor, quality teams use a Virtual Condition gauge—a physical “Go” pin sized exactly at the MMC limit minus the position tolerance.
However, MMC should not be applied unthinkingly. If a feature acts as a precision alignment dowel or requires an interference press-fit, you do not want the position tolerance to loosen as the size varies. In these high-precision cases, RFS (Regardless of Feature Size) is required to guarantee strict alignment.

Common Sources of Position Error in Manufacturing
Even with a perfectly specified drawing, features will naturally deviate from their True Position. World-class manufacturers don’t just measure these errors; they design their processes to counteract them.
Material Behavior
In sheet metal fabrication, internal material stresses are a major factor. Processes like laser cutting induce localized heat, while bending stretches the metal. “Spring-back” after a bend can pull a previously perfectly located hole out of position.
To mitigate this, experienced fabricators often utilize stress-relief techniques or sequence the laser-cutting of critical holes after the bending process is complete.
Machining Variables
In CNC machining, position error often begins the moment the tool touches the metal. “Drill walk” occurs when the chisel edge of a drill bit wanders slightly before biting into the material. Furthermore, tool deflection—the physical bending of the cutter under load—will push the feature out of its target coordinate.
Setup and Fixturing
The accumulation of tolerance error frequently happens between manufacturing operations. If a part is machined on one side, unclamped, flipped, and re-clamped for a secondary operation, microscopic variations in how the part seats in the fixture will cause the new features to be out of position relative to the original datums.
Tooling Wear
Position accuracy degrades over a production run. As drill bushings wear down or cutting inserts become dull, cutting pressure increases, exacerbating tool deflection and pushing features away from their True Position. Recognizing this inevitable degradation is why rigorous in-process CMM checks and statistical process control (SPC) are mandatory, even in highly automated facilities.
Inspection Methods for Position Tolerance
Adding True Position to a drawing is only part of the job. The harder part is proving on the shop floor that the part actually meets that requirement. This is where drawing theory meets real production conditions.
Functional Gaging
For high-volume manufacturing, functional gaging is the ultimate test of assembly fit. A functional gauge is a custom-made physical tool containing precision pins sized to the Virtual Condition of the part’s holes. If the part fits over the pins, it passes; if it doesn’t, it fails.
While a custom functional gauge requires an upfront tooling investment, it eliminates bottlenecks at the CMM queue, allowing a manufacturer to inspect 500 parts an hour instead of 50. For high-volume projects, this directly translates to shorter lead times and significantly lower unit costs.
CMM Verification
Coordinate Measuring Machines (CMM) are the standard for low-to-medium volume production and highly complex geometries. The CMM probes the physical surfaces of the hole, calculates the actual center axis, and compares it to the theoretical Basic coordinates.
However, CMMs require strict programming discipline. The programmer must digitally simulate the Datum Reference Frame exactly as specified on the drawing. If the CMM software is not configured to apply the datum sequence or evaluate the MMC modifier correctly, it will mathematically “reject” a part that would physically fit perfectly on the assembly line.
Manual Inspection and the Shop Floor Formula
When a CMM or custom gauge is unavailable, machinists rely on surface plates and height gages to measure the X and Y deviations from the datums. The operator then converts these linear errors into a diametric position error using the standard formula:
Actual Position Error = 2 × √(ΔX² + ΔY²)
While useful for quick checks, manual X/Y measurements have severe limitations. Standard calipers cannot reliably measure the orientation (tilt or perpendicularity) of a hole through the thickness of the material. A hole might have perfect X/Y coordinates at the surface, but tilt severely enough to block a fastener—a defect that only a CMM or a functional gauge pin will catch.

Common Drafting and Specification Mistakes
When parts fail in assembly despite passing inspection, the root cause is almost always a poorly constructed engineering drawing. Treating the drawing as a rigid legal contract means avoiding these costly specification errors.
Inappropriate Datum Selection
Choosing datums just because they are easy to measure is a major mistake. Datums should match how the part actually works in assembly.
For example, an engineer may use the outside sheared edge of a sheet metal bracket as a datum. But in real use, the bracket may align to a chassis through two precision dowel pins. In that case, the inspection setup follows the rough outer edge instead of the true mating points.
This creates a serious problem. Good parts may fail inspection, and bad parts may pass. Datums should represent the real physical surfaces or features that locate the part in use.
Over-Specification
Using very tight tolerances on non-critical features is one of the fastest ways to hurt a project’s profit margin. A Ø 0.05 mm position tolerance on a simple cable-routing hole does not make the part better. It only forces the shop to change from fast laser cutting to a slower secondary CNC milling process. That change can raise the part cost several times without adding any real functional value.
Tolerances should match the actual job of the feature. They should not come from the default settings in CAD software.
Conflicting Coordinate and Position Callouts
A drawing should not control a feature’s location with both a linear plus/minus tolerance and a True Position callout at the same time. The exact target location should be shown with Basic dimensions, usually as boxed numbers. Then the Feature Control Frame should be the only rule for allowed variation.
When both methods are used together, they create conflicting instructions. This can slow down production and make quality control harder.
Best Practices for Specifying Position
Designing for Manufacturability (DFM) means writing GD&T specifications that guarantee functional fit while granting the factory the maximum possible operational freedom.
Clearance-Based Tolerance Choice
The most robust way to determine a position tolerance is to calculate it based on the physical clearance between the fastener and the hole. The “Floating Fastener” formula is the industry standard:
T = H – F
(Position Tolerance = Minimum Allowable Hole Size – Maximum Fastener Size).
By using this formula, engineers guarantee that if the parts are manufactured within tolerance, interference is physically impossible.
Projected Tolerance Zones
When a part uses thick plates or long fasteners such as studs or standoffs, the angle of the threaded hole becomes very important. A hole may be in the correct position at the surface, but even a one-degree angle error can make a long bolt lean too much. This can stop the mating part from fitting into place.
A Projected Tolerance Zone helps solve this problem. It tells the inspector to check the hole position above the part, at the same height where the mating part will engage. This helps prevent bolt lean and makes the assembly result more reliable.
Early Supplier Involvement (ESI) and DFM
World-class engineering requires knowing the limits of the manufacturing process. A position tolerance of Ø 0.1 mm is routine for a rigid CNC milling center. Still, it is physically impossible to hold consistently across a large span on a standard turret punch press.
The best way to improve these tolerances is to involve the supplier early. Before you lock the drawing, talk with your manufacturing partner. A quick DFM review can help match your true position requirements with real sheet metal and CNC process limits. This makes the move from prototype to production smoother and helps protect your profit margin.
Conclusion
True Position helps define hole and feature location in a way that matches real assembly better than simple plus or minus dimensions. It gives engineers a clearer way to control fit, helps machinists understand what matters, and makes inspection more meaningful when the part has to work in a real product.
But True Position only works well when the callout matches the function, the datum scheme matches the assembly, and the tolerance matches the real process. A drawing can look correct and still create scrap, slow inspection, or assembly trouble if those points are not aligned.
If you are working on a part with position tolerances and want to avoid fit, inspection, or manufacturing issues, send us your drawing for review. We can look at the datum setup, hole pattern, tolerance strategy, and process flow before production starts.
Hey, I'm Kevin Lee

For the past 10 years, I’ve been immersed in various forms of sheet metal fabrication, sharing cool insights here from my experiences across diverse workshops.
Get in touch
Kevin Lee
I have over ten years of professional experience in sheet metal fabrication, specializing in laser cutting, bending, welding, and surface treatment techniques. As the Technical Director at Shengen, I am committed to solving complex manufacturing challenges and driving innovation and quality in each project.