Press fits can make or break a product. They’re crucial for countless mechanical assemblies, yet many engineers need help to get them right. Poorly designed press fits lead to loose parts, premature wear, and even catastrophic failures. What is the cost of these mistakes? Wasted time, materials, and money.
A tolerance press fit is a method of joining parts without fasteners. It relies on precise sizing to create interference between mating components. This interference generates friction, holding parts together securely. Proper tolerancing ensures a robust and reliable connection without damaging the parts during assembly.
Want to master this critical aspect of precision engineering? Let’s explore the ins and outs of tolerance press fits. We’ll cover everything from basic principles to advanced techniques for achieving optimal results.
The Basics of Press Fit
What is Tolerance Press Fit?
Press fit, or interference fit, is a joining method that connects two parts strongly. It works by sizing one part slightly larger than the hole it fits into. The parts create a tight, secure bond without additional fasteners when forced together.
This technique relies on friction and material deformation to maintain the connection. The interference between the parts generates stress, which leads to a firm hold. Engineers carefully calculate the dimensions to achieve the right balance of tightness and assembly ease.
Applications in Modern Manufacturing
Press fit finds extensive use across various industries. Automotive manufacturers employ it for bearings, bushings, and gears. Electronics companies use press fit for circuit board components. Aerospace engineers rely on it for critical assemblies in aircraft and spacecraft.
The versatility of press fit makes it ideal for both small-scale prototypes and large-scale production. It offers a clean, efficient way to join parts without welding or adhesives. This method often reduces overall part count and simplifies assembly processes.
Importance of Press Fit in Mechanical Engineering
Press fit plays a crucial role in mechanical engineering design. It provides a reliable, long-lasting connection that can withstand high loads and vibrations. Engineers value press fit for effectively transmitting torque and axial forces.
The technique also offers advantages in terms of weight reduction and space efficiency. By eliminating the need for separate fasteners, press fit allows for more compact designs.
Types of Press Fits
Interference Fit
Interference fits create the tightest connection among press fit types. The outer part’s diameter exceeds the inner part’s bore diameter. When assembled, this difference causes material deformation, resulting in a very secure joint.
Engineers use interference fits when they need maximum holding power. These fits resist rotation and axial movement effectively. However, they require more force during assembly and can potentially damage parts if not designed correctly.
Transition Fit
Transition fits occupy the middle ground between interference and clearance fits. The size difference between mating parts is minimal, allowing for slight interference or clearance. This type offers flexibility in assembly and function.
These fit prove useful when parts need to be occasionally disassembled, or thermal expansion might affect the fit. They provide a balance between holding power and ease of assembly or removal.
Clearance Fit
Clearance fits feature a slight gap between mating parts. The inner part’s diameter is smaller than the outer part’s bore. This allows for easy assembly, disassembly, and relative movement between components.
Engineers choose clearance fits for applications requiring rotation or sliding motion. They’re common in bearings, bushings, and other components where reduced friction is crucial. Clearance fits also accommodate thermal expansion more readily than tighter fits.
Examples of Each Fit in Real-World Applications
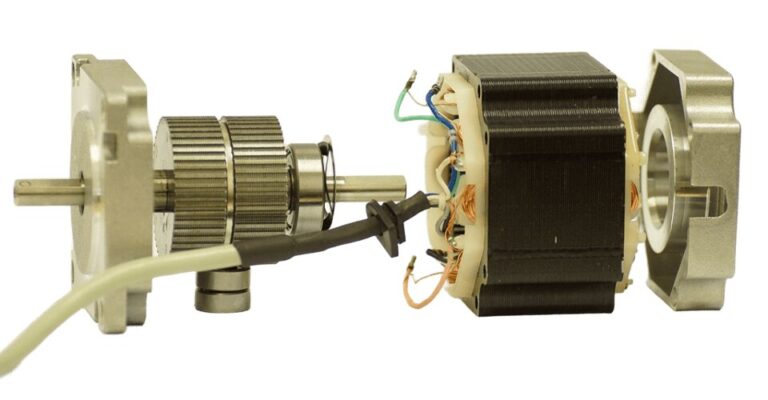
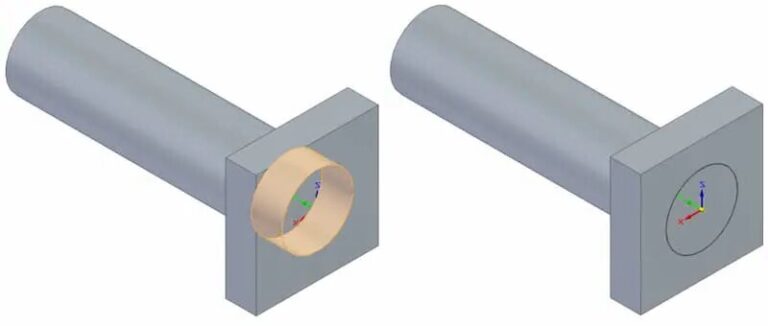
Interference fits shine in wheel hubs, where a bearing needs to stay firmly in place. Transition fits often appear in electric motor shafts, balancing secure mounting with ease of service. Clearance fits excel in applications like piston rings, where controlled movement is essential for proper function.
The Role of Tolerances Press Fit
Defining Tolerance in Engineering
Tolerance in engineering refers to the acceptable range of variation in a part’s dimensions. It’s the difference between the maximum and minimum allowable sizes for a specific feature.
Tolerances ensure parts fit together correctly and function as intended. They account for inevitable manufacturing variations. Tighter tolerances often mean higher precision but also increased production costs.
How Tolerances Affect Press Fit
Tolerances directly impact the effectiveness of press fits. They determine the amount of interference or clearance between mating parts. Too little interference may result in a loose fit, while excessive interference can cause part damage.
Proper tolerance selection ensures:
- Consistent assembly forces
- Reliable holding power
- Prevention of part distortion or damage
- Optimal performance in the intended application
Common Tolerance Standards (ISO, ANSI, etc.)
Various standards govern tolerances globally:
ISO (International Organization for Standardization):
- Widely used internationally
- Offers a comprehensive system for hole and shaft tolerances
ANSI (American National Standards Institute):
- Common in North America
- Provides guidelines for dimensional tolerances
DIN (Deutsches Institut für Normung):
- German standards are also used internationally
- Known for precision in engineering applications
These standards help engineers communicate and maintain consistency across different manufacturing environments.
Key Factors Influencing Tolerance in Press Fits
Impact of Material Properties on Press Fit
Material properties play a crucial role in press fit tolerances. The hardness, elasticity, and surface finish of the shaft and hub affect the fit’s strength and durability. More complex materials typically require tighter tolerances, while softer ones allow more flexibility.
The coefficient of thermal expansion is another critical factor. Materials that expand or contract differently under temperature changes can lead to loosening or excessive stress in the fit. We always consider these properties when designing press fits for our clients.
Temperature and Environmental Conditions
Temperature fluctuations significantly impact press fit tolerances. Heat causes materials to expand, potentially loosening the fit. Cold can lead to contraction, increasing stress on the components. Humidity and corrosive environments also affect the long-term stability of press fits.
We recommend considering the full range of operating conditions when specifying tolerances. This ensures the fit remains secure throughout the product’s lifecycle. Our team can help you select materials and tolerances that withstand your specific environmental challenges.
Case Studies: Material Choices in Successful Press Fits
Let’s look at some real-world examples:
- Automotive engine bearings: We used a copper alloy for its excellent thermal conductivity and wear resistance. The tight tolerances ensured proper oil film formation and long-lasting performance.
- Aerospace fasteners: Titanium alloys were chosen for their high strength-to-weight ratio. Precise tolerances prevented loosening under vibration while allowing for thermal expansion.
- Medical implants: Biocompatible stainless steel with carefully controlled surface finishes enabled secure, long-lasting fits in orthopedic devices.
These cases highlight how material selection and precise tolerances create optimal press fits. Our experience spans various industries, allowing us to recommend the best solutions for your application.
Design Considerations for Tolerance Press Fit
Engineering Design Principles
We follow fundamental principles when designing press fits. First, we consider the function of the assembly.
Is it a permanent connection, or does it need occasional disassembly? This guides our tolerance choices.
We also factor in the manufacturing process. Tight tolerances may be challenging to achieve consistently in mass production.
Calculating Tolerances for Press Fit
Tolerance calculation involves several factors. We start with the nominal size of the parts and determine the interference needed.
We use formulas that account for material properties, operating conditions, and safety factors. Software tools help us optimize these calculations.
It’s a balancing act. Too tight, and assembly becomes difficult. Too loose, and the connection may fail prematurely.
Avoiding Common Design Mistakes
One frequent error is overlooking the cumulative effect of tolerances. Each part has its tolerance, which adds up in the final assembly.
We use statistical tolerance analysis to account for this. It helps predict the overall fit more accurately.
Another mistake is ignoring the surface finish. A rough surface can increase friction, affecting the press fit’s behavior.
Manufacturing Techniques
Traditional Press Fit Techniques
Traditional press fit methods rely on mechanical force. We often use hydraulic or arbor presses for this process.
These techniques work well for smaller parts and simple assemblies. They’re cost-effective and widely understood in the industry.
However, they can be less precise for complex geometries. Damaging parts during assembly is also risky if not carefully controlled.
Modern Manufacturing Methods
Advanced techniques have emerged to improve press fit accuracy. Thermal fitting involves heating or cooling parts to alter their size temporarily.
Cryogenic fittings use extreme cold to shrink parts before assembly. This method works well for large or delicate components.
Laser welding can create precise, localized heating for assembly. It’s beneficial for small electronic components.
Pros and Cons of Different Techniques
Traditional methods are simple and cost-effective. However, they may need more precision for demanding applications.
Thermal fitting offers high accuracy but requires specialized equipment. It’s excellent for sensitive parts but can be slower than mechanical methods.
The cryogenic fitting provides exceptional precision. However, it’s more expensive and time-consuming than other methods.
Measuring and Inspecting Tolerances
Tools for Measuring Tolerances
Precision measurement is crucial for press fits. We use micrometers and calipers for basic dimensional checks.
Coordinating measuring machines (CMMs) offer high accuracy for more advanced needs. They’re ideal for complex geometries.
Optical comparators help inspect surface finish and edge quality. These factors can significantly impact press fit performance.
Inspection Methods for Press Fit Assemblies
We employ various techniques to verify press fit quality. Visual inspection can catch obvious defects or misalignments.
Ultrasonic testing helps detect internal gaps or inconsistencies in the fit. It’s non-destructive and works well for assembled parts.
For critical applications, we might use X-ray or CT scanning. These methods provide detailed internal views of the assembly.
Calculations for Predicting Press Fit Tolerance
Predicting tolerance involves several calculations. We start with the basic interference formula: Interference = Shaft diameter – Hole diameter.
We then factor in material properties and operating conditions. Stress analysis helps ensure the fit won’t fail under load.
Statistical methods like Monte Carlo simulation help account for manufacturing variations. This gives us a more realistic prediction of fit behavior.
Challenges in Tolerance Press Fit Assembly
Common Issues and Their Causes
Press fit assembly can face several challenges:
- Misalignment: Often caused by inaccurate tooling or improper part positioning.
- Galling: Results from excessive friction during assembly, damaging component surfaces.
- Cracking: Occurs when stress exceeds material strength, typically due to overly tight fits.
- Incomplete insertion: This may happen if interference is too high or insufficient force is applied.
- Loosening over time usually stems from inadequate interference or thermal cycling effects.
These issues can lead to product failures, increased scrap rates, and production delays.
Troubleshooting Tolerance Press Fit Problems
When problems arise, we follow a systematic approach:
- Analyze the failed assembly: We examine parts for signs of damage or wear.
- Review design specifications: We check if tolerances match the intended fit.
- Inspect manufacturing processes: We verify if the parts meet specified dimensions.
- Evaluate assembly methods: We assess if proper techniques and tools are used.
- Test environmental conditions: We consider if temperature or humidity affects the fit.
This systematic process helps identify root causes and develop practical solutions.
Case Studies: Overcoming Tolerance Press Fit Challenges
Here’s a real-world example we encountered:
A client’s automotive bearing assembly was failing prematurely. Our investigation revealed slight misalignment during pressing.
We redesigned the assembly fixture to ensure perfect alignment. We also adjusted the pressing force and speed.
These changes resulted in a 98% reduction in assembly failures and significantly improved product reliability.
Another case involved electronic connectors loosening under vibration. We recommended a slight increase in interference fit and added a knurled surface to the male component.
This solution enhanced the connection’s stability without compromising ease of assembly.
These cases demonstrate how careful analysis and creative problem-solving can overcome press-fit challenges.
Conclusion
Press fit tolerances are crucial for reliable assemblies. They require careful consideration of materials, design, and manufacturing processes. While challenges exist, they can be overcome with expertise and attention to detail. Continuous improvement in techniques and tools keeps pushing the boundaries of what’s possible in press-fit assembly.
Contact us today to discover how we can achieve exceptional results for your projects. You can also request a quote, and we’ll work with you to find a customized, budget-friendly solution!
FAQs
What should the tolerance be for a press-fit bushing?
Tolerance for a press fit bushing depends on several factors. The material, size, and application all play a role. Generally, we aim for an interference of 0.001 to 0.003 inches per inch of diameter. For precise recommendations, we consider the specific use case and environmental conditions.
How much clearance for a press fit?
Press fits have negative clearance, which we call interference. The amount varies based on the application. We might use an interference of 0.0005 to 0.001 inches for light-duty assemblies. Heavy-duty applications could require up to 0.003 inches or more. When determining the ideal interference, we always consider factors like operating temperature, loads, and material properties.
What is H7 tolerance fit?
H7 is a standard tolerance class in the ISO system. It refers to the hole in a shaft-hole fit. The ‘H’ means a hole tolerance, and ‘7’ indicates the tolerance grade. H7 provides a close fit suitable for locating surfaces. It’s often paired with various shaft tolerances to achieve different fits, from clearance to interference.
Can press fit be used in high-stress environments?
Yes, press fits can be effective in high-stress environments when adequately designed. We consider factors like temperature fluctuations, vibration, and dynamic loads. Material selection becomes crucial in these cases.
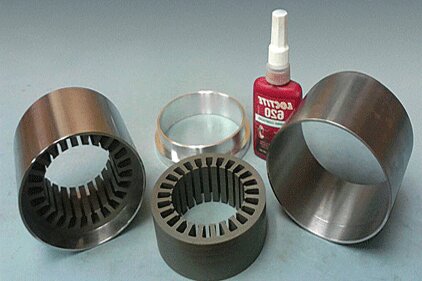
For instance, we might choose materials with similar thermal expansion coefficients to maintain the fit under temperature changes. In some high-stress applications, we might combine press fits with additional securing methods like adhesives or mechanical locks for extra reliability.
Hey, I'm Kevin Lee

For the past 10 years, I’ve been immersed in various forms of sheet metal fabrication, sharing cool insights here from my experiences across diverse workshops.
Get in touch

Kevin Lee
I have over ten years of professional experience in sheet metal fabrication, specializing in laser cutting, bending, welding, and surface treatment techniques. As the Technical Director at Shengen, I am committed to solving complex manufacturing challenges and driving innovation and quality in each project.

