Many parts need flush screw heads to ensure smooth surfaces or tight fits. However, if you drill holes the usual way, the screw will protrude. That creates problems—interference with parts, poor appearance, or weak joints. This is where countersinking comes in. It conceals the screw head, provides a smooth surface, and enhances the overall appearance and safety of the part.
A smooth countersink makes assembly easier and results in a more professional-looking final product. Let’s examine how to do it correctly, step by step.
What Is a Countersink Hole?
A countersink hole has a conical shape at its opening, created by drilling. It matches the angle of a flat-head screw. This lets the screw sit flush with or below the surface of the part. A countersink hole looks like a funnel. The cone tapers inward from the surface toward the drilled hole.
Countersinks are common in sheet metal, woodworking, and plastic parts. They reduce snagging, make surfaces smoother, and give a cleaner look. They also help distribute pressure around the screw head.
How to Make a Countersink Hole in Sheet Metal Parts?
Making a clean and accurate countersink hole takes careful planning. Each step plays a role in the final result. Let’s break down every stage in more detail to avoid rough edges, misalignment, or part damage.
Step 1: Choose the Right Countersink Bit
Start by selecting the correct countersink angle. In most U.S. applications, flat-head screws use an 82° angle. Some aerospace or specialty applications may require 100°. If you’re unsure, measure the screw head with a protractor or use manufacturer data.
Choose a bit of material based on your sheet metal:
- High-Speed Steel (HSS): Good for aluminum and mild steel.
- Cobalt or Carbide: Better for stainless steel or more complex alloys.
But design also matters. A single-flute countersink cuts more cleanly and reduces chatter. Multi-flute types work well for soft metals but can produce vibration in harder ones. If surface finish is a concern, test the bit on scrap material first.
Step 2: Mark & Secure the Workpiece
Use a sharp scribe or marker to mark the exact center of the hole. For higher accuracy, use a center punch to make a small dent. This helps guide the drill and stops the bit from wandering.
Place the workpiece on a firm surface. Use clamps, a vise, or a fixture to hold it in place. Make sure the sheet lies flat and doesn’t vibrate. Movement during drilling can damage the hole or cause the bit to snap. Avoid holding the part by hand, especially with power tools.
Step 3: Drill the Pilot Hole
Use a twist drill bit that matches the screw’s body diameter (not the thread diameter). For sheet metal, start with a small pilot bit (like 1/8″) if needed, then enlarge the hole to the final size.
Keep the drill perpendicular to the surface. Tilted drilling creates uneven countersinks later. Use low to medium RPM and steady pressure. For thin sheets, a backing block (made of wood or plastic) placed under the metal helps prevent burrs on the exit side.
Deburr the pilot hole if needed before countersinking. A clean edge gives a smoother finish.
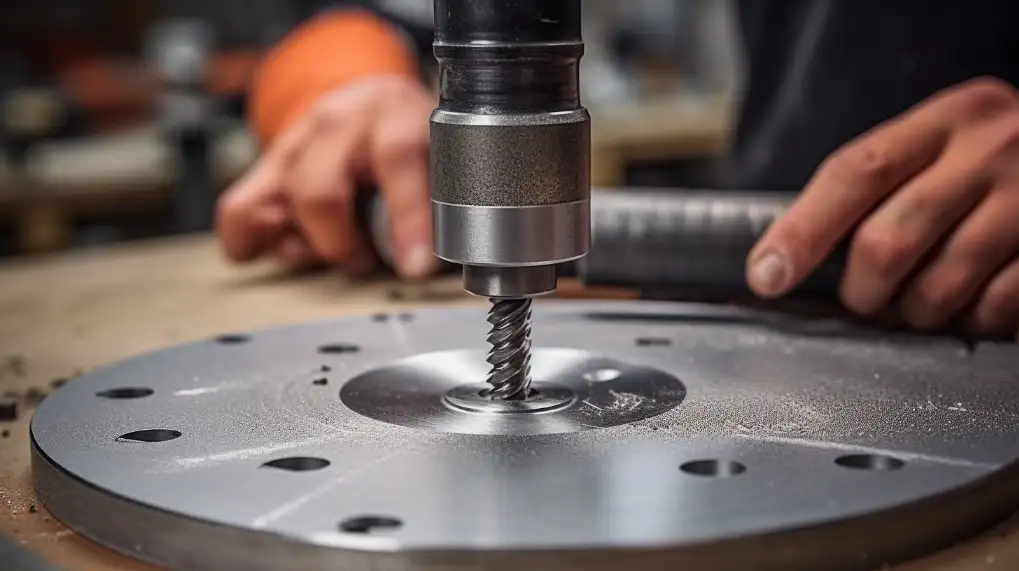
Step 4: Switch to the Countersink Bit
Mount the countersink bit into the drill or drill press chuck. Make sure it’s centered and tight. Set the RPM to a low setting (around 500–800 RPM) to minimize chatter.
Align the bit with the pilot hole. If you’re using a hand drill, steady your hands and brace the drill body against a stable surface. If using a drill press, adjust the table height and use a depth stop if available.
Keep the bit straight—angled entry causes uneven chamfers or weak spots.
Step 5: Cut the Countersink
Slowly lower the countersink bit into the hole. Let the cutting edge touch the surface and begin cutting. Apply light, steady pressure—do not force it. The bit should remove metal smoothly.
Watch the size of the chamfer. Stop once the screw head sits flush or just below the surface. If you go too deep, the screw may pull through or weaken the part.
For high precision, test-fit the screw after a few seconds of cutting. Remove the bit and check the depth before continuing.
If there’s any chatter or rough edges, reduce speed, clean the bit, and try again.
Step 6: Inspect the Countersink Hole
Place the fastener in the hole. Check:
- Is the head flush with the surface?
- Is the edge smooth with no burrs?
- Is the angle clean and even?
If needed, clean up the edge with a deburring tool or fine file. Inspect both sides of the part. Thin sheet metal can sometimes deform from drilling pressure. If so, support the backside during the next attempt.
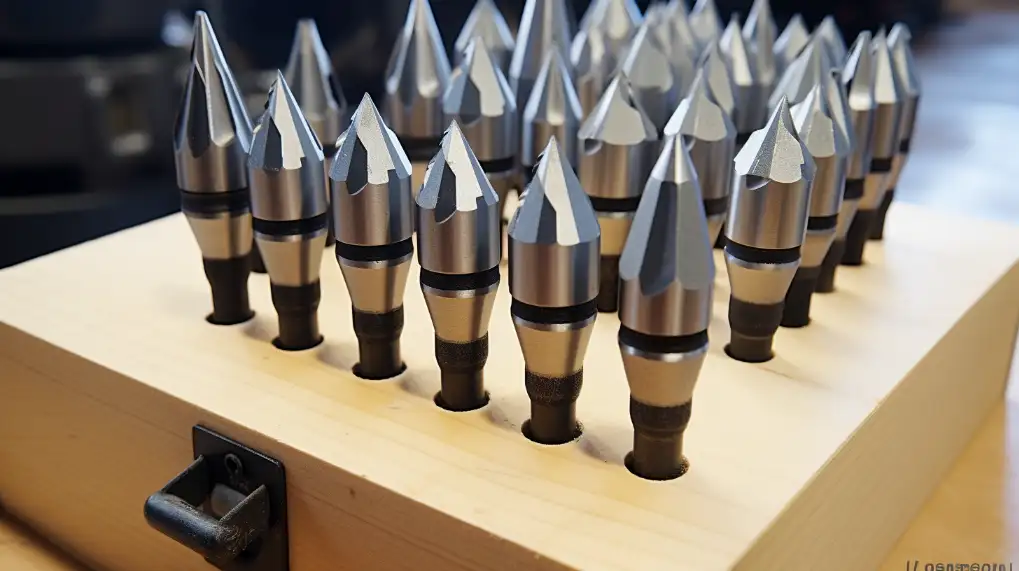
Countersink Drill Bit: Which One Works Best for Metal?
Different countersink bits are more effective for other metals. Choosing the wrong one can dull your tool fast or leave a rough finish. Here’s how to pick the right type based on the metal you’re working with.
High-Speed Steel (HSS) Bits
HSS bits are the most common and affordable option. They work well on soft to medium metals, such as aluminum, brass, and mild steel.
- Pros: Inexpensive, widely available, easy to resharpen
- Cons: Dulls quickly on stainless steel or hardened alloys
Use HSS if you’re working with thinner sheets or doing occasional countersinking. It’s a good choice for general-purpose use.
Cobalt Steel (HSS-Co) Bits
These bits are made by adding 5–8% cobalt to high-speed steel. The addition of cobalt enhances heat resistance and hardness.
- Pros: Stays sharp longer, handles tougher metals like stainless steel
- Cons: More expensive than standard HSS, can be brittle if dropped
Cobalt bits are better for production work or jobs involving tough sheet metals. They reduce wear and can handle repeated use.
Carbide-Tipped Bits
Carbide is extremely hard and wear-resistant. Carbide-tipped bits cut very clean holes, even in hardened steel and titanium.
- Pros: Very long life, excellent finish, cuts through hard metals with ease
- Cons: High cost, brittle if mishandled
Use carbide if you need consistent results in high-volume jobs or when cutting hard alloys. They’re not ideal for hand drills due to their fragile edge.
Titanium-coated (TiN, TiCN, TiAlN) Bits
These are HSS or cobalt bits with a thin, hard coating. The coating reduces friction and helps extend tool life.
- TiN (Titanium Nitride): Gold color, suitable for general use
- TiCN (Titanium Carbonitride): Dark gray, harder and better for stainless
- TiAlN (Titanium Aluminum Nitride): Violet/black, better heat resistance for dry cutting
- Pros: Cuts cleaner, lasts longer, resists heat
- Cons: Can’t be resharpened once coating wears off
Use coated bits when cutting metal at high speeds or for longer tool life between replacements.
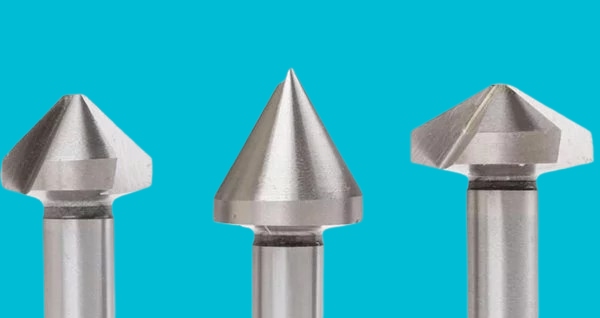
Standard Countersink Angles & Their Uses
Different fasteners and applications call for different countersink angles. Using the wrong angle can cause poor fit, loose joints, or cosmetic defects. Here’s how each common angle is used.
82° Countersink (Most Common)
This is the standard angle used for flat-head screws in the U.S. It allows the screw to sit flush with the surface, giving a clean and smooth finish. You’ll find this angle used in most general-purpose sheet metal work, especially in enclosures, brackets, and control panels. If you’re using inch-based screws, 82° is usually the correct choice.
90° Countersink
The 90° angle is more common in Europe and is often used with metric screws. It’s also seen in woodworking and some plastic parts. This angle works well when a wider screw head is required or when using hardware that adheres to ISO standards. If your screws are metric or sourced from European suppliers, check if a 90° countersink is needed.
60° Countersink
This sharper angle is not meant for mounting screws. It’s used mainly for center drilling or preparing holes for threading. In machining setups, it is helpful to align the part or guide the cutting tools. You might use this in lathe work or when creating starter holes for thread taps, but not for general fastener mounting in sheet metal.
75° Countersink
It is less common but useful for low-profile fasteners. This angle allows the screw to sit close to the surface without going too deep into the material. It’s used in custom designs where space is tight, or aesthetics require a shallow fit. You’ll find it occasionally in aerospace or electronics, where every millimeter counts.
120° Countersink
This angle is typically used with rivets, especially in aerospace or automotive panels. The wider angle spreads the load over a larger surface, which helps prevent tearing in thin metals. It’s not common for screws but is critical when installing flush rivets. If your design utilizes blind rivets or similar fasteners, this angle may be applicable.
How to Check Your Angle?
To ensure you’re using the correct countersink angle, check the fastener’s specifications first. If you don’t have the spec sheet, measure the head angle using a protractor or angle gauge. Some calipers also have angle-check features. You can also test-fit a screw into a scrap piece of material. If the screw head doesn’t sit flush, the angle might be wrong.
Common Mistakes and How to Avoid Them
Countersinking may seem simple, but it’s easy to make minor errors that can affect the quality of the part. Each mistake has a clear cause and can be avoided with the proper technique.
Over-Countersinking and Material Damage
Drilling too deep is a common problem. When the countersink extends too far, it creates a hole that is too wide and weakens the surrounding area. In thin sheet metal, this can cause distortion or cracking. The screw may sit far below the surface, which is not what you want.
To avoid this, check the depth as you drill. Use a test screw during the process. If you’re using a drill press, set the depth stop to control the cut more precisely. Go slow and stop as soon as the screw head fits flush.
Incorrect Angle or Bit Selection
Many countersink problems come from using the wrong angle. If the angle of the bit doesn’t match the screw, the screw won’t sit flush. This can lead to loose joints or a poor surface finish. Most flat-head screws used in U.S. manufacturing require an 82° countersink. Metric screws or some specialty fasteners may need 90° or other angles.
Before drilling, always check the fastener specs. Also, choose the right material for your metal. High-speed steel works for soft metals. For stainless steel or harder materials, use cobalt or carbide-tipped bits.
Burr Formation and Inadequate Deburring
Burrs form when the cutting edge pushes metal out of the hole instead of cleanly slicing it. These sharp edges are not only ugly but can cut fingers or scratch nearby parts. They also interfere with assembly. Burrs often appear when bits are dull, or the speed is too high.
To reduce burrs, use a sharp countersink bit and cut at a low speed with light pressure. After drilling, always inspect both sides of the hole. Use a deburring tool or a fine file to clean the edge.
Conclusion
To create a countersink hole in sheet metal, begin by drilling a pilot hole that matches the diameter of your screw. Then, use a countersink bit with the correct angle—most commonly 82°—to cut a clean, conical recess. Select the appropriate bit material based on the type of metal you are working with. Work slowly, apply light pressure, and check depth often to avoid overcutting.
Need custom sheet metal parts with clean, accurate countersink holes? Our team can help. Contact us today to get a fast quote and expert support for your project.
Hey, I'm Kevin Lee

For the past 10 years, I’ve been immersed in various forms of sheet metal fabrication, sharing cool insights here from my experiences across diverse workshops.
Get in touch
Kevin Lee
I have over ten years of professional experience in sheet metal fabrication, specializing in laser cutting, bending, welding, and surface treatment techniques. As the Technical Director at Shengen, I am committed to solving complex manufacturing challenges and driving innovation and quality in each project.
Related Resource

Fingerprint Resistant Stainless Steel: How It Works,and How to Choose


