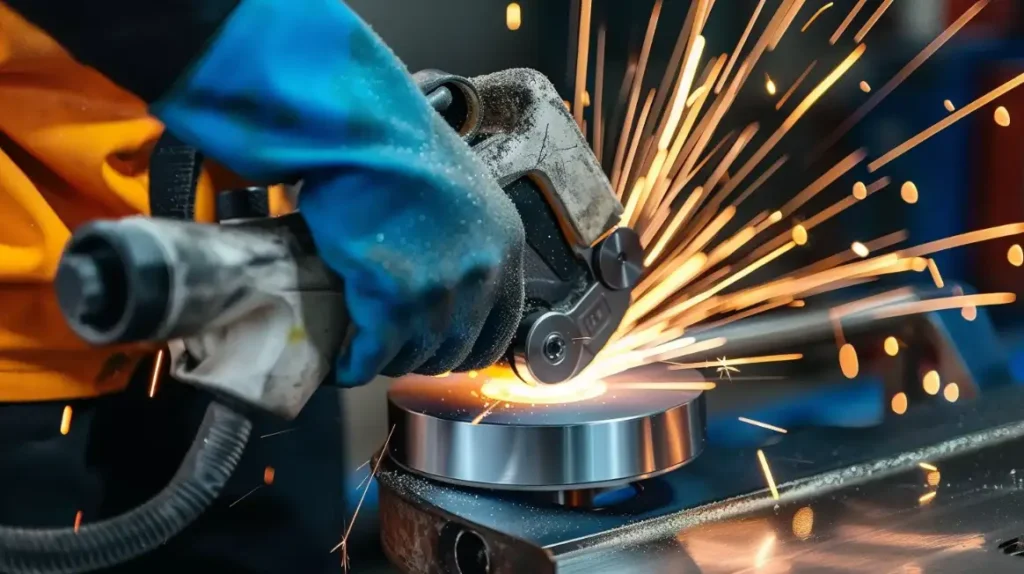
Working with stainless steel presents unique challenges. The material is rigid, heats up quickly during grinding, and requires specific approaches to achieve quality results. Many fabricators struggle with discoloration, warping, and poor surface finishes when grinding stainless steel because they use the wrong tools or methods.
Getting good results when grinding stainless steel starts with choosing the right tools and methods. Use aluminum oxide or ceramic abrasives made explicitly for stainless steel. Keep the metal cool during grinding to avoid heat discoloration. Work with light to medium pressure and move constantly to prevent overheating one area.
Want to make your stainless steel projects look professional? The details matter, and proper grinding techniques differentiate between amateur and expert results.
Why does Grinding Stainless Steel require special Attention?
Grinding stainless steel isn’t the same as working with regular steel. Stainless steel contains chromium and nickel, which make it resist corrosion and more challenging to grind. It heats up fast during grinding and can lose corrosion protection if mishandled.
It’s also prone to contamination, which can ruin its corrosion-resistant properties. You must pay extra attention to the tools, techniques, and steps involved.
Challenges in Grinding Stainless Steel
Grinding stainless steel presents its own challenges. The material heats up quickly, which can cause warping or discoloration. It’s also harder than other metals, so it wears down tools faster. Contamination from other metals can lead to rust, and improper techniques can leave deep scratches.
Grinding Methods for Stainless Steel
The method you choose affects quality and efficiency when working with stainless steel. Each approach has specific benefits for different projects.
Manual vs. Automated Grinding
Manual grinding gives you direct control over pressure and angle. It works well for small projects or hard-to-reach areas. You can feel how the metal responds and adjust your technique right away.
Automated grinding provides consistent results across large surfaces. CNC grinders maintain exact pressure and speed throughout the process. This method excels for production runs where every piece must match perfectly.
Dry vs. Wet Grinding Techniques
Dry grinding is faster and more convenient but generates heat. The lack of coolant means using lighter pressure and taking breaks to prevent heat damage. It creates more dust, so good ventilation is a must.
Wet grinding keeps the metal cool during work. The coolant absorbs heat and flushes away metal particles that would clog the abrasive. This method works better for precision grinding and gives a superior surface finish. The drawbacks are the mess and the need for coolant handling systems.
Surface vs. Cylindrical Grinding
Surface grinding creates flat, even surfaces on stainless steel plates and sheets. The grinding wheel moves across the metal in a controlled pattern, making this method great for making precision parts with tight tolerances.
Cylindrical grinding shapes round objects like rods, tubes, and shafts. The workpiece rotates while the grinding wheel contacts it at a fixed point. This technique creates perfectly round parts with exact diameters. External cylindrical grinding works on outer surfaces, while internal grinding shapes holes and bores.
Steps and Methods for Effective Grinding
Grinding stainless steel isn’t just about removing material. It’s about doing it smartly. Follow these steps:
- Start with a Coarse Grit: To remove major imperfections, start with a lower grit (around 60-80) and move the grinder in a consistent, steady motion.
- Control Heat: Stainless steel heats up quickly. Use a lower speed setting and apply light pressure. Overheating can weaken the metal and cause discoloration.
- Switch to Finer Grits: Gradually move to higher grits (120-220) for smoothing. This reduces scratches and prepares the surface for polishing.
- Polish for a Shiny Finish: Use polishing pads with compounds to achieve a reflective surface. Work in small sections for even results.
The correct grit will determine the final finish of the metal and its integrity. The choice of abrasive depends on the specific task. The following are the basic principles:
- Rough Grinding and Stock Removal: Rough grinding removes scale, defects, and excess material. For this heavy material removal, use coarse abrasives (36-60 grit).
- Intermediate Grinding: Intermediate grinding removes the marks left by rough grinding. Switch to medium-grit abrasives (80-120 grit) and reduce the pressure. This stage starts to define the final appearance of the surface.
- Fine Grinding: Fine grinding creates the final surface texture. Use fine abrasives (150-400 grit) with light pressure. This stage prepares the metal for polishing if desired.
Types of Abrasives for Stainless Steel
Stainless steel requires abrasives that can handle its toughness without causing heat damage. The right abrasive makes your work easier and produces better results.
Aluminum Oxide vs. Silicon Carbide vs. Ceramic Abrasives
- Aluminum Oxide: Aluminum oxide abrasives work well for general stainless steel grinding. They last longer than other options and cost less.
- Silicon Carbide: Silicon carbide cuts faster than aluminum oxide but wears out quicker. It works best for finishing operations rather than heavy grinding. The sharp cutting action leaves a cleaner finish with less heat.
- Ceramic Abrasives: Ceramic abrasives offer the best performance for heavy grinding. They stay sharp longer and remove material faster than other types. Ceramic abrasives cost more but last much longer when grinding stainless steel.
Coated vs. Bonded Abrasives
- Coated Abrasives include sandpaper, flap discs, and sanding belts. Abrasive grains stick to the backing material with adhesive. These work well for finishing and lighter grinding.
- Bonded Abrasives: Bonded abrasives include grinding wheels and cut-off discs. The abrasive grains mix with bonding material to form solid shapes. These handle heavier grinding but are less flexible.
Essential Tools and Equipment
The right equipment makes stainless steel grinding safer, faster, and more precise. Each tool has specific strengths that make it suitable for different grinding tasks.
Angle Grinders vs. Bench Grinders vs. Belt Grinders
- Angle Grinders are versatile and handheld. They are perfect for cutting, grinding, and polishing and are great for small to medium projects.
- Bench Grinders: Stationary tools with two wheels. It is ideal for sharpening tools and light grinding tasks.
- Belt Grinders: Use a continuous belt for grinding. Best for large surfaces and heavy material removal.
Each tool has its strengths. Choose based on your project’s size and complexity.
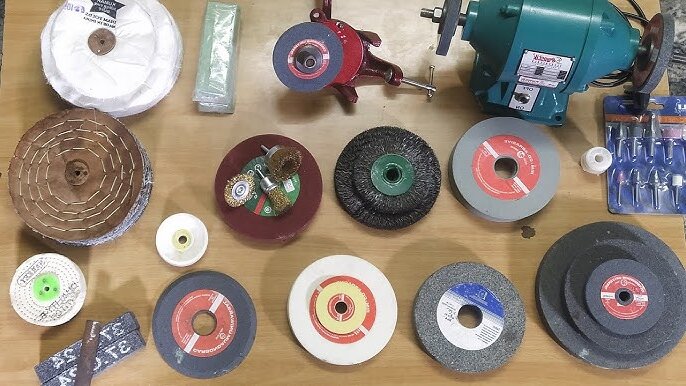
Grinding Wheels vs. Flap Discs vs. Sanding Belts
- Grinding Wheels: Durable and practical for heavy material removal. Use them for rough grinding and shaping.
- Flap Discs: Combine grinding and sanding. Great for blending and finishing surfaces.
- Sanding Belts: Used in belt grinders. Ideal for large, flat surfaces and consistent material removal.
Pick the tool that matches your grinding stage and desired finish.
Importance of Coolants and Lubricants in Grinding
Coolants prevent heat damage when grinding stainless steel. Even brief overheating can discolor the surface and reduce corrosion resistance. Water-based coolants work well for most grinding operations. Apply coolant generously and frequently during prolonged grinding sessions.
Lubricants reduce friction between the abrasive and metal, helping the abrasive cut more efficiently while extending its life. Use lubricants specifically formulated for stainless steel.
Post-Grinding Finishing Techniques
These finishing methods enhance stainless steel’s appearance and function after grinding. Each technique builds on proper grinding preparation.
Brushing
Brushing removes minor scratches and creates a uniform texture. Use a wire brush or abrasive pad. Move in the direction of the grain for a consistent finish. This step prepares the surface for polishing or buffing.
Polishing
Polishing enhances the shine and smoothness of stainless steel. Start with a coarse polishing compound and gradually move to finer ones. Use a polishing wheel or pad. Work in small sections for even results. Polishing gives the material a reflective, professional look.
Buffing
Buffing is the final step for a mirror-like finish. Use a soft buffing wheel and a fine compound. Apply light pressure and move steadily. Buffing removes any remaining imperfections and removes the stainless steel’s natural luster.
How Do You Prevent Common Problems?
Problems with stainless steel grinding often ruin projects at the last minute. These prevention tips save time and materials.
Avoid Contamination
Contamination ruins stainless steel’s corrosion resistance and appearance. Carbon steel particles embedded in the surface will rust later, even though the stainless steel itself wouldn’t.
Keep separate tools for stainless steel work. Never use the same grinding wheels or abrasives on carbon and stainless steel. Clean your workspace thoroughly before grinding stainless steel. Wear clean gloves to prevent oil and dirt transfer from your hands.
Clean the stainless steel surface with acetone or alcohol before grinding. This removes oils that can trap contaminants—store stainless steel materials and tools away from carbon steel to prevent cross-contamination.
Watch for Discoloration
Heat discoloration on stainless steel shows up as blue, brown, or yellow tints. This indicates chromium oxide formation, which weakens corrosion resistance.
Use lower speeds when grinding stainless steel. Take frequent breaks to let the material cool. Apply coolant regularly during grinding operations. Press lighter rather than harder – let the abrasive do the work.
Stop immediately if you see color changes forming. Let the material cool completely before continuing. If discoloration occurs, remove the affected layer entirely and start over.
Check for Scratches
Deep scratches require starting over with coarse grits. This wastes time and thins your material unnecessarily.
Check your work frequently under good lighting. Look at the surface from different angles to spot scratches. Use a flashlight held at a low angle to highlight surface imperfections.
Work systematically through grit sequences without skipping grades. Each grit should remove the scratches from the previous one altogether. Take your time – rushing leads to missed scratches that show up later.
Maintain Your Tools
Worn or damaged tools produce poor results on stainless steel. Proper maintenance saves money and improves quality.
Dress grinding wheels regularly to keep them cutting efficiently. Replace wheels and discs when they show signs of glazing or loading. Store abrasives properly to prevent damage and contamination.
Clean your tools after use with compressed air or a cleaning stick—balance wheels properly when mounting them to prevent vibration. Check for loose components that might cause chatter marks in your finish.
What Are the Best Practices for Grinding Stainless Steel?
Following proven methods ensures quality results when grinding stainless steel. These practices help avoid common pitfalls and achieve professional finishes.
- Start with the right abrasive for stainless steel. Use products labeled explicitly for stainless or “inox” materials.
- Work from coarse to fine grits systematically. Don’t skip more than one grit size in your sequence. Each step should remove the scratches from the previous grit altogether.
- Control heat generation at all times. Use light to medium pressure and keep the tool moving. Make multiple light passes instead of one heavy pass. Apply coolant regularly during extended grinding sessions.
- Maintain consistent angle and direction. Grind in one direction only for visible surfaces, especially for final passes. This creates uniform patterns that look professional.
- Wear proper protection, including face shields, not just safety glasses. Use respiratory protection when dry grinding.
- Match your tool speed to the operation. Use higher speeds for finishing and lower speeds for material removal.
Conclusion
Grinding stainless steel requires the right tools, techniques, and attention to detail. Start with the appropriate abrasives and tools, and follow a step-by-step process from rough grinding to fine finishing. Control heat to avoid discoloration, prevent contamination, and maintain your tools for consistent results.
Need help with your stainless steel fabrication project? At Shengen, our team has 10+ years of experience working with stainless steel and other sheet metal materials. Contact us today to discuss your project and get a free consultation.
More Resources:
Common Grinding Errors – Source: Cdtusa
Grinding burn – Source: Grindaix
Types of Grinding Machines – Source: Xometry
Metal Grinding Tools Guide – Source: Empire Abrasives
Hey, I'm Kevin Lee

For the past 10 years, I’ve been immersed in various forms of sheet metal fabrication, sharing cool insights here from my experiences across diverse workshops.
Get in touch
Kevin Lee
I have over ten years of professional experience in sheet metal fabrication, specializing in laser cutting, bending, welding, and surface treatment techniques. As the Technical Director at Shengen, I am committed to solving complex manufacturing challenges and driving innovation and quality in each project.
Related Resource

Fingerprint Resistant Stainless Steel: How It Works,and How to Choose


