3D printing can produce strong parts or fragile ones—and the difference often comes down to one setting: infill. Many first-time users struggle with weak structures, long print times, or wasted material. If you’re printing functional parts or prototypes, knowing how infill works helps you avoid costly mistakes and get better results from your prints.
Infill refers to the internal structure within a 3D printed part. It supports the outer shell and gives the part its strength. Infill patterns, percentage, and orientation all affect how strong, heavy, or fast the part prints. Choosing the proper infill depends on your part’s use and requirements.
Now that you know what infill does, you’ll want to see how to use it properly and get better results in your prints. This guide breaks down infill types and densities, helping you select the best one for your project.
Basics of Infill in 3D Printing
Infill isn’t just filler. It’s a key part of every 3D printed part’s structure. Here’s what it does and why it matters.
Definition and Function of Infill
Infill refers to the internal support structure within a 3D printed part. It fills the space between the outer shell walls. You don’t see it from the outside, but it holds everything together inside.
Its main job is to provide strength. It supports the top layers and prevents them from collapsing. It also helps parts hold their shape and carry loads. Some parts require only minimal support. Others need more to handle stress or wear and tear.
How does Infill affect structural Integrity?
Infill affects the strength of a part. The more infill you use, the stronger the part becomes. But that also means more time and more material.
The type of infill pattern also affects strength. Some patterns spread force better. Others are faster to print. If your part needs to carry weight or resist pressure, denser infill and stronger patterns make a difference.
The Relationship Between Infill and Material Usage
Infill uses up material. The denser it is, the more filament or resin it needs. At a 10% infill rate, a part feels light and flexible. At 80%, it’s heavy and solid.
More infill also increases print time. So, there’s a tradeoff. You save time and cost with low infill, but you give up strength. You get a more challenging part with high infill, but you’ll wait longer and use more material.
Common Infill Patterns and Their Uses
Different infill patterns can alter the strength, flexibility, or lightweight nature of your 3D print. Each type has its strengths. The right choice depends on the part’s purpose.
Concentric Infill Pattern
The concentric infill follows the shape of the outer wall. It creates rings inside the part that copy the outer shell. This pattern provides smooth surface finishes and is particularly well-suited for curved objects. It adds a little strength but focuses more on looks. It’s often used when aesthetics take precedence over load-bearing.
Grid Infill Pattern
Grid infill forms a square crisscross layout. It spreads strength evenly in all directions. It’s strong, simple, and prints fast. This is one of the most common choices for general parts. The Grid is a solid choice for boxes, brackets, and covers that require a balance of strength and print speed.
Line Infill Pattern
Line infill moves in straight parallel lines for each layer. The direction shifts slightly between layers. It uses less material and prints faster than a grid. However, it’s weaker. This pattern works well for visual models or quick drafts where function is not the primary goal.
Gyroid Infill Pattern
Gyroid infill creates a flowing 3D curve that doesn’t repeat in the same way from layer to layer. It offers high strength and good flexibility while maintaining a low weight. This pattern is ideal for parts that face twisting or bending. It’s often used in functional parts and impact-resistant components.
Octet Infill Pattern
The octet pattern uses a mix of triangles and diagonal lines. It forms a strong, three-dimensional lattice. This design gives an excellent strength-to-weight ratio. It resists pressure from many directions. It’s ideal for parts that require high mechanical strength while maintaining a lightweight design.
Lightning Infill Pattern
Lightning infill resembles random paths, much like a bolt of lightning. It only supports the top parts of a model. It uses very little material and prints fast. This pattern is best suited for visual models or prototypes that require minimal strength. It’s not suitable for functional parts.
Triangular Infill Pattern
This pattern prints triangles in layers. Triangles give firm support. The pattern holds up well under pressure. It’s suitable for parts that carry heavy loads. It takes more time and material to print than simpler patterns, but the strength makes up for it.
Cross Infill Pattern
The cross pattern looks like minor plus signs. It prints fast and uses little material. However, its strength is low. It works well for lightweight models or parts with low stress. It’s quick and straightforward but not suitable for heavy-duty use.
Infill Density Explained
Infill density affects the strength, lightness, or speed of your 3D print. It’s one of the most critical settings in slicing software.
What Is Infill Density?
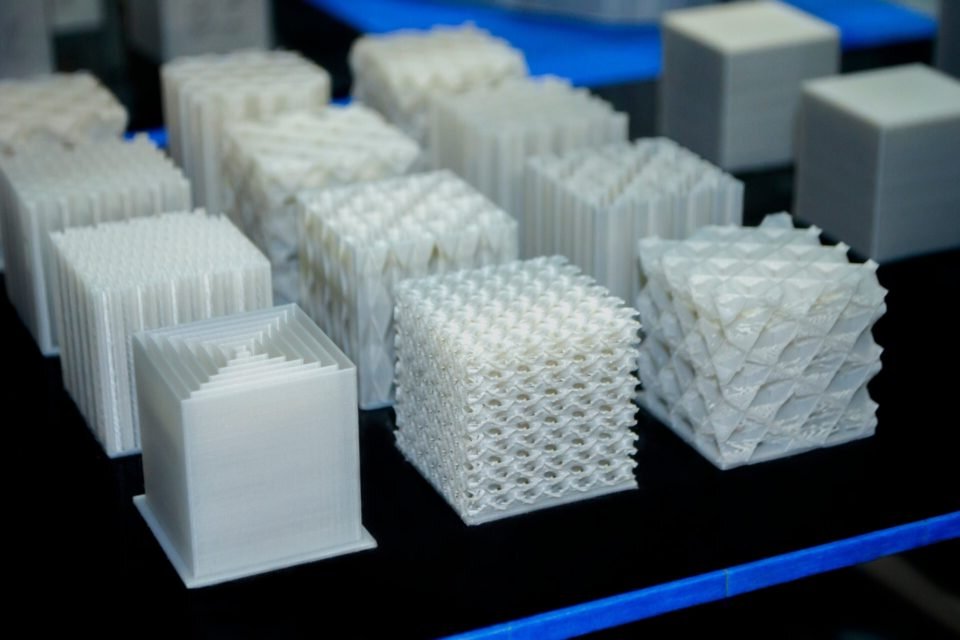
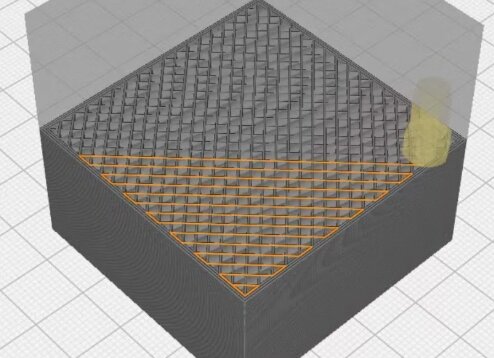
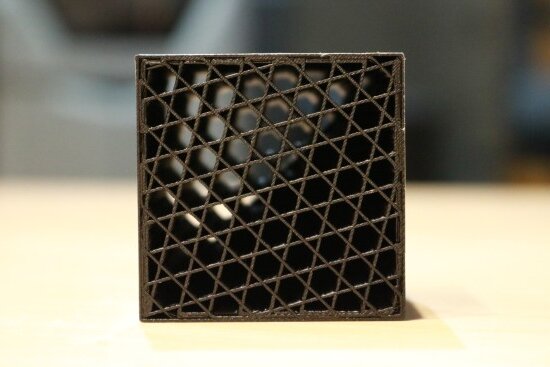
Infill density is the amount of material used to fill the inside of a part. It’s measured as a percentage. A 0% infill makes the part hollow. A 100% infill makes it solid.
Higher density gives more strength and weight. Lower density saves time and material.
Standard Density Ranges and Their Applications
- 0%–15%: Used for visual models and display pieces. Parts are lightweight and fast to print, but they are weak.
- 20%–40%: Good for most functional parts. It provides moderate strength while saving on material.
- 50%–70%: Suitable for strong parts that handle regular stress.
- 80%–100%: Used for parts under high loads or impact. These prints require more time and use significantly more material.
What is an Optimal Infill Density?
The best density depends on the part’s use. If the part won’t carry weight or stress, 15–20% is usually enough. For load-bearing or moving parts, a balance of 40–60% is ideal. For heavy-duty applications, go higher.
Avoid using 100% unless it’s needed. It adds print time and material cost without providing much-added benefit in most cases.
Factors Influencing Infill Selection
The right infill choice depends on several things. These include how the part will be used, the material being printed, and how the layers are arranged.
Print Purpose: Functional vs. Decorative
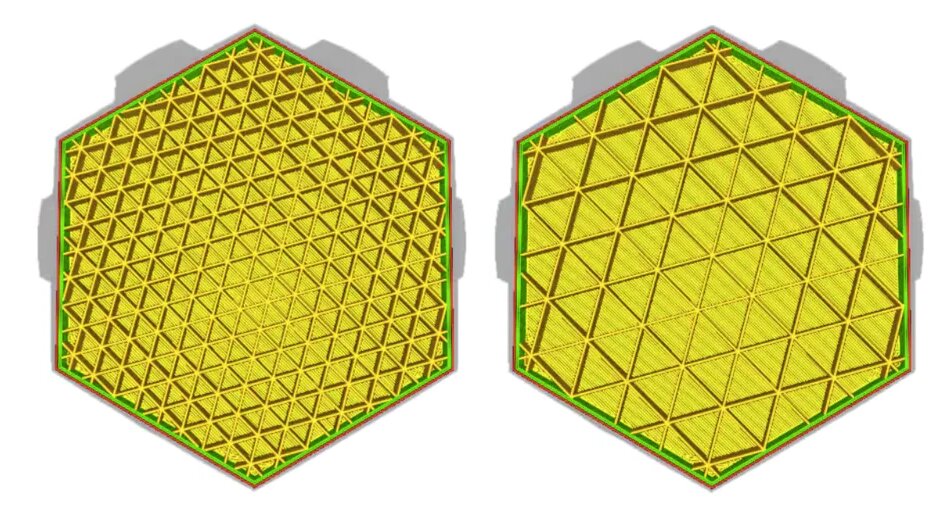
If the part is decorative, it doesn’t need much strength. You can save time and filament by using a low infill density and a basic pattern.
Functional parts must be able to hold weight or resist force. These need higher infill and stronger patterns. A part used in a machine or tool needs more support inside than a display piece.
Material Considerations for Optimal Infill
Different materials behave differently with infill. PLA prints well even with low infill because it’s stiff. Flexible TPU may need more infill to avoid sagging.
Some materials shrink or warp more. Stronger infill can help resist those effects. Material cost also matters—expensive filament might push you to lower the infill to save money.
Layer Height and Its Impact on Infill Density
Layer height affects how strong the infill works with the outer shell. Thicker layers print faster but may not bond as well. Thinner layers produce smoother prints and better strength but require more time.
If you use a thick layer, you may need a higher infill density to compensate for the weaker bond. With delicate layers, even lower infill can still provide sufficient support to the structure.
Conclusion
Infill refers to the internal structure within a 3D printed part. It affects strength, weight, print speed, and material usage. The correct infill pattern, percentage, and setup all depend on what your part is meant to do. Lighter parts use less infill. Stronger parts need more. Choosing the right combination helps you print more efficiently and achieve better results.
Need help with custom 3D printed parts for your project? Contact our team for fast, reliable solutions tailored to your design requirements.
Hey, I'm Kevin Lee
For the past 10 years, I’ve been immersed in various forms of sheet metal fabrication, sharing cool insights here from my experiences across diverse workshops.
Get in touch
Kevin Lee
I have over ten years of professional experience in sheet metal fabrication, specializing in laser cutting, bending, welding, and surface treatment techniques. As the Technical Director at Shengen, I am committed to solving complex manufacturing challenges and driving innovation and quality in each project.