Aluminum is one of the most commonly milled materials in manufacturing. However, due to its unique properties, many face challenges when working with it. Many engineers face challenges with tool wear, poor surface finish, and dimensional accuracy. The proper techniques can solve these issues and help you create perfect aluminum parts quickly and efficiently.
Aluminum milling requires specific approaches that are different from other metals. The right combination of cutting tools, speeds, feeds, and cooling methods can dramatically improve your results. You can achieve excellent surface finishes with proper technique while extending tool life and maintaining tight tolerances across your projects.
Aluminum milling requires precision and the right techniques. Let’s examine how these proven methods can improve your aluminum milling operations.
Understanding Aluminum as a Material
Before we discuss specific milling techniques, let’s consider the material we’re working with. Aluminum’s unique properties directly influence how we should approach machining it.
Properties of Aluminum
Aluminum possesses several distinctive characteristics that set it apart from other metals commonly used in manufacturing. These properties determine the best practices for milling operations.
Lightweight yet strong
Aluminum weighs about one-third as much as steel while maintaining good strength. When milling aluminum, this lighter weight means less tool pressure than steel, allowing faster cutting speeds.
The material’s strength varies greatly between alloys. Some aerospace-grade alloys rival steel in strength while maintaining the weight advantage.
High thermal conductivity
Aluminum conducts heat exceptionally well—about three times better than steel. This property has two crucial effects on milling operations. First, heat generated during cutting spreads quickly through the workpiece instead of concentrating at the cutting edge. This helps prevent localized overheating.
However, this high conductivity also means workpieces can expand during machining as they warm up. This thermal expansion must be considered for precision parts.
Softness compared to other metals
Aluminum’s softness makes it easier to cut than harder metals like steel or titanium. This softness allows for higher cutting speeds and feed rates. Tools experience less wear when cutting aluminum, extending their useful life when used correctly.
The downside of this softness appears in chip formation. Aluminum produces long, stringy chips that can tangle around the tool. These chips may also stick to cutting edges, creating a built-up edge that ruins the surface finish.
Choose the Right Aluminum Alloy
The specific aluminum alloy you select directly impacts your milling process and results. Let’s compare three common alloys and their milling characteristics.
| Property | 6061 Aluminum | 5052 Aluminum | 7075 Aluminum |
|---|---|---|---|
| Main Applications | General purpose, prototypes, structural | Marine, electronics, food equipment | Aerospace, military, high-stress parts |
| Hardness (Brinell) | 95-97 (T6 temper) | 60-70 | 150 (T6 temper) |
| Chip Formation | Well-formed, breaks cleanly | Longer, stringier chips | Small, brittle chips |
| Tool Wear Rate | Low | Very low | Moderate |
| Surface Finish Capability | Excellent (32 RMS or better) | Good to excellent | Excellent with proper parameters |
| Heat Generation | Moderate | Low | Higher |
| Key Milling Considerations | Balanced properties make it forgiving; use sharp tools | Requires extremely sharp tools; focus on chip evacuation | Higher cutting forces; shorter tool life; reduced speeds |
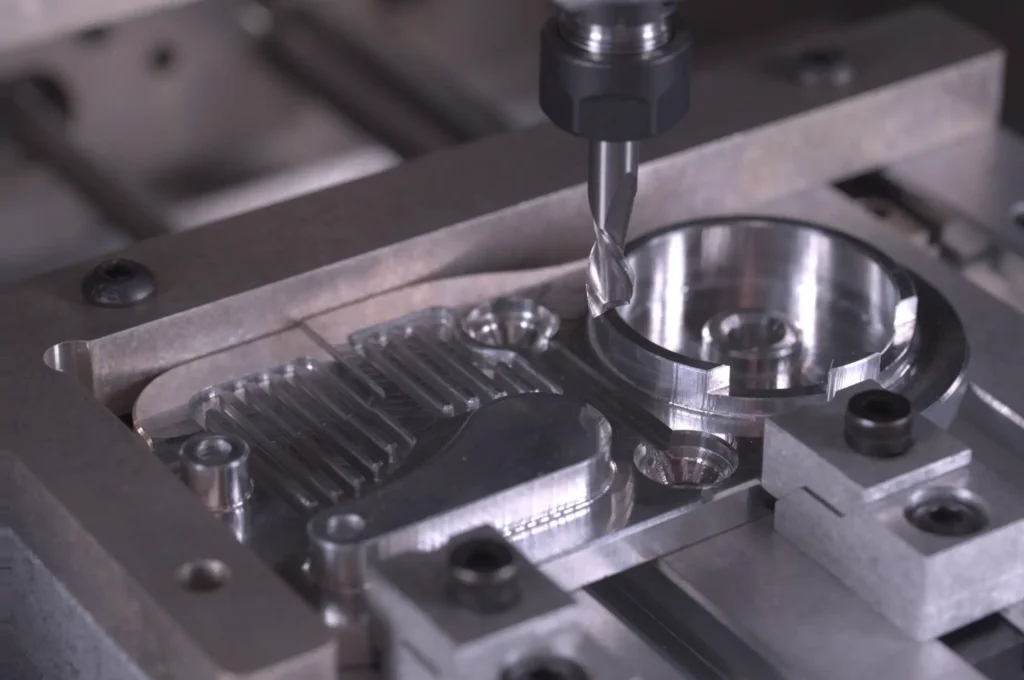
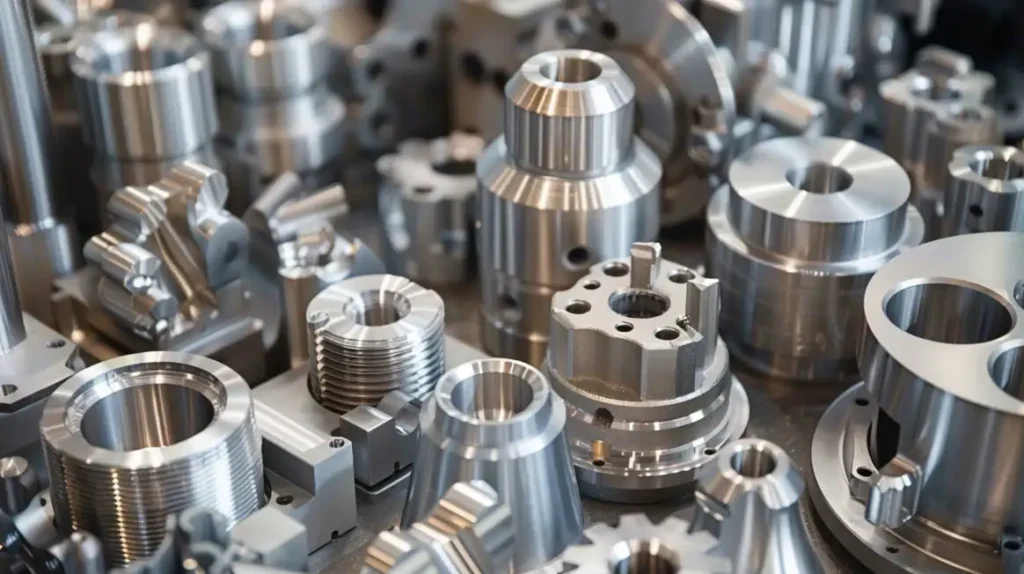
Choosing the Right Tools for Aluminum Milling
Tool selection forms the foundation of successful aluminum milling. When we choose tools specifically designed for aluminum, we set ourselves up for better outcomes.
Cutting Tool Materials
High-speed steel (HSS) and carbide tools represent the two main options for aluminum milling, but they offer different advantages based on your specific needs.
Carbide tools provide several benefits:
- They maintain their cutting edge up to 10 times longer than HSS
- They allow cutting speeds 2-3 times faster than HSS
- They resist heat better, which is valuable when milling for extended periods
However, HSS tools have their place as well:
- They cost significantly less upfront
- They’re more forgiving of minor programming errors
- They can be resharpened more easily in-house
For optimal results with either material, look for tools with these specific features:
- Polished flutes that reduce friction by providing a smooth surface for chip evacuation
- Sharp cutting edges with minimal edge preparation to slice through aluminum cleanly
- 2-3 flutes (rather than 4+ flutes used for steel), which creates larger chip channels
- Specialized coatings like TiCN (Titanium Carbon Nitride) or ZrN (Zirconium Nitride) reduce friction and prevent built-up edge formation.
Tool Geometry
The shape and angles of your cutting tool dramatically affect how it interacts with aluminum. Think of tool geometry as defining the “personality” of your cutting tool—how aggressively it cuts, handles chip formation, and manages heat.
For aluminum milling, the most effective geometries include:
- High positive rake angles between 15 and 20 degrees create a slicing rather than a scraping action, reducing cutting forces and heat generation.
- Large flute valleys: These provide ample space for aluminum’s relatively large, soft chips.
- Helix angles between 35 and 45 degrees: This middle range balances chip evacuation (higher angles push chips up faster) with tool strength (lower angles create stronger cutting edges).
Optimizing Cutting Parameters
The right combination of speed and feed transforms adequate aluminum milling into excellent aluminum milling. These parameters work hand-in-hand to determine how your tool interacts with the aluminum.
Cutting Speed
Aluminum allows for significantly faster cutting speeds than steel or other harder metals. This higher speed capability stems from aluminum’s lower hardness and its response to the cutting action.
For optimal results, consider these speed ranges:
- HSS tools: 500-1,000 SFM (surface feet per minute)
- Carbide tools: 1,000-2,500 SFM
- PCD (polycrystalline diamond) tools: Up to 5,000 SFM for specialized applications
You can calculate the correct spindle RPM for your particular tool diameter using this formula:
RPM = (SFM × 12) ÷ (π × tool diameter in inches)
For example, with a 1/2″ carbide endmill and a desired cutting speed of 1,500 SFM:
RPM = (1,500 × 12) ÷ (3.14159 × 0.5) = 11,459 RPM
Feed Rate
Feed rate—how quickly the tool moves through the material—affects both the quality of the finish and the life of the tool. This parameter requires careful balancing.
For aluminum milling:
- Start with feed rates between 0.001-0.005 inches per tooth (IPT)
- For roughing operations, use the higher end of this range
- For finishing operations, use the lower-end
When adjusting your feed rate, remember that it works in conjunction with:
- The number of flutes on your tool (more flutes = more cutting edges passing through the material per revolution)
- Tool diameter (more extensive tools can generally handle higher feeds per tooth)
- Depth of cut (lighter depths can often use higher feeds)
A good starting point is to use this formula: Feed Rate (inches per minute) = RPM × Number of Flutes × Feed per Tooth.
For example, with a 3-flute tool running at 10,000 RPM and a feed of 0.003″ per tooth: Feed Rate = 10,000 × 3 × 0.003 = 90 inches per minute
Everyday Operations of Aluminum Milling
Aluminum milling encompasses several fundamental operations that form the basis of most machining projects. Each operation presents unique challenges and opportunities when working with aluminum.
Facing
Facing operations create flat, smooth surfaces on aluminum workpieces. This fundamental milling process establishes reference surfaces for subsequent operations and achieves precise dimensional control.
When facing aluminum, take these steps for optimal results:
- Use climb milling direction rather than conventional milling
- Set the depth of cut between 0.020″ and 0.100″ depending on your machine’s rigidity
- Run at higher speeds (1,000+ SFM) to prevent built-up edge
- Keep feed rates high enough to create proper chip formation
Slotting
Slotting cuts channels or grooves into aluminum workpieces. This operation creates features like T-slots, keyways, and mounting slots. The confined cutting area makes chip evacuation particularly important.
When slotting aluminum:
- Select end mills with fewer flutes (1-2 flutes) to maximize chip clearance
- Reduce cutting depth to 0.5-1× tool diameter per pass to prevent chip packing
- Apply high-pressure coolant directly into the slot when possible
- Use higher speeds but moderate feeds to maintain chip control
Pocketing
Pocketing removes material to create internal cavities in aluminum parts. This ordinary operation appears in everything from electronic enclosures to lightweight structural components.
Effective aluminum pocketing requires:
- Helical entry into the material rather than plunging
- Tool diameter 25-50% smaller than internal corner radii
- High spindle speeds to maintain clean-cutting action
- Trochoidal toolpaths for deeper pockets
- Progressive depth strategy for pockets deeper than 1× tool diameter
Troubleshooting Common Aluminum Milling Issues
Even with careful planning and setup, challenges can arise when milling aluminum. Let’s explore machinists’ most frequent problems with aluminum and their solutions.
Preventing Built-Up Edge (BUE)
Built-up edge occurs when small particles of aluminum weld themselves to the cutting edge of your tool. This creates a false edge that ruins the surface finish and accelerates tool wear.
Fortunately, several proven strategies can dramatically reduce or eliminate built-up edge when milling aluminum:
- Increase cutting speeds by 15-20% instead of slowing down
- Use aluminum-specific coolant directed at the cutting interface
- Replace tools at the first signs of dulling
- Select tools with specialized coatings like ZrN or diamond-like carbon
- Maintain proper chip load to ensure cutting action instead of rubbing
Managing Chip Welding and Chip Evacuation
Proper chip control represents one of the biggest challenges in aluminum milling. If not managed effectively, long, stringy chips can quickly wrap around tools, clog flutes, and ruin workpieces.
If you encounter chip evacuation issues during an aluminum milling operation, these intervention strategies can help:
- Apply high-pressure coolant directly at the chip formation point
- Program periodic tool retractions during deep pocket operations
- Reduce cut width to 30-50% of tool diameter when possible
- Select tools with fewer flutes for better chip clearance
- Use tools with chip-breaking geometries
Avoiding Tool Breakage and Excessive Wear
Tool failure during aluminum milling usually stems from preventable causes. Understanding the warning signs and taking proactive steps can dramatically extend tool life and improve results.
Implement these proven approaches to maximize tool life when milling aluminum:
- Increase feed rate if you hear high-pitched squealing
- Minimize tool overhang to reduce vibration
- Make lighter cuts at higher speeds rather than heavy cuts at lower speeds
- Use coolant-through tooling for internal features
- Ensure proper chip evacuation to prevent re-cutting chips
Conclusion
Aluminum milling works best when you understand how this metal behaves undercutting tools. You need the right tools, speeds, and methods to get good results. Each aluminum alloy has different properties that affect how it mills.
Do you need help with your aluminum projects? Our engineers can help you choose materials, find the right tools, and improve your methods. Contact us today for a free meeting about your next aluminum job.
Hey, I'm Kevin Lee

For the past 10 years, I’ve been immersed in various forms of sheet metal fabrication, sharing cool insights here from my experiences across diverse workshops.
Get in touch
Kevin Lee
I have over ten years of professional experience in sheet metal fabrication, specializing in laser cutting, bending, welding, and surface treatment techniques. As the Technical Director at Shengen, I am committed to solving complex manufacturing challenges and driving innovation and quality in each project.
Related Resource

Fingerprint Resistant Stainless Steel: How It Works,and How to Choose


