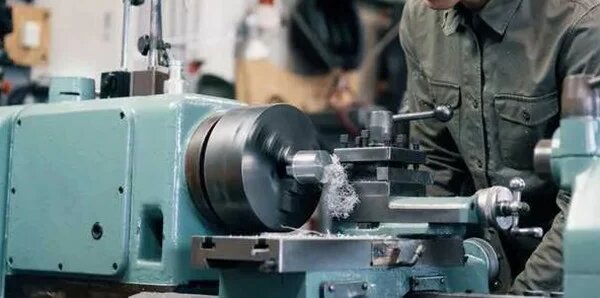
Manual milling gives the machinist direct control. The operator guides the machine by hand to cut and shape solid materials such as metal or plastic. The process requires skill but offers high flexibility for custom parts or small runs. Many shops use it for prototypes, tooling, and repair work.
The real strength of manual milling is its hands-on accuracy. Let’s examine the main techniques that make it so useful.
What is Manual Milling?
Manual milling is the process of shaping a workpiece with a milling machine operated by hand. The machine uses a rotating cutter to remove material and form flat surfaces, slots, holes, or more complex shapes. Unlike CNC milling, which follows computer programs, manual milling relies on the machinist’s skill and adjustments.
Shops use manual milling for prototypes, repair jobs, and low-volume runs. It works with many materials, including steel, aluminum, brass, and plastics. With the right cutter, it can create smooth finishes and detailed shapes. Standard tools include end mills, face mills, and slot drills.
Manual vs. CNC Milling
Manual and CNC milling both shape materials with rotating cutters, but their workflows are different. Manual milling depends on the machinist’s direct control. The operator moves the workpiece by hand and makes every decision. This makes it slower for mass production but ideal for custom or small-scale work.
CNC milling uses computer programs to guide movement. It delivers speed, repeatability, and accuracy in large numbers. Once programmed, a CNC machine can produce hundreds or thousands of identical parts with minimal variation. However, it requires more time to set up and test before production begins.
Basics of Manual Milling Machines
Manual milling machines form the core of traditional machining. Understanding their parts and types helps machinists choose the proper setup for each task.
Key Components of a Milling Machine
A manual milling machine has several main parts that work together:
- Base and Column: The base supports the machine, and the column holds the structure. Together, they give strength and stability.
- Knee: The knee supports the table and moves up or down to set the cutting depth.
- Table: The table holds the workpiece. It moves in the X and Y directions to place the material under the cutter.
- Saddle: The saddle links the table to the knee and controls side movement.
- Spindle: The spindle holds the cutter. It rotates at different speeds to match the material and cut.
- Overarm and Arbor: On horizontal mills, these hold long cutting tools in place.
- Controls and Handwheels: Operators use these to move the table, set the feed, and adjust spindle speed.
Types of Manual Milling Machines
Manual milling machines come in different types. Each type works best for specific jobs.
Vertical Milling Machines
A vertical mill has a spindle that points straight up and down. The cutter moves vertically, while the table shifts side to side and front to back. Vertical mills are common and versatile. They work well for drilling, slotting, and making flat surfaces. They are often used for small parts and detailed features.
Horizontal Milling Machines
A horizontal mill has a spindle that sits sideways. It can hold extended cutters called arbors. This setup makes the machine strong for heavy cuts. Horizontal mills can remove more material in one pass and are suited for large parts or tough metals. They also work well for cutting grooves and slots.
Universal Milling Machines
A universal mill combines features of both vertical and horizontal mills. Its table can swivel at angles, giving more flexibility. This lets machinists cut complex shapes without moving the workpiece to another machine. Universal mills are useful in shops that need one machine for many different tasks.

Essential Manual Milling Tools
Manual milling depends on the right tools to achieve accuracy and efficiency. A machinist must understand how each tool works and when to use it.
Milling Cutters and Their Types
Milling cutters are the primary tools that shape the workpiece. Each cutter has a specific role.
- End Mills: The most common cutters. They make slots, pockets, and contours. They come in many sizes for different jobs.
- Face Mills: Large cutters for flattening surfaces quickly.
- Slot Drills: Designed for narrow slots and keyways. They cut straight and leave clean edges.
- Ball Nose Cutters: Cutters with rounded tips. They are used for curved surfaces and 3D shapes.
- Fly Cutters: Simple single-point tools for wide, smooth surfaces.
Workholding Devices and Fixtures
Holding the workpiece firmly is just as important as using the right cutter. Workholding tools keep the part steady and prevent movement.
- Vices: The most common device. They clamp parts on the table for general work.
- Clamps and Step Blocks: Hold large or irregular shapes directly on the table.
- Angle Plates: Hold parts at set angles for drilling or milling.
- Rotary Tables: Allow rotation of the part for circular cuts or patterns.
- Custom Fixtures: Built for special jobs when standard tools cannot hold the part.
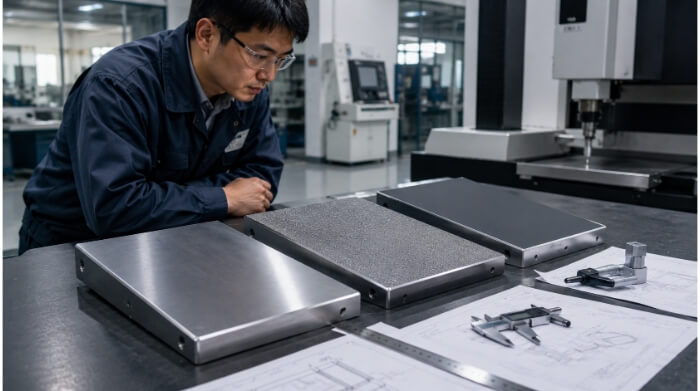
Measuring and Inspection Tools
Precision depends on accurate measurement. Machinists use several tools to check size and quality.
- Calipers: Measure inside and outside dimensions with reasonable accuracy.
- Micrometers: Give exact readings of thickness, diameter, or length.
- Dial Indicators: Help align workpieces and check flatness.
- Height Gauges: Measure features and set tool heights.
- Surface Plates: Provide a flat base for accurate inspection.
Manual Milling Operations
Manual milling includes several cutting methods, each with a specific purpose. Knowing these operations helps machinists choose the best approach for each part.
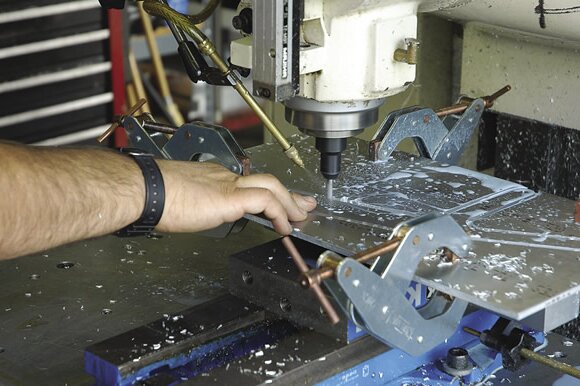
Face Milling
Face milling uses a cutter with multiple teeth mounted on the spindle. The cutting edges face downward and remove material from the top of the workpiece. This method creates flat and smooth surfaces. Machinists often use it to prepare stock before other machining steps. Face mills cover vast areas quickly, making them efficient for finishing and leveling.
Peripheral Milling
Peripheral milling, also called plain milling, uses the side of the cutter. The cutting edges run along the outside of the tool. This method shapes edges, cuts slots, and machines surfaces parallel to the cutter’s axis. It provides accurate dimensions and can remove large amounts of material. Machinists can choose climb or conventional milling, depending on the desired finish and tool life.
Slotting and Pocketing
Slotting cuts a straight groove into the workpiece with an end mill or slot drill. It is common for keyways, guides, and other precise channels. Pocketing removes material inside a closed boundary to create recessed areas or cavities. Both methods require careful cutter path and depth control to avoid tool deflection and uneven cuts.
Drilling, Boring, and Tapping on a Mill
A manual mill can also perform hole-making tasks with the right tools.
- Drilling uses a drill bit to create round holes. The spindle holds the bit while the table positions the workpiece.
- Boring enlarges an existing hole with a single-point tool to improve accuracy and surface finish.
- Tapping creates internal threads in a drilled hole. A tap is held in the spindle or in a tapping attachment.
Step-by-Step Milling Process
A manual milling job follows a precise sequence. Each step ensures accuracy and consistency. Skipping or rushing any stage can cause errors, wasted material, or poor finishes.
Step 1: Preparing the Workpiece
The process starts with preparation. The machinist selects the right material and cleans its surface. Dirt, rust, or burrs can affect accuracy. The workpiece is then secured with a vise, clamps, or fixtures. Proper alignment on the table ensures that all cuts stay in the correct position.
Step 2: Planning the Cut
Before cutting, the machinist makes a plan. They choose the cutter, spindle speed, feed rate, and depth of cut and decide on the milling direction—conventional or climb. Careful planning prevents tool damage and improves efficiency.
Step 3: Executing the First Pass
The first pass removes a small layer of material. This step checks the setup and confirms accuracy. The machinist watches for vibration, cutter performance, and surface quality. Adjustments can be made before deeper cuts continue.
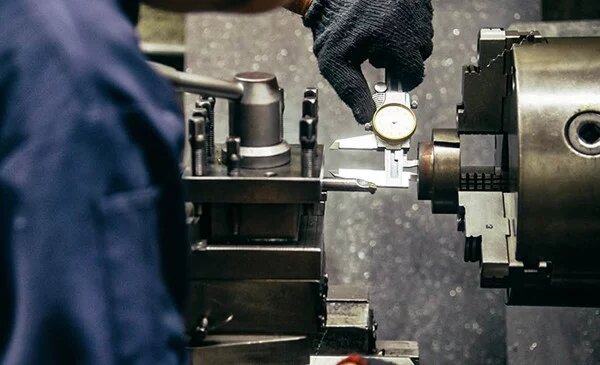
Step 4: Achieving Precision through Multiple Passes
Precision comes from repeated, controlled passes. Each pass removes more material while keeping tight tolerances. The machinist measures often with calipers or micrometers to confirm progress. Minor tool position and depth adjustments bring the part to its final size.
Step 5: Finishing and Surface Quality
The last step focuses on surface finish. A finishing pass uses a light cut and slow feed to create a smooth surface. Deburring tools remove sharp edges, and inspection tools check dimensions and quality. At this point, the part is ready for use or further processing.
Safety in Manual Milling
Safety is always a top priority in manual milling. Machines are powerful, and even small mistakes can cause injury or damage. Understanding the risks and following safe practices protects both operators and parts.
Common Hazards in Milling Work
Milling involves several risks:
- Flying Chips: Sharp chips can strike the operator or others nearby.
- Rotating Tools: Contact with cutters or the spindle can cause serious injury.
- Loose Workpieces: Poor clamping may cause parts to shift and break tools.
- Noise and Vibration: Long exposure can harm hearing or reduce focus.
- Coolant and Oil: Spills can create slippery floors or skin irritation.
Best Safety Practices for Operators
Operators lower risks by building safe habits:
- Clamp the workpiece tightly before cutting.
- Use the correct cutter for the material and job.
- Keep your hands clear of rotating tools and moving parts.
- Stop the spindle before measuring or making adjustments.
- Remove chips with a brush, never with your bare hands.
- Stay focused and avoid distractions during cutting.
Personal Protective Equipment
Protective gear gives an extra layer of safety. Common items include:
- Safety Glasses or Face Shields: Protect eyes from flying chips.
- Hearing Protection: Reduce the effects of machine noise.
- Gloves: Safe for handling materials, but not near rotating tools.
- Protective Clothing: Fitted clothing prevents fabric from catching in moving parts.
- Safety Shoes: Protect feet from dropped tools or heavy parts.
Advantages and Limitations of Manual Milling
Manual milling has strengths that make it valuable for specific projects. However, it also has limitations compared to automated machining. Knowing both helps engineers and managers decide when to use each.
Benefits of Manual Milling for Specific Projects
Manual milling offers flexibility. A machinist can adjust depth, angle, or feed without reprogramming, making it ideal for prototypes, one-off jobs, and repairs.
It is cost-effective for small batches. Setup is faster and cheaper than programming a CNC machine, especially when parts are not repeated.
Manual milling gives hands-on control. Operators can feel the cutting process and make fine adjustments in real time. This control is helpful for custom features or irregular parts.
It is also a strong training tool. Learning manual milling builds an operator’s understanding of cutting forces, tool paths, and material behavior, which prepares them for advanced machining later.
Limitations Compared to Automated Processes
Manual milling depends on the operator’s skill and focus. Accuracy may vary between machinists, and fatigue can affect results.
Production speed is lower. CNC machines cut faster and more consistently for large runs. Manual milling is not practical when thousands of identical parts are needed.
Complex shapes are more complicated to produce. Manual mills can handle many features, but intricate 3D forms are better made with CNC machines.
Repeatability is limited. A manual setup often reflects the operator’s personal method, making it harder to duplicate the exact process later.
Applications of Manual Milling
Manual milling has many practical uses. Its flexibility and control make it valuable for work that needs precision or quick changes.
Prototyping and Low-Volume Production
Manual milling is well-suited for prototypes and small runs. Engineers can make parts quickly without the cost or time of CNC programming. Design changes are easy to adjust on the spot. For low-volume jobs, hands-on control ensures each piece meets the required specifications.
Repair and Maintenance Work
Repair work often calls for unique solutions. Manual milling lets machinists reshape, drill, or reface worn parts. They can modify components on-site, avoiding the cost and delay of ordering replacements. This makes it especially useful for repairing machinery, tools, and specialized equipment.
Educational and Training Environments
Manual milling is a key teaching tool in schools and workshops. Students learn how cutters interact with materials, how cutting forces behave, and how to maintain accuracy. These lessons provide a strong base before moving on to advanced CNC machines.
Conclusion
Manual milling remains a versatile and dependable machining method. It gives operators precision, flexibility, and direct control over the process. This makes it an excellent choice for prototypes, small production runs, repair work, and training. While CNC machines excel in speed and mass production, manual milling provides adaptability and cost-effectiveness for custom and one-off projects.
Need precision custom parts or prototypes? Request a fast, free quote today. Our machining experts are ready to deliver competitive pricing and reliable lead times tailored to your project.
Hey, I'm Kevin Lee

For the past 10 years, I’ve been immersed in various forms of sheet metal fabrication, sharing cool insights here from my experiences across diverse workshops.
Get in touch
Kevin Lee
I have over ten years of professional experience in sheet metal fabrication, specializing in laser cutting, bending, welding, and surface treatment techniques. As the Technical Director at Shengen, I am committed to solving complex manufacturing challenges and driving innovation and quality in each project.