現代の板金加工は、レーザー切断と金属プレスという2つの中心的な方法に依存しています。どちらも精密な金属部品を作りますが、生産量、形状、コストの面で、その目的は大きく異なります。これらの違いを理解することで、エンジニアはリードタイムを短縮し、後々の高額な再設計を避けることができます。
レーザー切断と金属プレスの仕組み?
レーザー切断とスタンピングはどちらも効率的に金属を成形するが、その方法はまったく異なる。そのメカニズムを知ることで、それぞれの方法が時間と投資に対して最高のリターンをもたらす場所が明らかになります。
レーザー切断 - 柔軟で工具不要
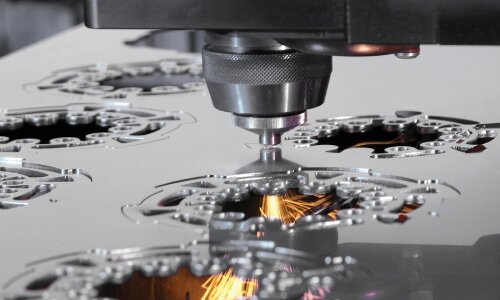
レーザー切断 は、集光された光ビームで、プログラムされた経路に沿って金属を溶融または蒸発させます。物理的な工具の接触がないため、エッジは滑らかでストレスのない状態を保ちます。1回のセットアップで、複雑な形状、狭い穴、微細なディテールも簡単に加工できます。
CADファイルが承認されると、金型やセットアップの遅れもなく、即座にプロセスが開始されます。そのため、プロトタイプ、小ロット、カスタムアセンブリに最適です。一般的な寸法公差は約±0.1mmで、スチール、ステンレス、アルミニウムの各シートで一貫しています。
最新のネスティング・ソフトウエアは、シート上に部品を密に配置し、材料の歩留まりを最大95%向上させます。この効率は、高価な合金を切断する場合や、混合部品のネスティングが必要な生産において非常に重要になります。
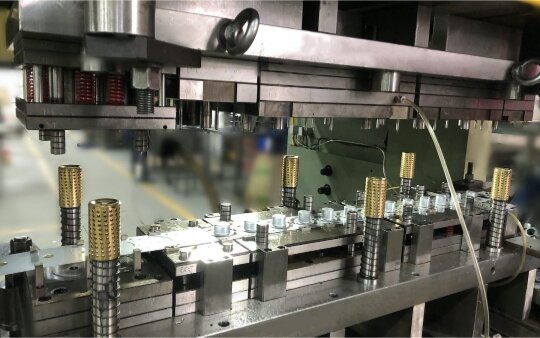
金属プレス加工 - 高速・大量生産
金属プレス パンチとダイを使い、強い圧力でシートを成形または切断します。ツーリングが完了すると、各ストロークで数秒以内に完成部品が作られる。この方法は±0.025 mmの繰り返し精度を達成し、1時間に数千個の部品を生産することができる。
しかし、金型製作には高い初期費用とリードタイムが必要である。精密金型は、5,000米ドルから50,000米ドルの費用がかかり、製作と検証に4~8週間かかる。このような投資の後、スタンピングは安定した長期生産のための最も迅速で経済的な選択肢となります。
実例だ: 1.5mmのステンレス鋼製筐体のプロトタイプは、レーザー切断で1個あたり40米ドルかかるかもしれないが、プレス加工量が1万個に達すると、コストは10米ドル以下に下がる。
コスト比較 - セットアップ vs ボリューム
すべてのプロジェクトは、セットアップ投資と生産量のバランスをとらなければならない。コスト曲線は、それぞれの方法が最適値を達成するポイントを示している。
レーザー切断は、工具を必要とせず、最小限のセットアップで、単価を1,000個から2,000個まで安定させることができます。量産前のデザイン検証やブリッジ生産に最適です。
スタンピングは、5,000~10,000個を超えると、金型費用が大量に分散するため、経済的になります。損益分岐点を超えると、部品単価は少量のレーザー加工と比較して60%以上下がる可能性があります。
デザインのヒント 試作品や初期の設計検証にはレーザー切断を使用する。形状や需要が安定したらプレス加工に切り替え、部品あたりのコストを最低限に抑えます。
標準誤差: 設計検証を完了する前にスタンピング金型に投資すると、金型が無駄になり、製品発売が遅れることがよくある。
切削精度とエッジ仕上げ
それぞれの方法は、明確な表面特性と公差を生み出します。これらを理解することは、エンジニアが製造工程の後半で仕上げ、溶接、コーティングの計画を立てるのに役立ちます。
レーザー切断 - 滑らかで、正確で、バリがない
レーザー切断は、材料を剪断するのではなく、溶かすため、バリを最小限に抑えた滑らかなエッジが得られます。ビームの精密さにより、シートの大部分は影響を受けず、熱影響部(HAZ)は通常0.2mm以下です。
最新のファイバーレーザーは、シャープなコーナーや繊細なカットアウトを維持しながら、最大6 mmの厚さにわたって±0.1 mmの寸法公差を達成します。このきれいなエッジにより、多くの場合、二次的なバリ取りや研削が不要になり、コーティングや溶接前の準備時間を 30 ~ 50% 節約できます。
レーザー切断された部品は、特にデジタルネスティングとプロセスパラメータが同じプログラム内に保存されている場合、複数のバッチ間で高い再現性を示します。
スタンピング - 一貫しているが工具に依存する精度
スタンピングは、±0.025mm以内という高い機械精度を達成することが多いが、一貫性は金型の品質と適切なメンテナンスに大きく依存する。機械的なせん断は、特に金型が摩耗するにつれて、微細なバリやわずかなエッジの変形を引き起こす可能性があります。安定した公差を維持するには、定期的な再研磨と潤滑が重要です。
プレス加工された部品は、長時間の運転では均一な形状を実現しますが、金型の継ぎ目やコーナー付近ではわずかなばらつきが生じることがあります。適切な検査スケジュールとツールのメンテナンスは、これらの影響を軽減します。
デザインのヒント 溶接されたアセンブリや化粧パネルでは、レーザー切断によりエッジがきれいになり、仕上げが速くなります。
標準誤差: スタンピングエッジにバリ取りが不要だと仮定すると、最終組立時に位置ズレや塗装の密着不良が発生することが多い。
材料の応力と歪み
成形力と熱の両方が、曲げ、溶接、コーティング時の金属の挙動に影響します。これらの応力を早期に管理することで、あらゆる段階での部品の安定性が確保されます。
レーザー切断 - 最小限の機械的歪み
物理的な力がかからないため、レーザー切断によってシートにはほとんど機械的な応力が残りません。
狭いHAZと正確な熱制御により、薄い素材でも反りを最小限に抑えることができます。3mm以下のステンレス鋼の場合、平坦度の偏差は通常0.2mm以下に抑えられ、その後の曲げ加工やスポット溶接が容易に行えます。
また、工具の圧力が低いため、コーナー部での微小クラックの発生が防止され、後の成形や表面仕上げが必要な部品にとって価値がある。
スタンピング - 強い力と内部応力
スタンピングは、ミリ秒単位で何トンもの機械的負荷を加える。この冷間加工プロセスは、ひずみ硬化によってエッジを強化しますが、内部応力を発生させることもあります。この応力が緩和されないと、成形時のスプリングバックや溶接後のわずかな曲がりの原因となります。
エンジニアは、割れを防止するために、金型設計にフィレット、コーナーリリーフ、より大きな曲げ半径を追加することがよくあります。厳しい公差が要求される場合、スタンピング後のアニールや応力除去による平坦化は、寸法安定性の回復に役立ちます。
デザインのヒント CADで応力分布をシミュレーションしたり、パイロットスタンピングを行い、量産前に部品の平坦度を確認することができます。
標準誤差: 残留応力を無視すると、最終組立時にエッジ・クラックや溶接部のアライメント不良につながる可能性がある。
材料適合性と厚み範囲
材料によって熱や圧力に対する反応は異なります。それぞれの合金に適したプロセスを選択することで、精度と工具寿命を最適化することができます。
レーザー切断 - 幅広い材料範囲、柔軟な厚さ
レーザー切断は、炭素鋼、ステンレス鋼、アルミニウム、銅合金を簡単に扱うことができる。一般的な切断厚さの限界は、高出力ファイバーレーザーを使用した場合、軟鋼で最大25 mm、ステンレス鋼で最大15 mm、アルミニウムで最大10 mmです。真鍮や銅のような反射しやすい金属はビーム調整が必要ですが、最新の光学系により後方反射のリスクを大幅に軽減できます。
チタンやニッケルのような高価値の合金の場合、レーザー切断の非接触プロセスは表面の汚染を防ぎ、構造的完全性を維持します。
プレス加工 - 薄くて延性のある金属に効果的
スタンピングは、厚さ3mmまでの軟鋼、アルミニウム、銅板に最適です。硬い素材やコーティングされた素材は金型の磨耗を早め、金型表面を研磨する必要があります。一貫した潤滑は摩擦を減らし、大量生産時にダイの寿命を30~40 %延ばします。
単純な形状のプレス加工は依然として効率的だが、材料や厚みを頻繁に変更する場合は、コストのかかる金型調整が必要になる。
デザインのヒント 形状が固定された薄いアルミニウムやスチールの部品には、プレス加工がコストと均一性の最適なバランスを保証します。
標準誤差: 1つの金型を調整せずに異なる合金に再利用すると、公差ドリフトや金型の早期破損につながることが多い。
生産スピードとリードタイム
どちらの方法も高速で行えるが、製品のライフサイクルの段階は異なる。
レーザー切断 - ラピッドプロトタイピングの即時開始
レーザー切断はCAD承認後すぐに開始されます。金型が不要なため、設計から生産までの遅れがありません。これにより、リードタイムは数週間から数時間に短縮されます。
デジタルワークフローは、迅速なプログラミングとネスティングを可能にし、変更を即座に適用できます。一般的なサイクルタイムは、材料の厚みや複雑さにもよりますが、1部品あたり1~5分です。この応答性により、ブリッジ生産または少量生産に最適で、プロトタイプから大量生産への移行にまたがる。
レーザー切断は、部品に後工程の修正が必要な場合にもうまく機能する。エンジニアは、再工程を行うことなく、1つのバッチで複数の設計バージョンを実行できます。
スタンピング - 金型が準備できれば非常に速い
金型製作後、プレス加工は比類のないスループットに達する。プレス1台で毎分200~1,000個の部品を生産できるため、大量生産に最適な選択肢となる。しかし、製作には時間がかかり、設計、機械加工、テストに通常4~8週間かかる。
生産が始まれば、プレス加工の部品単価は劇的に下がる。しかし、設計が修正されるたびに、新しい金型やコストのかかる調整が必要になる。次のような安定した大量生産品には、金型が必要です。 括弧, パネルとワッシャーは、このトレードオフを受け入れることができる。
デザインのヒント 金型に投資する前に、形状やアセンブリの適合性を検証するために、レーザー切断を生産前工程に使用する。
標準誤差: 設計変更時にスタンピングに頼ることは、長い遅延を引き起こし、既存の金型を無駄にする可能性がある。
設計の柔軟性と形状の複雑さ
柔軟性とは、エンジニアリングの修正、カスタム設計、または市場からのフィードバックに対して、プロセスがどれだけ容易に適応できるかを定義するものである。
レーザー切断 - デジタルの敏捷性と無制限の形状
レーザー切断はCADデータを直接読み取るため、物理的なセットアップなしで迅速な調整が可能です。エンジニアは、追加コストなしで形状、穴の位置、寸法を変更することができます。スロット、換気口、鋭い内角などの複雑なデザインも、一貫した精度で処理できます。
設計変更が発生した場合は、デジタルファイルのみを更新すればよい。これにより、迅速な反復、エンジニアリングの変更管理、大規模なカスタマイズが可能になります。エレクトロニクス、医療、オートメーションなどの業界では、この機能により製品開発サイクルが大幅に短縮されます。
スタンピング - 信頼性は高いがデザインに制約がある
スタンピングは、金型が完成すれば再現性のある精度が得られますが、その後の柔軟性には限界があります。各金型は特定の形状用に設計されており、それを変更するには、必要な仕様に適合していることを確認するための機械加工、テスト、再検証が必要です。工具の変更には数日から数週間かかることもあり、その結果、ダウンタイムとコスト増を招く。
この剛性により、スタンピングは、生産寿命が長く、設計に若干のばらつきがある部品に理想的です。進化するモデルの場合、エンジニアは安定した設計のためにスタンピングに移行する前に、初期段階でレーザー切断を行うことがよくあります。
デザインのヒント 設計変更に対応するためにレーザー切断から始め、形状が安定したらプレス加工に移行する。
標準誤差: 金型ベースの生産に早急に固定することは、サンク・ツーリング・コストを増加させ、将来のアップデートを制限する。
レーザー切断と金属プレスの比較:概要表
| カテゴリー | レーザー切断 | 金属プレス |
|---|---|---|
| セットアップ&ツーリング | 金型不要、デジタルファイルで即生産 | カスタム金型が必要、金型費用≒5,000~50,000米ドル |
| リードタイム | CAD承認後、数時間以内に開始 | ツールの設計と検証に4~8週間 |
| 生産量の範囲 | 1~2,000個に最適(短納期またはブリッジ生産) | 5,000~10,000個以上で経済的(安定した大量生産) |
| 標準公差 | ±0.1mm(材料間で一定) | ±0.025mm(ツーリングが維持されている場合) |
| エッジクオリティ | 滑らかでバリのない、最小限の熱影響部(<0.2 mm) | エッジが鋭く、バリ取りや再研磨が必要な場合がある。 |
| 材料応力 | 非接触プロセス → 機械的ストレスが少ない | 高い成形力→内部応力またはスプリングバックの可能性 |
| デザインの柔軟性 | CADベースのワークフローが迅速な反復と変更をサポート | 金型製作後に形状が固定されるため、修正にはコストがかかる |
| 生産速度(1部品あたり) | 厚さにより1~5分 | セットアップ後、毎分200~1,000個 |
| 最適 | プロトタイプ、カスタムパーツ、マルチバージョンプロジェクト | 長期的かつ大量の標準部品 |
各プロセスを選択するタイミングは?
レーザー切断とスタンピングのどちらを選択するかは、数量、形状の複雑さ、生産目標によって決まります。それぞれの方法は、プロジェクトのさまざまな段階とその優先順位に沿った独自の強みを提供します。
レーザー切断を選ぶ
- 試作品や少量生産品(1~2,000個)が必要です。
- デザインは変更されたり、頻繁なアップデートが必要になったりすることがあります。
- 部品には複雑な形状、細かいディテール、厳しい公差がある。
- 迅速なターンアラウンドと最小限のセットアップが鍵となる。
- 金型投資を削減し、設計検証をスピードアップしたい。
レーザー切断は、単価よりも精度と敏捷性が優先されるフレキシブルな生産と小ロット生産に最適です。
スタンプを押すタイミングを選ぶ:
- 生産は大量で安定している(5,000個以上)。
- ジオメトリーは標準化されており、わかりやすい。
- 非常に高い再現性と部品単価の低さが必要です。
- リードタイムは、金型設計と製作のための時間である。
- 表面仕上げの要求は、軽い後処理に耐えられる。
スタンピングは、一度金型を作れば比類のない効率を発揮するため、長期の大量生産に最適です。
ハイブリッド・アプローチを考える
多くのメーカーが両方の方法を組み合わせています。初期のプロトタイプやブリッジランではレーザー切断から始め、設計が安定したらスタンピングに移行します。この戦略は、財務リスクを軽減し、テストを加速し、完全生産へのスムーズな移行を保証します。
デザインのヒント 両方の段階を早めに計画する。プロトタイプと最終設計の両方で同じ材料の厚みと曲げ半径を使用することで、後で再修正の必要性を避けることができます。
結論
レーザー切断とスタンピングには明確な強みがある。レーザー切断は柔軟性、ネスティング、迅速な適応に優れ、スタンピングは大量生産効率と再現性に優れています。どちらが優れているかは、バッチサイズ、形状の複雑さ、品質と持続可能性に関する長期的な目標によって決まります。
もしあなたのプロジェクトが、両方の方法を比較するサポートを必要とするならば、 シェンゲンのエンジニア お客様のCADファイルを拝見し、プロトタイプからフル生産まで、最も費用対効果の高い方法をご提案いたします。
よくあるご質問
レーザー切断とスタンピングの主な違いは何ですか?
レーザー切断は高エネルギーのビームを利用し、物理的な接触なしに金属を切断するのに対し、スタンピングはパンチとダイを使用し、圧力下で部品をせん断または成形する。レーザー切断は柔軟性を提供し、スタンピングは大量生産にスピードを提供します。
どちらのプロセスが全体として速いのか?
大規模で反復可能な部品の場合、金型が完成すればスタンピングの方がはるかに速い。プロトタイプや少量生産の場合、レーザー切断はすぐに開始され、数週間ではなく数時間で部品を提供します。
スタンピングが費用対効果に優れるようになるのはいつですか?
プレス加工が経済的になるのは、生産数が5,000~10,000個を超えたときである。その規模になると、金型費が多くの部品に分散され、単価が大幅に下がる。
レーザー切断はスタンピングよりも正確ですか?
レーザー切断は、きれいなエッジと最小限のバリで±0.1 mmの精度を達成します。プレス加工では、大量生産で±0.025 mmの公差を達成できますが、これは金型の状態とメンテナンスに依存します。
設計変更にはどちらの方法が効果的か?
レーザー切断は、金型を変更することなく、デジタルファイルの更新に即座に適応する。スタンピングは、高価な金型交換や新しい金型を必要とするため、頻繁な設計変更に柔軟に対応できません。

ケビン・リー
レーザー切断、曲げ加工、溶接、表面処理技術を専門とし、板金加工において10年以上の実務経験があります。シェンゲンのテクニカルディレクターとして、複雑な製造上の課題を解決し、各プロジェクトにおける革新と品質の向上に尽力しています。


