La découpe laser de tôles est aujourd'hui l'une des méthodes les plus précises et les plus souples de la fabrication moderne. Cependant, de nombreux nouveaux acheteurs se heurtent encore à des problèmes courants. Il s'agit notamment de dessins peu clairs, du choix de matériaux inadaptés ou de l'absence de détails sur les tolérances. Ces erreurs entraînent souvent des retards et une augmentation des coûts.
Cet article explique comment éviter ces problèmes avant de passer votre commande. Il explique comment fonctionne le processus de découpe au laser, comment sélectionner les bons matériaux, définir les tolérances appropriées et planifier les finitions de surface. Chaque section donne des conseils simples et pratiques pour vous aider à obtenir des résultats précis à un coût raisonnable.
Comment fonctionne la découpe au laser?
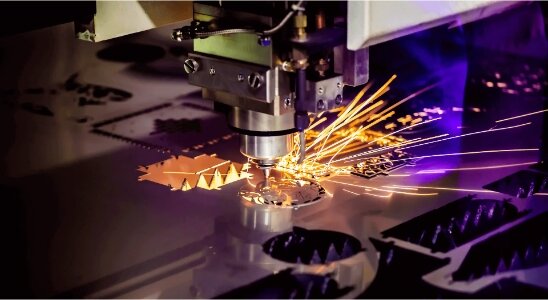
La découpe au laser est une méthode qui utilise un faisceau lumineux focalisé pour découper des feuilles de métal avec une grande précision. L'énergie du laser fait fondre ou vaporise le matériau le long d'une trajectoire déterminée, créant ainsi des bords nets et lisses. Un système contrôlé par ordinateur déplace le faisceau en fonction de votre fichier CAO, ce qui permet de produire avec précision des formes complexes, des trous fins et des angles vifs.
Le processus commence lorsqu'un fichier de conception, généralement au format DXF ou STEP, est téléchargé dans le logiciel de la machine. Le logiciel convertit le dessin en trajectoires de découpe. Ensuite, la tête du laser se déplace sur la tôle, en concentrant le faisceau sur un point minuscule. Le faisceau focalisé atteint des températures extrêmement élevées, faisant fondre instantanément le métal le long de la trajectoire.
Après la découpe, les pièces sont séparées de la feuille. Les petites bavures sont nettoyées. En raison de l'étroitesse de la poutre, le trait de scie, c'est-à-dire la largeur de la coupe, est minime. Cela permet de réduire la perte de matériau et de garantir la précision des bords.
Types de machines de découpe laser
Il existe trois principaux types de machines de découpe laser : à fibre, CO₂ et YAG. Chaque type a ses points forts et ses utilisations idéales.
Découpe au laser à fibre utilise un laser à semi-conducteurs transmis par fibre optique. Il est très efficace et idéal pour les métaux réfléchissants tels que l'acier inoxydable, l'aluminium, le laiton et le cuivre. Les lasers à fibre offrent des vitesses de coupe rapides, peu d'entretien et une excellente précision.
CO₂ découpe laser utilise un mélange de gaz composé de dioxyde de carbone, d'azote et d'hélium. Il crée des bords lisses et peut couper à la fois les métaux et les non-métaux, tels que le plastique, le bois et l'acrylique. Il donne de meilleurs résultats sur l'acier doux et l'acier inoxydable d'épaisseur moyenne, mais il est moins efficace sur les métaux réfléchissants comme l'aluminium ou le laiton.
La découpe au laser YAG est moins courante pour la tôle, mais elle est utile pour le marquage ou le perçage de caractéristiques fines. Il peut traiter des métaux fins et des matériaux spéciaux, bien qu'il fonctionne généralement à des vitesses inférieures à celles des lasers à fibre.
Préparation des fichiers de conception
La précision des fichiers de conception est la base de la précision des pièces découpées au laser. Un formatage correct et des mises en page propres permettent d'éviter les erreurs et de respecter les délais de production. Voici comment préparer vos fichiers CAO pour garantir un processus de découpe sans heurts.
Formats de fichiers acceptés
La plupart des systèmes de découpe laser utilisent directement les fichiers CAO. Les formats les plus courants sont DXF, DWG, STEP, IGES et AI.
Les fichiers DXF et DWG sont idéaux pour la découpe en 2D. Ils définissent les contours, les trous et les fentes à l'aide de lignes vectorielles. Ces formats garantissent des contours précis pour les pièces de tôle plates.
STEP et IGES sont les plus adaptés aux modèles 3D. Ils permettent aux ingénieurs de visualiser l'ensemble de la géométrie et de créer des modèles plats pour le cintrage ou le pliage des sections. Ces formats sont pratiques pour les pièces qui nécessitent une combinaison de découpe laser et de formage.
Les fichiers AI (Adobe Illustrator) conviennent aux conceptions plates simples telles que les panneaux ou les enseignes. Avant de les envoyer, assurez-vous que les chemins sont propres, vectoriels et sans chevauchement.
Lors de l'exportation, conservez le dessin à l'échelle 1:1 et supprimez toute géométrie cachée ou dupliquée. Enregistrez chaque pièce dans un fichier distinct et étiquetez-la clairement en indiquant le type et l'épaisseur du matériau. Cela permet aux ingénieurs d'examiner rapidement vos fichiers et d'éviter les erreurs lors de la configuration.
Conseils de conception pour une coupe en douceur
De petits détails de conception peuvent affecter de manière significative la précision de la découpe. Suivez ces règles simples pour améliorer les résultats et minimiser les retouches.
- Taille minimale de l'élément : Évitez les caractéristiques plus petites que la largeur du faisceau laser, généralement de 0,1 à 0,2 mm. Les trous minuscules ou les fentes fines peuvent fondre ou se déformer. À titre indicatif, la taille minimale des trous est égale à l'épaisseur du matériau.
- Compensation Kerf : Le laser enlève une étroite bande de matériau, appelée trait de scie, le long de sa trajectoire. Cette largeur dépend du matériau et du type de laser ; elle est généralement comprise entre 0,1 et 0,3 mm. Vérifiez si votre fabricant ajuste automatiquement le trait de scie ou s'il décale votre dessin pour maintenir des dimensions précises.
- Distance entre les trous et les bords : Placez les trous ou les découpes à au moins une épaisseur de matériau du bord extérieur. S'ils sont trop proches, la chaleur peut provoquer des déformations ou des zones de faiblesse. Pour les matériaux plus épais ou sensibles à la chaleur, l'augmentation de la distance améliore la résistance et la stabilité de la pièce.
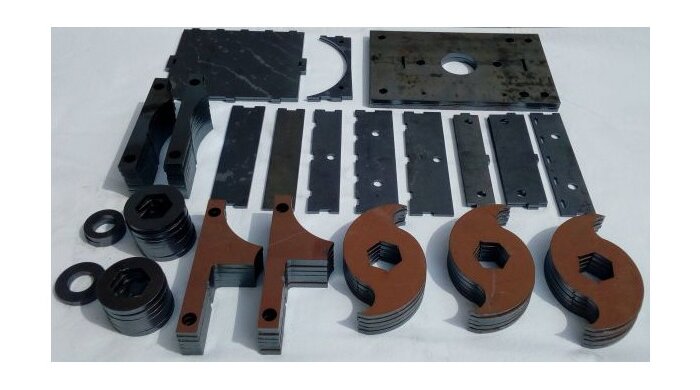
Choisir le bon matériau métallique
Chaque métal se comporte différemment sous le laser. Comprendre comment chaque matériau se découpe et comment l'épaisseur influe sur la qualité vous aide à choisir la meilleure option pour votre projet.
Options de matériaux courants
L'aluminium est un matériau léger, durable et résistant à la corrosion. Il est souvent utilisé pour les boîtiers, les panneaux et les boîtiers électroniques. L'aluminium se découpe rapidement mais réfléchit la lumière, c'est pourquoi les lasers à fibre sont le meilleur choix. Les feuilles minces, de 1 à 4 mm, se découpent proprement et laissent des bords brillants et lisses.
L'acier inoxydable combine une grande solidité, une résistance à la corrosion et une finition attrayante. Il est largement utilisé dans les appareils médicaux, les équipements alimentaires et les produits d'extérieur. Les lasers à fibre et les lasers CO₂ peuvent découper l'acier inoxydable et produire des bords lisses avec peu ou pas de bavures.
L'acier au carbone (également appelé acier doux) est solide, abordable et facile à travailler. C'est l'option la plus courante pour les supports, les cadres et la fabrication générale. Les lasers à fibre et les lasers CO₂ fonctionnent bien, en particulier lorsqu'un gaz d'assistance à l'oxygène est utilisé pour augmenter la vitesse de coupe.
Le laiton offre un aspect décoratif et résiste à la corrosion, ce qui le rend populaire pour la signalisation et les panneaux architecturaux. Le laiton réfléchissant la lumière laser, les lasers à fibre sont plus efficaces pour le découper que les lasers CO₂.
L'épaisseur du matériau et son impact
L'épaisseur du matériau a une influence significative sur les résultats de coupe. Les tôles minces se coupent plus rapidement et laissent des bords plus lisses, tandis que les tôles épaisses nécessitent plus de puissance et un mouvement plus lent.
Par exemple, une tôle d'acier inoxydable de 1 mm se coupe presque instantanément avec un bord net, comme un miroir. En revanche, une tôle de 6 mm nécessite une puissance plus élevée et une vitesse plus lente pour être complètement coupée, ce qui peut légèrement émousser le bord.
Les matériaux plus épais retiennent également plus de chaleur, ce qui augmente le risque de déformation ou de décoloration, en particulier pour les petites pièces. L'utilisation de grilles de support et de gaz d'assistance appropriés permet de contrôler la chaleur et de garder les bords propres.
En termes de coûts, les tôles plus épaisses nécessitent des temps de coupe plus longs et consomment plus d'énergie, ce qui rend leur traitement plus onéreux. Certains fabricants facturent le temps de découpe, ce qui signifie que l'optimisation de la conception et de l'épaisseur du matériau peut faire gagner du temps et de l'argent.
Définition des tolérances et de la précision dimensionnelle
Une bonne précision dépend de l'étendue des tolérances et de la stabilité des conditions de découpe. Comprendre ce que la découpe laser peut réaliser - et ce qui peut l'affecter - vous aide à concevoir des pièces qui s'adaptent parfaitement et qui respectent le budget.
Tolérances typiques de la découpe laser
Les machines modernes de découpe au laser peuvent atteindre des tolérances de l'ordre de ±0,1 mm pour la plupart des pièces en tôle. Pour les tôles fragiles ou les formes simples, la précision peut atteindre ±0,05 mm. Ces niveaux sont plus que suffisants pour la plupart des supports, des panneaux et des boîtiers.
Si votre conception nécessite des ajustements très serrés ou des caractéristiques très détaillées, un usinage supplémentaire peut s'avérer nécessaire. Les tolérances inférieures à ±0,05 mm nécessitent souvent des processus secondaires tels que le fraisage, l'alésage ou le meulage. Ces procédés permettent d'affiner les petits trous, les fentes ou les arêtes critiques que le laser seul ne peut parfaire.
Lorsque l'on fixe des tolérances, il est préférable de ne les spécifier que là où elles sont vraiment importantes. Appliquer des tolérances strictes partout augmente à la fois les coûts et les délais de production. Le fait de maintenir des zones fonctionnelles strictes et d'autoriser des limites plus souples ailleurs permet de maintenir la précision sans dépenses inutiles.
Facteurs affectant la précision
Plusieurs facteurs influencent la précision avec laquelle une découpeuse laser peut reproduire les dimensions de votre dessin.
L'étalonnage de la machine est un élément clé. Un étalonnage régulier permet de s'assurer que le faisceau est parfaitement aligné et focalisé, ce qui garantit l'homogénéité de chaque coupe. Même de petits défauts d'alignement peuvent entraîner des bords irréguliers ou de légères variations de forme.
La planéité du matériau influe également sur la précision. Si la feuille est pliée ou irrégulière, le laser peut perdre la mise au point, ce qui peut modifier la largeur de la saignée et la profondeur de la découpe. L'utilisation d'un matériau plat et nivelé permet d'obtenir des résultats cohérents.
La dilatation thermique est un autre facteur. La chaleur du laser peut entraîner une légère dilatation du métal pendant la découpe. Lorsque la pièce refroidit, elle se contracte à nouveau, ce qui entraîne parfois de légères variations dimensionnelles. Cet effet est plus prononcé dans les tôles et les matériaux plus épais, tels que l'acier inoxydable, qui retiennent la chaleur plus longtemps.
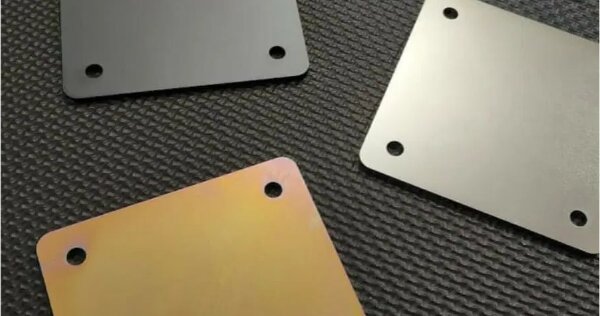
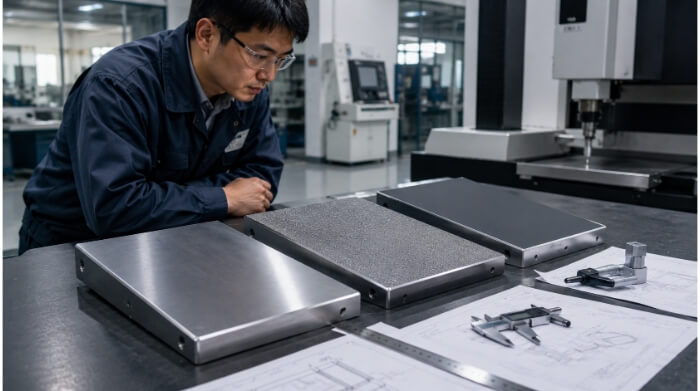
Choisir le bon état de surface
L'état de surface détermine à la fois l'aspect de votre pièce et ses performances à long terme. Le choix de la bonne finition améliore la durabilité, l'aspect et la résistance à la corrosion. Voici les méthodes de finition les plus courantes, ainsi que des conseils sur la manière de les appliquer.
Procédés de finition courants
Anodisation est largement utilisé pour les pièces en aluminium. Il crée une couche d'oxyde dure et protectrice qui empêche la corrosion et peut être teintée dans de nombreuses couleurs. Cette finition améliore à la fois l'aspect et la résistance à l'usure, ce qui la rend idéale pour les boîtiers électroniques, les panneaux décoratifs et les composants extérieurs.
Revêtement en poudre utilise un processus électrostatique pour appliquer une poudre sèche, qui est ensuite durcie par cuisson pour former une couche solide et uniforme. Ce procédé fonctionne sur l'acier, l'acier inoxydable et l'aluminium. Les pièces revêtues de poudre résistent aux rayures, à la rouille et à la décoloration, et sont disponibles dans une large gamme de couleurs. Elle est couramment utilisée pour les couvercles de machines, les boîtiers et les produits de consommation.
Polissage lisse et éclaircit la surface, lui donnant un aspect réfléchissant. Il est souvent appliqué à l'acier inoxydable pour lui donner un aspect propre et miroir. Le polissage permet également d'éliminer les défauts mineurs et d'améliorer l'hygiène, ce qui le rend adapté aux applications médicales, alimentaires et décoratives.
Brossage confère une texture délicate et linéaire au métal à l'aide de bandes ou de tampons abrasifs. Elle réduit les reflets et crée une finition douce et mate. Ce type de finition est très apprécié pour les boîtiers de commande, les panneaux et les appareils pour lesquels une apparence uniforme et professionnelle est souhaitée.
Quand finir avant ou après la coupe?
La finition peut être effectuée avant ou après la découpe au laser, en fonction des exigences en matière de conception et d'aspect.
Les matériaux préfinis, comme l'aluminium anodisé ou l'acier inoxydable brossé, sont pratiques lorsque de légères marques de chaleur près des bords sont acceptables. Ils permettent de gagner du temps et d'éliminer les étapes supplémentaires après la découpe. Cependant, la découpe à travers des couches enduites ou peintes peut parfois laisser une légère décoloration des bords.
Pour les pièces qui doivent avoir un aspect parfait, le post-traitement après découpe est le meilleur choix. Il permet d'éliminer les bavures, l'oxydation ou les taches de chaleur qui peuvent apparaître au cours du processus de découpe. Le post-traitement permet également de s'assurer que les revêtements ou les traitements couvrent uniformément toutes les surfaces, y compris les bords et les trous de coupe.
Optimiser votre commande en termes de coûts et de délais
De petites modifications de conception et de planification peuvent faire une grande différence en termes de coût et de rapidité. Voici comment commander intelligemment et obtenir des résultats plus rapides et plus abordables.
Commandes par lots et commandes prototypes
La découpe au laser nécessite un travail de préparation, notamment la préparation des fichiers, l'étalonnage de la machine et le positionnement des feuilles. Ces étapes prennent à peu près le même temps, qu'il s'agisse de découper une seule pièce ou des centaines. C'est pourquoi les commandes de prototypes coûtent généralement plus cher par pièce : les coûts de configuration sont répartis sur un nombre réduit de pièces et les petites séries nécessitent souvent plus de manipulations manuelles ou de réglages.
Les commandes par lots, en revanche, sont beaucoup plus efficaces. Une fois l'installation terminée, la machine peut fonctionner en continu et découper de nombreuses pièces avec un minimum de supervision. Cela permet de réduire le coût unitaire et de garantir une qualité constante sur l'ensemble du lot. Pour les grandes séries, cette efficacité fait une grande différence en termes de temps et de budget.
Conseils sur la conception pour la fabrication
Une bonne conception n'est pas seulement esthétique, elle permet aussi de réduire les coûts de production. Voici quelques moyens de rendre vos pièces plus faciles et plus rapides à découper :
- Simplifier la géométrie. Évitez les formes trop détaillées ou les décorations inutiles qui augmentent le temps de coupe. Les lignes droites et les courbes lisses se coupent plus efficacement, réduisant ainsi l'accumulation de chaleur.
- Regrouper les pièces similaires. Combinez des composants fabriqués à partir du même matériau et de la même épaisseur en un seul travail de découpe. Cela limite les changements de matériaux et raccourcit le temps de préparation.
- Utiliser une imbrication efficace. L'imbrication consiste à disposer les pièces sur la feuille de manière à utiliser le plus de matière possible. Il faut laisser un petit espace (environ 1 à 2 mm) pour le trait de scie et le contrôle de la chaleur. Une bonne imbrication réduit les rebuts et permet d'économiser sur les coûts des matières premières.
- Ajouter de petites languettes ou des micro-joints. Ils maintiennent les pièces attachées à la tôle pendant la coupe, les empêchant de basculer ou de se déplacer. Cela permet de conserver des bords plus nets et de réduire le besoin de retouches.
- Éviter les rayons d'angle trop serrés. Les angles vifs prennent plus de temps à couper et usent la buse plus rapidement. L'ajout de petits filets rend la coupe plus douce, prolonge la durée de vie de l'outil et améliore la qualité des arêtes.
Pourquoi travailler avec Shengen pour la découpe laser sur mesure? ?
Lorsque la précision, la vitesse et la fiabilité sont cruciales, il est essentiel de choisir le bon partenaire de fabrication. Chez Shengen, nous fournissons une assistance complète, de l'examen de la conception à la production finale, afin que chaque pièce réponde à vos exigences exactes avec une qualité constante à laquelle vous pouvez faire confiance.
Notre équipe d'ingénieurs examine soigneusement chaque fichier CAO avant le début de la découpe. Elle vérifie les dimensions, les tolérances et l'espacement des bords pour s'assurer que chaque pièce est optimisée pour une découpe en douceur et un assemblage précis. Cet examen précoce permet d'éviter les erreurs susceptibles d'entraîner des retards de production ou des coûts supplémentaires.
Nous formulons également des suggestions de conception pratiques pour faciliter la production de vos pièces et la rendre plus rentable. Qu'il s'agisse d'ajuster la taille des trous pour obtenir des coupes plus nettes ou d'optimiser la disposition des imbrications pour minimiser le gaspillage de matériaux, nos ingénieurs proposent des solutions qui permettent de gagner du temps et d'économiser des ressources. Vous recevrez un retour d'information clair avant le début de la fabrication, ce qui garantit la précision de vos pièces dès le premier passage.
Téléchargez vos dessins CAO dès aujourd'hui pour un examen DFM gratuit.. Notre équipe d'ingénieurs évaluera la faisabilité de votre conception et vous fournira un devis rapide et précis pour votre projet de découpe laser de métaux sur mesure.
Hey, je suis Kevin Lee

Au cours des dix dernières années, j'ai été immergé dans diverses formes de fabrication de tôles, partageant ici des idées intéressantes tirées de mes expériences dans divers ateliers.
Prendre contact
Kevin Lee
J'ai plus de dix ans d'expérience professionnelle dans la fabrication de tôles, avec une spécialisation dans la découpe au laser, le pliage, le soudage et les techniques de traitement de surface. En tant que directeur technique chez Shengen, je m'engage à résoudre des problèmes de fabrication complexes et à favoriser l'innovation et la qualité dans chaque projet.
Ressources connexes
Texturation au laser des métaux : préparation, conception pour la fabrication (DFM) et maîtrise des coûts

Acier électro-galvanisé : guide de fabrication et de sélection

Poinçonnage ou découpe laser : Coût, vitesse et compromis DFM
