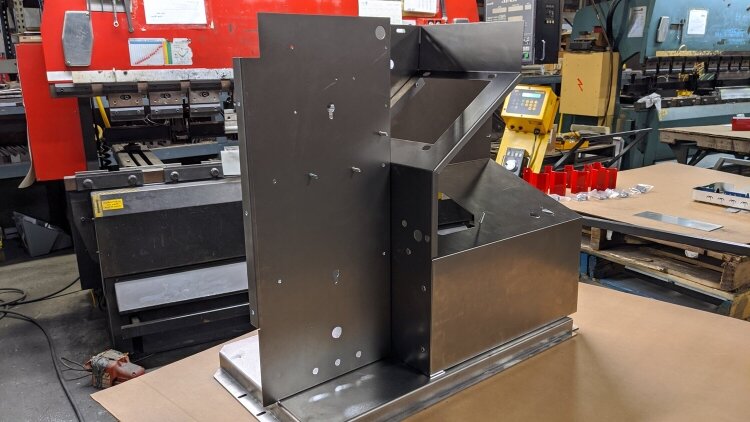
Molti assemblaggi di lamiere incontrano gli stessi problemi. I pezzi possono essere difficili da assemblare, le giunzioni possono non tenere bene e i costi spesso aumentano. Questi problemi raramente derivano da errori di fabbricazione. Di solito derivano da piccole scelte progettuali fatte troppo presto nel processo.
Tutti gli assemblaggi di lamiera iniziano con pezzi piatti dello stesso spessore. Questo semplice fatto guida ogni fase della progettazione. Influisce su curve, fori, giunzioni e dispositivi di fissaggio. Un'attenta pianificazione in questa fase rende l'assemblaggio più resistente, più veloce da costruire e meno dispendioso. Senza di essa, anche piccole sviste possono causare giunzioni deboli, allineamenti sbagliati e costose rilavorazioni.
Quindi, come progettare assemblaggi di lamiera migliori fin dall'inizio? I seguenti 8 consigli di progettazione mostrano chiaramente come migliorare la resistenza, facilitare l'assemblaggio e favorire una produzione efficiente.
Integrità strutturale nella progettazione
Una progettazione solida assicura che il vostro prodotto funzioni bene e duri a lungo. Concentratevi su queste due aree per rafforzare le vostre parti in lamiera fin dall'inizio.
Applicare i corretti raggi di curvatura per evitare le fessurazioni
Quando la lamiera si piega troppo strettamente, la superficie esterna si allunga e quella interna si comprime. Se la raggio di curvatura è troppo piccolo per il materiale scelto, si formano delle cricche che indeboliscono il pezzo. Una regola generale è quella di utilizzare un raggio di curvatura pari allo spessore del materiale. Ad esempio, una lamiera di acciaio dolce di 1,0 mm di spessore richiede un raggio di curvatura interno di almeno 1,0 mm.
Le curve strette indeboliscono il pezzo e ne riducono l'affidabilità durante l'uso. Progettare con raggi di curvatura standard che corrispondono agli utensili disponibili riduce gli scarti, migliora la coerenza e rende la produzione più efficiente.
Uso di nervature, tasselli e flange per il rinforzo
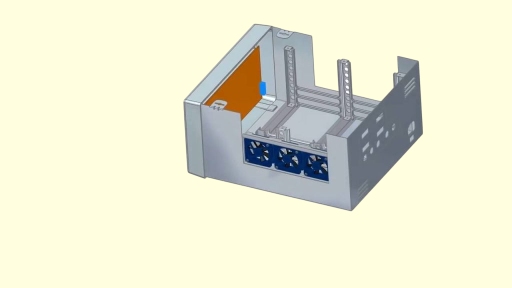
La lamiera piatta senza supporto si piega o si torce sotto carico. Le caratteristiche di rinforzo aumentano la rigidità senza aggiungere peso o costi. Le nervature sono efficaci per coperture, porte o pannelli di grandi dimensioni che devono resistere alle forze di flessione.
I tasselli rafforzano gli angoli e le giunzioni. Un semplice tassello triangolare in un giunto a 90° aiuta l'assemblaggio a sopportare un carico maggiore e migliora la durata a lungo termine. Questo li rende preziosi in telai, staffe o alloggiamenti dove si concentrano le forze.
Flange aggiungono resistenza e allineamento. Una flangia corta su un pannello di alluminio o acciaio può rendere i bordi molto più rigidi e costituire un elemento di localizzazione naturale per l'assemblaggio. In questo modo si riducono le deformazioni e si favorisce l'accoppiamento più preciso dei pezzi.
Caratteristiche di facile montaggio
Una buona progettazione rende l'assemblaggio più veloce e meno soggetto a errori. Concentrandosi sul modo in cui i componenti si uniscono, si possono evitare ritardi di produzione e guasti sul campo.
Progettazione per una facile saldatura, rivettatura o fissaggio
I metodi di giunzione influiscono sia sulla resistenza che sulla velocità di produzione. Saldatura fornisce giunzioni permanenti, ma richiede l'accesso alla torcia e lo spazio per controllare il calore. È probabile che si verifichino distorsioni se i cordoni di saldatura sono troppo vicini alle curve o ai bordi. Una buona regola è quella di mantenere almeno 2-3 volte lo spessore del materiale tra una curva e una linea di saldatura.
Rivetti e elementi di fissaggio funzionano meglio per gli assemblaggi che possono richiedere manutenzione. La standardizzazione delle dimensioni dei dispositivi di fissaggio per un prodotto riduce i cambi di utensili e semplifica l'inventario. I fori preforati migliorano anche la precisione e la velocità, poiché gli operatori non devono forare o riallineare i pezzi durante la produzione.
Pianificazione dell'allineamento dei fori e della sovrapposizione delle tolleranze
I fori disallineati sono uno dei problemi più comuni negli assemblaggi di lamiere. Anche piccoli spostamenti di tolleranza possono sommarsi su più parti collegate. Ad esempio, una tolleranza di ±0,2 mm su cinque pannelli può comportare un disallineamento di 1 mm, sufficiente a impedire un corretto accoppiamento.
I progettisti dovrebbero prendere in considerazione l'accumulo di tolleranze in anticipo. I fori scanalati o i fori di compensazione consentono ai pezzi di adattarsi quando le tolleranze si accumulano. Le spine o le linguette di posizionamento consentono un migliore allineamento prima del fissaggio.
Produttività ed efficienza del processo
Progetti efficienti consentono di risparmiare tempo e costi di produzione. La semplificazione delle forme e la riduzione dei passaggi aggiuntivi aiutano i team di produzione a lavorare in modo più efficace.
Semplificare le geometrie per ridurre i tempi di produzione
Le forme complesse richiedono un maggior numero di utensili, di impostazioni delle macchine e di manodopera. Ogni piegatura, ritaglio o contorno aggiunto rallenta la produzione. Quando questo accade per molti pezzi, l'impatto totale può essere significativo.
Superfici piane, raggi più ampi e un minor numero di curve facilitano la formatura dei pezzi e riducono gli errori. L'utilizzo di fori rotondi o quadrati al posto di forme personalizzate nella punzonatura CNC riduce inoltre i tempi di programmazione ed evita la necessità di utensili speciali.
Ridurre al minimo le operazioni secondarie attraverso una progettazione intelligente
Operazioni secondarie come sbavatura, macinazioneo di foratura aggiuntiva aggiungono costi e gestione. L'efficienza diminuisce ogni volta che un pezzo passa da una stazione all'altra. Progettare con ritagli puliti, fori di dimensioni standard e transizioni fluide riduce al minimo la necessità di ulteriori finiture.
Ad esempio, l'utilizzo di punzoni di dimensioni standard evita la foratura personalizzata in un secondo momento. L'aggiunta di raggi agli angoli vivi riduce i punti di stress ed elimina la necessità di ulteriori rettifiche. In alcuni casi, la progettazione di linguette e scanalature auto-posizionate può eliminare l'allestimento di attrezzature durante la saldatura.
Tolleranza e adattamento
Un controllo ragionevole delle tolleranze mantiene gli assemblaggi coerenti e riduce le rilavorazioni. Il giusto equilibrio garantisce un assemblaggio fluido e prestazioni affidabili.
Impostazione di tolleranze realistiche per i processi di lavorazione della lamiera
I processi di lavorazione della lamiera hanno dei limiti naturali. Taglio laser possono di solito mantenere una precisione di circa ±0,1 mm, mentre le curve variano spesso da ±1° a ±2°. Questi valori sono tipici della produzione e devono guidare le scelte progettuali. Richiedere tolleranze più strette di quelle che il processo può raggiungere aumenta i costi senza migliorare la funzionalità.
I progettisti dovrebbero applicare tolleranze strette solo quando la funzione lo richiede. Ad esempio, il foro di un perno può richiedere ±0,05 mm, mentre il foro di un bullone può consentire ±0,2 mm. Questo approccio aiuta a concentrare l'ispezione e il controllo qualità sulle caratteristiche più importanti.
Prevenzione di spazi vuoti e disallineamenti negli assiemi
Anche piccole deviazioni delle dimensioni del taglio o dell'angolo di piegatura possono causare spazi vuoti visibili o accoppiamenti inadeguati. Un errore di piegatura di 1° in una flangia di 100 mm sposta il bordo di quasi 2 mm, causando problemi di allineamento durante l'assemblaggio. Questi errori spesso costringono gli operatori a regolare manualmente i pezzi, rallentando la produzione e aumentando la possibilità di scarti.
I progettisti possono ridurre questi problemi inserendo nei pezzi delle caratteristiche di allineamento. Le linguette e le scanalature guidano i pezzi in posizione durante la saldatura o il fissaggio. I fori di compensazione sovradimensionati offrono ai bulloni o ai rivetti lo spazio necessario. I perni di posizionamento aiutano i pezzi a posizionarsi correttamente prima della giunzione finale.
Design di fori e ritagli
Fori e ritagli ben posizionati rendono gli assiemi più facili da costruire e più resistenti nell'uso. Un'attenta pianificazione delle dimensioni dei fori, della spaziatura e degli elementi di supporto migliora sia la producibilità che la durata.
Ottimizzazione delle dimensioni dei fori e della loro vicinanza ai bordi
I fori troppo vicini ai bordi indeboliscono la lamiera e aumentano il rischio di crepe. Una linea guida standard prevede che il centro del foro sia distante dal bordo almeno due volte lo spessore del materiale. Ad esempio, la distanza minima in una lamiera da 2 mm dovrebbe essere di 4 mm.
Anche il diametro dei fori non deve essere inferiore allo spessore della lastra. In questo modo si previene l'usura degli utensili e si evita la distorsione durante la punzonatura o il taglio laser. Se i fori sono più piccoli di quelli raccomandati, può essere necessaria una seconda foratura, che comporta costi e tempi aggiuntivi. Progettare i fori in modo che corrispondano alle dimensioni standard della punzonatura o del taglio laser garantisce una produzione più rapida e accurata.
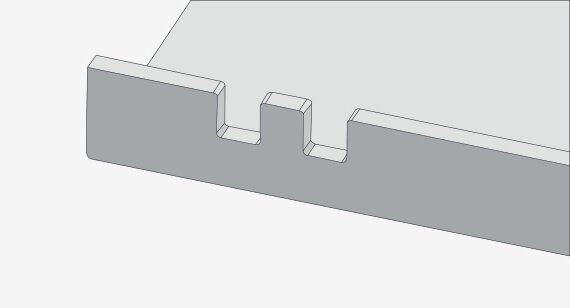
Progettazione di tacche e linguette efficaci per l'assemblaggio
Le tacche e le linguette aiutano i pezzi a localizzarsi e a collegarsi durante l'assemblaggio. Le linguette ben progettate possono fungere da elementi autofissanti, riducendo la necessità di maschere o dispositivi aggiuntivi. È buona norma che la larghezza delle linguette sia pari a 2-3 volte lo spessore del materiale, per mantenerle resistenti durante la manipolazione e la giunzione.
Gli intagli devono evitare gli angoli interni acuti, che creano punti di stress. L'aggiunta di un piccolo raggio (da 0,5 a 1 mm) distribuisce le sollecitazioni in modo più uniforme e migliora la durata a lungo termine. Per gli assiemi di grandi dimensioni, le linguette e le tacche ad incastro guidano i pezzi in posizione, rendendo l'allineamento più rapido e affidabile.
Finitura superficiale e rivestimenti
Finitura superficiale influisce sia sulle prestazioni che sull'aspetto. Una buona progettazione tiene conto di come i rivestimenti modificano le dimensioni, la durata e l'aspetto finale.
Preparazione per il rivestimento in polvere, l'anodizzazione o la placcatura
Ogni processo di rivestimento ha uno spessore e requisiti propri. Rivestimento in polvere aggiunge circa 50-150 micron (0,05-0,15 mm), che possono influire sulla tenuta di giunti e fori. I progettisti dovrebbero lasciare uno spazio sufficiente per evitare interferenze.
Anodizzazione è comune per l'alluminio e fornisce resistenza alla corrosione e durezza. Uno strato anodizzato tipico ha uno spessore di 5-25 micron. L'anodizzazione dura, utilizzata per i componenti per impieghi gravosi o aerospaziali, può raggiungere i 100 micron e offre una maggiore protezione dall'usura.
Placcaturacome lo zinco o il nichel, migliora la conduttività e la protezione della superficie. Questi rivestimenti sono più sottili, di solito 2-25 micron, ma richiedono tolleranze. Le aree di mascheratura, come i punti di messa a terra o le filettature, devono essere pianificate in anticipo nella progettazione.
Progettare tenendo conto di finiture estetiche e protettive
Le finiture non si limitano a proteggere il metallo. Danno anche forma all'aspetto e alla sensazione di un prodotto per l'utente. La verniciatura a polvere offre una vasta scelta di colori e crea una superficie liscia e resistente. Resiste ai graffi e ai danni dei raggi UV, rendendola adatta all'uso esterno.
L'anodizzazione conferisce un aspetto metallico e migliora la resistenza all'usura. Può anche essere tinta a scopo decorativo. La placcatura crea un aspetto lucido e brillante e può aggiungere proprietà come la conduttività elettrica.
Ottimizzazione dei costi
Progetti efficienti fanno risparmiare denaro senza ridurre la qualità. Un'attenta pianificazione in fase di progettazione ha spesso l'impatto più significativo sul costo complessivo del progetto.
Ridurre gli sprechi di materiale attraverso il nesting e il layout
I costi dei materiali rappresentano una quota importante della produzione di lamiere. Il nesting - il processo di disposizione dei pezzi su una lamiera per massimizzare l'uso del materiale - aiuta a ridurre gli scarti. Ad esempio, un nesting accurato può far risparmiare 10-20% di materia prima nella produzione di pannelli di medie dimensioni.
I progettisti dovrebbero evitare ritagli inutili o forme irregolari che complicano il nesting. Forme semplici e ripetibili facilitano la disposizione efficiente dei pezzi. Quando si progettano gli assiemi, bisogna considerare come i pezzi si incastrano tra loro sul foglio grezzo. Questo approccio migliora l'efficienza del taglio laser e della punzonatura, riducendo al minimo gli avanzi di materiale.
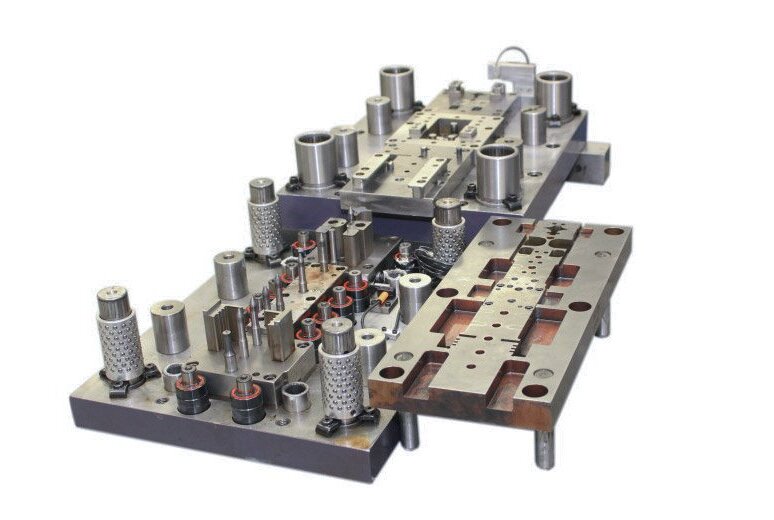
Progettare tenendo conto degli strumenti e degli stampi standard
L'utilizzo di utensili standard riduce i costi e i tempi di consegna. Punzoni, stampi o utensili di piegatura personalizzati aggiungono costi e rallentano la produzione. La progettazione di pezzi che corrispondono a stampi di pressa piegatrice, punzonatura o stampaggio standard consente di risparmiare tempo di preparazione e di evitare costi di attrezzaggio speciali.
Ad esempio, la scelta di dimensioni dei fori e raggi di curvatura adatti agli utensili disponibili elimina la necessità di operazioni secondarie. Gli angoli, gli schemi dei fori e le dimensioni delle flange standard migliorano l'uniformità dei cicli di produzione. La progettazione con utensili standard garantisce risultati affidabili, tenendo sotto controllo i costi.
Manutenzione e accessibilità
Progettare per la manutenzione aiuta i gruppi a rimanere funzionali nel tempo. I prodotti di facile manutenzione durano più a lungo e hanno prestazioni più affidabili.
Consente un facile smontaggio per le riparazioni e gli aggiornamenti.
Le parti devono essere facili da rimuovere senza danneggiare i componenti circostanti. L'utilizzo di elementi di fissaggio standard e la presenza di punti di accesso liberi velocizzano lo smontaggio. Ad esempio, i pannelli fissati con viti anziché con saldature consentono di sostituirli senza doverli tagliare o molare.
I progettisti dovrebbero anche evitare componenti strettamente annidati che bloccano gli strumenti o limitano l'accesso manuale. Le linguette e le funzioni di allineamento aiutano i componenti a scorrere in posizione durante il riassemblaggio, riducendo gli errori e rendendo il processo più fluido.
Progettare per l'uso e la manutenzione a lungo termine
La durata non dipende solo dalla scelta dei materiali, ma anche dalle modalità di manutenzione del prodotto. L'aggiunta di rinforzi nei punti in cui l'usura è probabile, la presenza di spazi per la lubrificazione e la progettazione di componenti sostituibili aumentano la durata del prodotto.
Cerniere, giunti e dispositivi di fissaggio sono punti di rottura comuni. Se queste aree sono progettate per un uso ripetuto e una facile sostituzione, gli assemblaggi rimangono funzionali per anni. I progetti di manutenzione riducono anche il costo totale di proprietà per gli utenti finali, rendendo i prodotti più affidabili e attraenti nel tempo.
Anche i progetti migliori possono incontrare problemi se l'assemblaggio e la producibilità non vengono considerati in anticipo. Questi otto consigli si concentrano sulle aree problematiche più comuni e sulle soluzioni pratiche per rendere gli assemblaggi più resistenti, più facili da produrre e più affidabili.
Per un ulteriore supporto, potete rivolgervi a noi di Shengen. Condividete il vostro modello CAD 3D con il nostro teamPossiamo esaminare il vostro progetto, suggerirvi miglioramenti e fornirvi un preventivo pratico e veloce.
Ciao, sono Kevin Lee

Negli ultimi 10 anni mi sono immerso in varie forme di lavorazione della lamiera, condividendo qui le mie esperienze in diverse officine.
Contattate
Kevin Lee
Ho oltre dieci anni di esperienza professionale nella fabbricazione di lamiere, con specializzazione nel taglio laser, nella piegatura, nella saldatura e nelle tecniche di trattamento delle superfici. In qualità di direttore tecnico di Shengen, mi impegno a risolvere sfide produttive complesse e a promuovere innovazione e qualità in ogni progetto.
Risorsa correlata

Acciaio inossidabile resistente alle impronte digitali: come funziona e come sceglierlo

OEM e produzione a contratto: Come scegliere il modello giusto per il vostro progetto

Costo di allestimento e costo unitario nella produzione di lamiere
