De nombreux fabricants sont confrontés à des difficultés lorsqu'ils passent du prototype à la production dans le domaine de la fabrication métallique. Les retards, les incohérences en matière de qualité et l'augmentation des coûts peuvent faire dérailler même les projets les plus prometteurs. Grâce à des stratégies de planification et d'exécution appropriées, vous pouvez éviter ces écueils courants et obtenir des résultats satisfaisants pour vos besoins en matière de fabrication métallique.
Nous explorerons des méthodes éprouvées et des conseils pratiques pour vous aider à optimiser votre parcours de fabrication métallique, du concept initial à la production finale. Ces idées sont le fruit d'années d'expérience pratique dans le cadre de divers projets de fabrication.
Comprendre le processus de fabrication des métaux
Fabrication métallique est au cœur de nombreuses industries, de l'aérospatiale à l'automobile. Il s'agit de transformer des matières premières en formes et produits spécifiques à l'aide de divers procédés tels que le découpage, le soudage, l'emboutissage et l'assemblage. Mais qu'est-ce qui se passe exactement dans ce processus ?
Qu'est-ce que la fabrication métallique ?
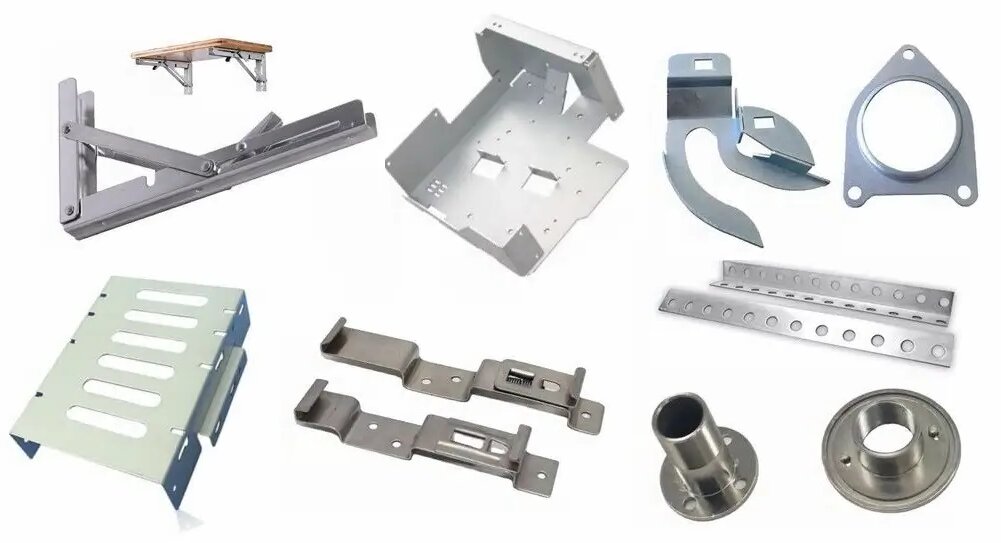
La fabrication de métaux est le processus de création de structures et de composants métalliques à partir de matériaux bruts. Elle consiste généralement à façonner, couper et assembler des métaux pour former des pièces utilisées dans différentes industries. En fonction des spécifications, ce processus peut aller de petits projets personnalisés à des séries de production à grande échelle.
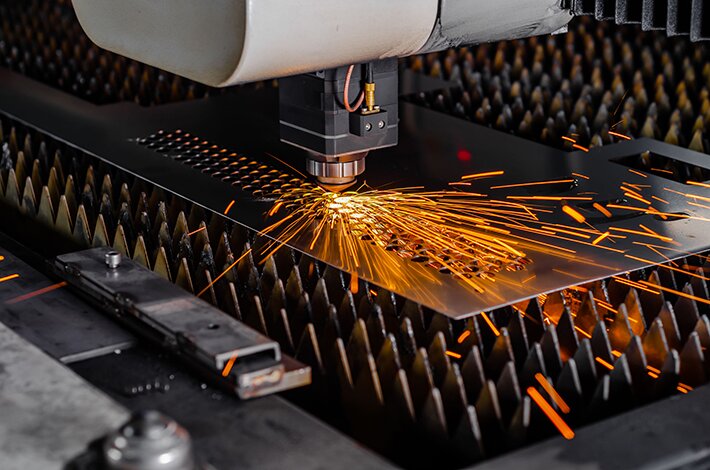
Principaux processus impliqués : Découpage, soudage, emboutissage et assemblage
- Découpage : Diviser des feuilles ou des blocs de métal en pièces plus petites à l'aide d'outils tels que lasersLes outils de travail peuvent être utilisés pour la fabrication d'outils de coupe, de coupes au plasma ou de cisailles.
- Soudage: Soudage assemble des pièces métalliques en faisant fondre les bords et en les fusionnant. Cette opération est essentielle pour créer des structures solides et durables.
- Estampillage: Estampillage consiste à façonner ou à découper le métal dans des formes prédéfinies à l'aide de matrices et de presses. Ce processus est souvent utilisé pour la production de masse et garantit l'uniformité de la taille des pièces.
- Assemblée: L'étape finale consiste à assembler les éléments fabriqués et à les mettre en forme. assemblage pour en faire un produit complet.
Phase de prototypage : Préparer le terrain pour la production
Le prototypage est la base de tout projet de fabrication métallique réussi. C'est là que les idées prennent forme et que les problèmes potentiels sont identifiés avant qu'ils ne deviennent coûteux. Voyons pourquoi le prototypage est important, comment choisir la bonne méthode et quels sont les matériaux les plus efficaces.
Importance du prototypage dans la fabrication métallique
Le prototypage ne se limite pas à la création d'un modèle : il s'agit d'une étape essentielle pour s'assurer que votre projet fonctionne comme prévu.
Identifier rapidement les défauts de conception
Un prototype vous permet de tester votre conception dans des conditions réelles. Vous pouvez repérer des problèmes tels que des articulations faibles, un mauvais ajustement ou des géométries inefficaces avant de passer à la production. La résolution de ces problèmes à un stade précoce permet de gagner du temps et de l'argent.
Réduction des coûts et efficacité des processus
Le prototypage vous aide à optimiser votre conception en vue de la fabrication. En affinant le prototype, vous pouvez réduire le gaspillage de matériaux, simplifier l'assemblage et rationaliser les processus de production, ce qui permet de réduire les coûts et d'accélérer les délais d'exécution.
Choisir la bonne méthode de prototypage
La méthode de prototypage que vous choisissez dépend de la complexité, du calendrier et du budget de votre projet.
Prototypage rapide
Utilisations du prototypage rapide impression en 3D ou Usinage CNC pour créer rapidement un modèle physique à partir d'une conception numérique. Il est idéal pour tester la forme, l'ajustement et la fonction.
- Avantages: Rapidité d'exécution, rentabilité pour les petits lots.
- Meilleur pour: Validation de la conception à un stade précoce.
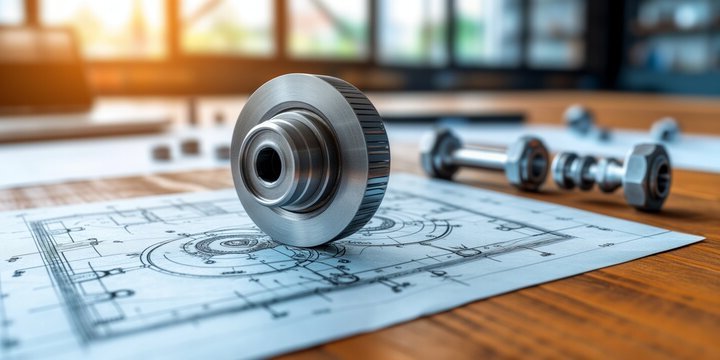
Usinage CNC et fabrication additive
- Usinage CNC: Elle utilise des méthodes soustractives pour sculpter un prototype à partir d'un bloc de métal solide. Cette méthode est précise et fonctionne bien pour les prototypes fonctionnels.
- Fabrication additive (impression 3D): Construit le prototype couche par couche. Cette méthode est plus rapide pour les géométries complexes, mais elle n'offre pas la solidité des pièces usinées.
Sélection des matériaux pour les prototypes
Les matériaux que vous choisissez pour votre prototype ont une incidence sur ses performances, son coût et sa faisabilité.
Matériaux couramment utilisés
- Aluminium: Léger, résistant à la corrosion et facile à usiner. Idéal pour les prototypes de l'aérospatiale et de l'automobile.
- Acier: Solide et durable, convient aux applications industrielles.
- Acier inoxydable: Offre une excellente résistance à la corrosion, parfaite pour les prototypes médicaux ou alimentaires.
- Laiton et Cuivre: Utilisé pour les composants électriques ou les pièces décoratives.
Propriétés des matériaux à prendre en compte
- Fonctionnalité: Le matériau répond-il aux exigences de performance du prototype ?
- Coût: Le matériau est-il rentable à des fins d'essai ?
- Usinabilité: Le matériau peut-il être facilement façonné ou modifié ?
Les étapes du processus de passage du prototype à la production
Passer du prototype à la production est un parcours structuré qui nécessite une planification et une exécution minutieuses. Chaque étape permet de s'assurer que votre produit est prêt pour le marché. Décomposons le processus en étapes concrètes.
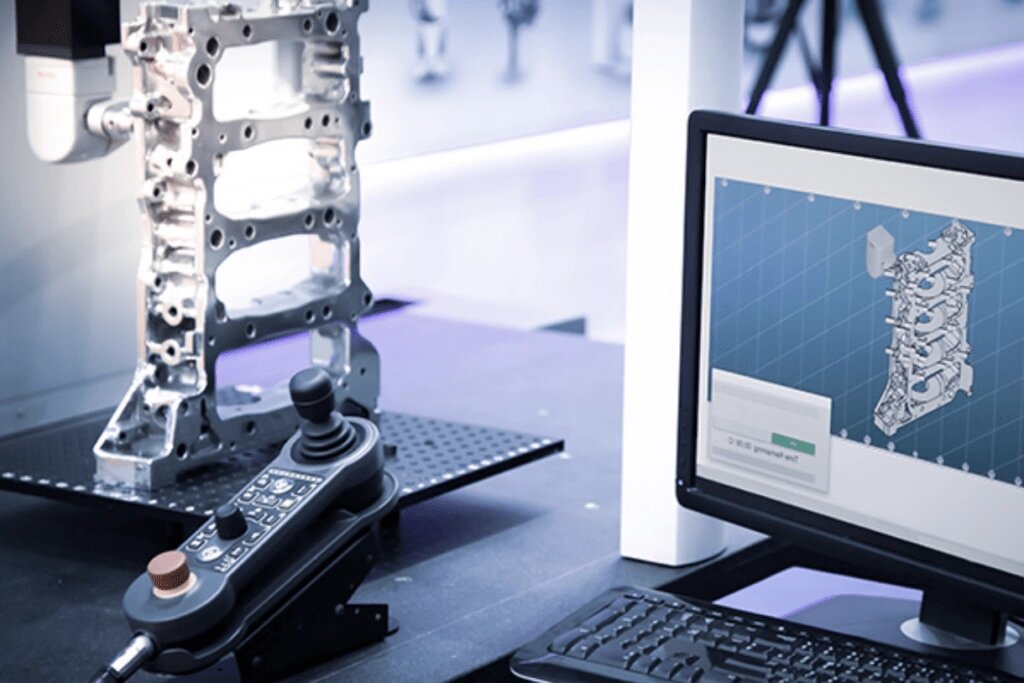
Étape 1 : Création d'un modèle de prototype numérique
Un prototype numérique est le plan de votre produit physique. Il vous aide à visualiser et à affiner votre conception avant le début de la fabrication.
Prototypage conceptuel
Cette étape consiste à transformer les idées en un modèle numérique de base. Utilisez un logiciel de CAO 3D pour créer une ébauche de conception qui donne un aperçu de la forme et des caractéristiques du produit.
- Objectif: Valider le concept de base.
- Outils: Esquisse, modélisation 3D de base.
Prototypage de fonctionnalités
Une fois le concept approuvé, ajoutez des caractéristiques détaillées au modèle. Il s'agit des dimensions, des tolérances et des éléments fonctionnels.
- Objectif: Affiner la conception en termes de fonctionnalité.
- Outils: Outils de simulation avancés pour les logiciels de CAO.
Prototypage évolutif
Sur la base du retour d'information et des essais, itérer sur la conception et procéder à des ajustements pour améliorer les performances, la fabricabilité et l'expérience de l'utilisateur.
- Objectif: Optimiser la conception pour la production.
- Outils: Logiciels de CAO, outils de prototypage (CNC, impression 3D).
Estimation du calendrier de création des prototypes
- Prototypage conceptuel : 1 à 2 semaines.
- Prototypage des fonctionnalités : 2 à 4 semaines.
- Prototypage évolutif : 4-6 semaines.
Étape 2 : Étude de marché et essais de produits
Avant de vous engager dans la production de masse, vérifiez la viabilité commerciale et la fonctionnalité de votre produit.
Tester la demande pour le produit
Réalisez des enquêtes, des groupes de discussion ou des campagnes de crowdfunding pour évaluer l'intérêt. Assurez-vous qu'il existe un marché pour votre produit avant de passer à l'échelle supérieure.
Outillage, échantillonnage et lancement de la non production
Créer l'outillage (moules, matrices) pour la production de petites séries. Tester ces échantillons pour s'assurer qu'ils répondent aux normes de qualité.
- Objectif: Valider la fabricabilité et la qualité.
- Sortie: Petit lot de prototypes fonctionnels.
S'assurer que le prototype est adapté à la production de masse
Tester le prototype dans des conditions réelles. Vérifiez la durabilité, les performances et la facilité d'assemblage. Effectuer les ajustements nécessaires.
Étape 3 : Passage à une production à faible volume
La production de faibles volumes comble le fossé entre le prototypage et la fabrication à grande échelle.
Préparer les documents requis
- Dessins techniques.
- Nomenclature (BOM).
- Plans de contrôle de la qualité.
Délai idéal
Pour la production de faibles volumes, prévoyez de 2 à 4 semaines. Ce délai est nécessaire pour la mise en place de l'outillage, l'approvisionnement en matériaux et les contrôles de qualité.
Budget total de fabrication
Tenez compte des coûts des matériaux, de la main-d'œuvre, de l'outillage et des frais généraux. Veillez à ce que le budget corresponde à votre stratégie de prix.
Donner des produits pour la production
Remettre les dessins et les spécifications finalisés à votre fabricant. Maintenir une communication claire pour éviter les malentendus.
Lancement du produit
Une fois la production terminée, distribuez le produit à votre marché cible. Surveillez les réactions et soyez prêt à apporter des améliorations.
Passage du prototype à la production
Le passage d'un prototype à la production de masse est une phase critique qui nécessite une planification et une exécution minutieuses. C'est là que votre conception rencontre les contraintes de fabrication du monde réel. Examinons les facteurs clés à prendre en compte et les ajustements nécessaires pour assurer une transition en douceur.
Passage des prototypes à la production de masse
Passer d'un prototype à une production de masse ne se résume pas à une simple augmentation des quantités. Il faut évaluer les capacités de production et prendre des décisions stratégiques.
Facteurs clés à prendre en compte lors du passage à la production
- Fabrication: Veillez à ce que votre conception puisse être produite efficacement à l'échelle. Simplifiez les géométries complexes et standardisez les composants.
- Disponibilité du matériel: Confirmer que les matériaux sont disponibles dans les quantités nécessaires.
- Rapport coût-efficacité: Optimiser les processus afin de réduire les déchets et les coûts unitaires.
- Contrôle de la qualité: Mettre en œuvre des protocoles d'essai et d'inspection rigoureux pour maintenir la cohérence.
Capacités de production et considérations relatives au volume
- Production à faible volume: Idéal pour tester le marché ou produire des produits de niche. Utiliser des méthodes de fabrication flexibles telles que l'usinage CNC.
- Production en grande série: Nécessite un outillage spécifique et des processus automatisés. Envisager le moulage par injection ou l'emboutissage pour plus d'efficacité.
Ajustements et raffinements dans la conception
Même les meilleurs prototypes nécessitent souvent des ajustements avant d'être prêts pour la production de masse.
Ajustements standard de la conception avant la production
- Tolérances: Resserrer ou desserrer les tolérances en fonction des capacités de fabrication.
- Épaisseur de matériau: Ajuster l'épaisseur pour améliorer la durabilité ou réduire le poids.
- Processus d'assemblage: Simplifier l'assemblage en réduisant le nombre de pièces ou en utilisant des conceptions modulaires.
- Finitions de surface: Spécifier des finitions qui améliorent la fonctionnalité ou l'esthétique, telles que le revêtement en poudre ou l'anodisation.
Pourquoi l'itération est nécessaire au succès d'un produit
L'itération permet de s'assurer que le produit répond aux objectifs de performance, de qualité et de coût.
- Performance: Les tests révèlent des faiblesses qui peuvent être corrigées avant de passer à l'échelle supérieure.
- Coût: L'affinement de la conception permet de réduire les déchets de matériaux et le temps de production.
- Expérience de l'utilisateur: Le retour d'information sur les prototypes permet d'améliorer la convivialité et la fonctionnalité.
Conclusion
Le passage du prototype à la production est une phase cruciale dans la réalisation de votre produit. En planifiant soigneusement le processus de mise à l'échelle, en apportant les ajustements nécessaires à la conception et en affinant les méthodes de production, vous pouvez vous assurer que le produit final est à la fois de haute qualité et rentable.
Lorsque vous êtes prêt à faire passer votre produit du stade du prototype à celui de la production, assurez-vous d'avoir un partenaire de confiance qui comprend les nuances de la fabrication à grande échelle.
Prêt à donner vie à votre projet ? Contactez-nous dès aujourd'hui pour discuter de votre projet et de la manière dont nous pouvons vous aider à passer sans heurts du prototype à la production !
Hey, je suis Kevin Lee

Au cours des dix dernières années, j'ai été immergé dans diverses formes de fabrication de tôles, partageant ici des idées intéressantes tirées de mes expériences dans divers ateliers.
Prendre contact
Kevin Lee
J'ai plus de dix ans d'expérience professionnelle dans la fabrication de tôles, avec une spécialisation dans la découpe au laser, le pliage, le soudage et les techniques de traitement de surface. En tant que directeur technique chez Shengen, je m'engage à résoudre des problèmes de fabrication complexes et à favoriser l'innovation et la qualité dans chaque projet.
Ressources connexes

Acier électro-galvanisé : guide de fabrication et de sélection

Poinçonnage ou découpe laser : Coût, vitesse et compromis DFM

Usinage d'angle : Ce qui détermine le coût et la qualité des pièces
