Many manufacturers struggle with cutting thick metal in a way that’s clean, affordable, and easy to manage. Plasma cutting works, but it gets expensive. Waterjet is precise, but slow. If you’re working with carbon steel, oxy-fuel cutting might be your simplest solution. It’s an old-school method, but it still gets the job done with lower cost and less setup.
Want to know how it works, what you need, and when to use it instead of plasma or laser? Keep reading.
What is Oxy Fuel Cutting?
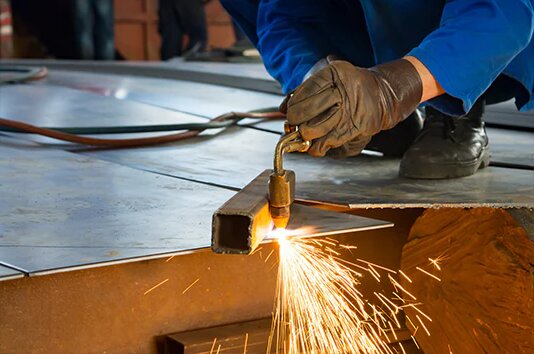
Oxy fuel cutting is a method for slicing through steel using a torch. The torch mixes fuel gas and oxygen to heat the metal surface. Once the steel reaches its ignition temperature, a jet of pure oxygen is blown through the heated area. This burns the metal and forces out the molten oxide, creating a narrow, clean cut.
This method is mainly used for cutting mild or low-alloy steel. It doesn’t work well on stainless steel or non-ferrous metals because they don’t oxidize in the same way.
Core Principles of Oxy-Fuel Cutting
Oxy-fuel cutting works by combining heat and oxygen to cut through steel. The process may sound simple, but each part plays a specific role. Here’s how it works from the ground up.
The Combustion Process Explained
The cutting torch uses two gases: one to heat, one to cut. First, the torch preheats the metal using a mix of oxygen and a fuel gas like acetylene, propane, or natural gas. This preheating brings the steel close to its ignition temperature, around 1,800°F (980°C).
Once the metal is hot enough, a valve opens to release a stream of pure oxygen. This stream reacts with the hot steel and starts a rapid oxidation process. The metal burns and turns into iron oxide, which is blown away by the force of the oxygen stream.
Role of Oxygen and Fuel Gases
Each gas in the process has a job. Fuel gas provides the initial heat. Acetylene is the hottest and most common, but propane and other gases are also used depending on the application. Oxygen plays two roles. It mixes with the fuel to create the flame and then acts alone to burn and remove the metal.
Pure oxygen is key. It must be at high pressure and free of contaminants. Even a slight impurity can weaken the flame or slow the cutting process.
Exothermic Reactions and Cutting Action
The cutting itself comes from an exothermic reaction. When pure oxygen hits the hot steel, it triggers rapid oxidation. This reaction gives off more heat, which helps keep the cut going. The reaction continues as long as oxygen flows and the metal stays hot.
The oxygen not only helps burn the metal but also clears the molten oxide from the cut zone. This is why the cut is narrow, sharp, and consistent. There’s no mechanical force. The whole process relies on chemical energy.
How Does Oxy Fuel Cutting Work?
Oxy fuel cutting may seem simple, but it follows a clear step-by-step process. Each step plays a role in getting a clean, accurate cut. Here’s how it works from start to finish:
Step 1: Set up the Equipment
Connect the oxygen and fuel gas tanks to the torch using proper hoses and regulators. Make sure all connections are tight. Check for leaks and confirm that flashback arrestors are in place.
Step 2: Adjust Gas Flow
Open the valves slowly. Set the correct pressure for both the oxygen and fuel gas using the regulators. Follow the recommended settings for the type of fuel and the thickness of the steel.
Step 3: Light the Torch
Use a spark lighter to ignite the fuel gas. Open the oxygen valve slightly to adjust the flame. Set the torch to a neutral flame—this gives a clean and steady heat source.
Step 4: Preheat the Steel
Hold the torch close to the edge of the metal. The preheat flame raises the temperature until the steel turns bright red. This stage prepares the metal for cutting.
Step 5: Start the Cut
Press the cutting lever to release a stream of pure oxygen. This triggers a chemical reaction. The hot steel reacts with the oxygen and starts burning away.
Step 6: Guide the Torch
Move the torch steadily along the desired cut path. Keep the tip at a consistent distance and speed. Too fast, and the cut may not go through. Too slow, and slag builds up.
Step 7: Finish and Inspect
Once the cut is done, release the oxygen jet. Turn off the torch in reverse order—oxygen first, then fuel gas. Let the part cool, then inspect the edge for straightness and slag. Touch up if needed.
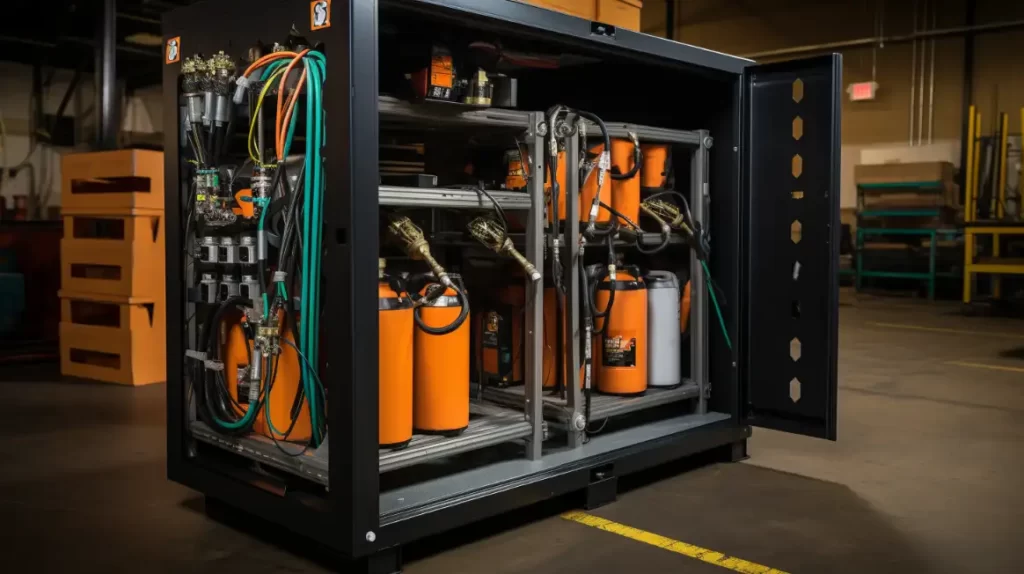
Equipment Overview
Oxy fuel cutting depends on the right setup. Each component in the system must work properly for safe and clean cuts. Let’s look at what equipment you need and how it works together.
Cutting Torch Components
The torch is the heart of the system. It mixes fuel gas and oxygen to create a flame. It has two valves—one for oxygen, one for fuel. The torch head includes a nozzle or tip where the flame exits. This nozzle controls the shape and intensity of the flame.
Inside the torch, separate channels keep the gases from mixing too early. A trigger or lever controls the oxygen jet for cutting. A good torch design keeps the flame stable and allows quick control during cutting.
Fuel Gas Options: Acetylene, Propane, and More
Acetylene is the most common fuel gas. It burns hotter than others, making it great for fast preheating. But it’s also more expensive and has stricter handling rules.
Propane is cheaper and easier to store. It doesn’t burn as hot, so it takes longer to preheat, but it works well for longer cuts and general use. Natural gas and propylene are also used in some setups. The choice depends on cut thickness, cost, and available storage.
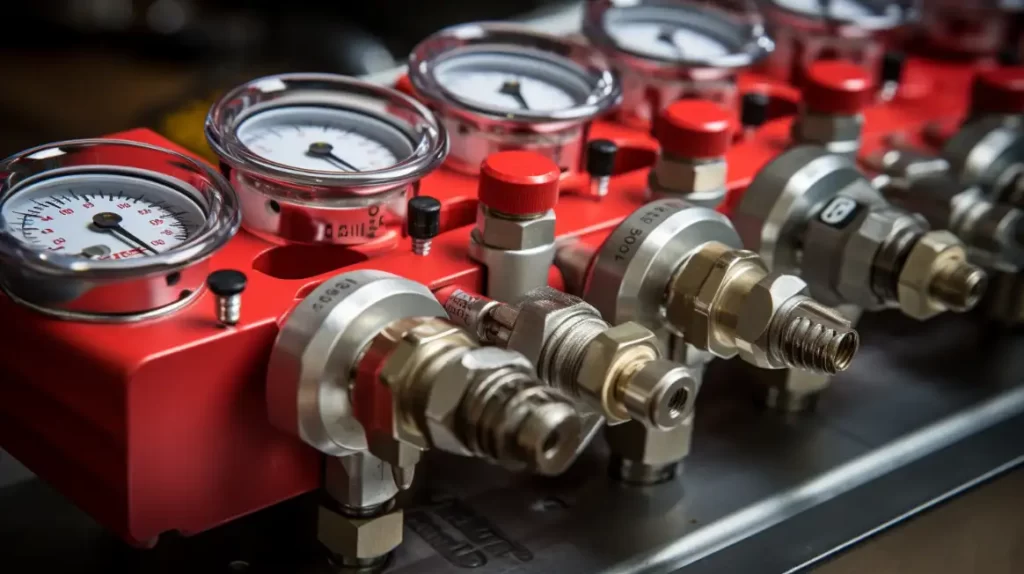
Oxygen Supply and Regulation Systems
Oxygen must be pure and pressurized. It usually comes in large cylinders or from an on-site generator. A steady flow is key to clean cuts. If the pressure drops, the oxygen jet weakens, and the cut quality suffers.
A regulator keeps the oxygen pressure stable. It connects to the cylinder and controls how much oxygen flows to the torch. The cutting process needs more oxygen than the preheating flame, so proper pressure settings matter.
Safety Valves, Hoses, and Regulators
The system uses flexible hoses to carry gas from the tanks to the torch. These hoses are color-coded: red for fuel, green for oxygen. They must be in good shape to prevent leaks or backfires.
Flashback arrestors and check valves protect the user. They stop flames from traveling backward into the hose or tank. Regulators also play a key role. They control gas pressure and help prevent surges.
Types of Oxy Fuel Cutting Torches
The cutting torch design affects how fast and accurately you can cut. Some torches are handheld, while others are mounted to machines for large-scale work. Each type fits a different need.
Manual Cutting Torches
Manual or handheld torches are used for small jobs, repairs, and fieldwork. They give the operator full control over the movement of the cut. These torches are simple to set up and easy to use.
They work best for cutting thick steel in situations where precision isn’t the top priority. A steady hand is important, especially for long or curved cuts. They are widely used in construction, scrap yards, and general fabrication.
Machine-Mounted Cutting Torches
Machine-mounted torches attach to a track or cutting table. These setups are used for cutting large sheets or repeating patterns. They offer better control and consistency than manual torches.
CNC oxy-fuel machines can follow pre-programmed paths. They are slower than plasma or laser cutters, but much more affordable for thick steel. These systems are common in fabrication shops and shipyards.
Multi-Torch Setups for Industrial Use
Multi-torch systems use several cutting heads at once. These are mounted on gantry-style machines. They allow shops to cut multiple parts at the same time, increasing production speed.
This setup is ideal for high-volume work. It’s used in industries that cut thick steel plates daily, like bridge building or heavy machinery manufacturing. These systems require a skilled setup but save time and cost per cut.
Fuel Gases: Properties and Selection
The choice of fuel gas affects cut speed, preheat time, cost, and safety. Each gas has unique traits. Picking the right one depends on your cutting needs, budget, and work environment.
Acetylene: High Heat, High Risk
Acetylene produces the hottest flame of all fuel gases. Its peak temperature reaches around 6,000°F when mixed with oxygen. This makes it great for quick preheating and starting cuts fast.
However, acetylene is unstable. It can explode under high pressure or if handled carelessly. It requires special storage and strict handling rules. It also costs more than other gases. For many shops, the speed it offers is worth the added precautions.
Propane: Economical and Versatile
Propane burns cooler than acetylene but still gets the job done. It’s safer to store and easier to handle. It also costs less and comes in many tank sizes.
Because of its lower flame temperature, propane takes a little longer to preheat metal. But it has a broader flame, which helps in cutting thicker plates or longer lines. It’s a popular choice for general-purpose cutting, especially in high-volume environments.
Other Gases: MAPP, Natural Gas, Hydrogen
MAPP gas is a blend of several hydrocarbons. It burns hotter than propane but is more stable than acetylene. It’s good for users who want a balance between speed and safety.
Natural gas is cheap and clean-burning. It’s used in shops with a fixed gas supply system. Its lower heat output means slower preheat, but it’s ideal for long production runs.
Hydrogen burns clean and hot, but is rarely used due to safety risks. It’s mostly limited to special applications where other gases don’t perform well.
Materials Suitable for Oxy-Fuel Cutting
Oxy fuel cutting works best with certain metals. The process relies on a specific chemical reaction, so the type of metal you cut matters a lot. Here’s what you should know before choosing this method.
Carbon Steel: Ideal Material Choice
Carbon steel is the best match for oxy-fuel cutting. This is because it oxidizes easily and has the right ignition temperature. The oxygen reacts with the hot steel and burns it cleanly.
Low to medium carbon steels give the best results. The cut edges are smooth, and the process is fast. That’s why this method is often used in construction, heavy equipment, and shipbuilding.
Why It’s Not Suitable for Stainless Steel or Aluminum
Stainless steel and aluminum don’t oxidize the same way. Instead of forming easy-to-remove slag, they form a tough oxide layer that resists cutting. The oxygen jet can’t break through it effectively.
As a result, the cut quality is poor or fails. For these metals, other methods like plasma or waterjet are a better choice.
Special Considerations for Rusty or Painted Surfaces
Rust or paint on the surface can affect the preheating stage. These coatings block the heat or burn unpredictably, which delays ignition. Paint may also release toxic fumes.
For best results, clean the surface before cutting. A wire brush or grinder removes most rust and coatings. This helps the torch heat the metal evenly and keeps the cut stable.
Cutting Techniques and Tips
Different cuts need different techniques. Whether you’re working with straight lines, circles, or beveled edges, torch control is key. These tips help you get cleaner, more accurate cuts.
Straight Line Cutting
For straight cuts, use a guide like a metal ruler or a cutting track. This keeps your hand steady and improves the edge quality. Keep the torch at a consistent angle and height. Watch the sparks—they should flow evenly from the bottom of the cut. If they scatter or stop, adjust your speed.
Mark your line clearly with soapstone or a scriber. Preheat the full starting edge to avoid a rough lead-in.
Circle and Shape Cutting
Cutting curves or holes takes more control. For small circles, you can use a compass attachment on the torch. For freehand shapes, go slow and steady. Keep your wrist flexible and move in smooth arcs.
Start from the center for inside cuts. Pierce a hole first, then work outward. For outside cuts, begin at the edge and follow the outline closely.
Bevel Cutting for Weld Prep
Bevel cuts help prepare parts for welding. Set the torch at a fixed angle—usually 30 to 45 degrees. Hold it steady throughout the cut to keep the bevel consistent.
Use a guide or jig to control the torch path. Practice is key, since bevel cuts are more sensitive to torch movement.
Controlling Speed and Flame Height
Speed affects cut quality. Go too fast, and the cut may not go through. Go too slow, and slag builds up on the bottom. Watch the spark trail to check if your speed is right.
Keep the torch tip at the right height—usually 1/8 to 1/4 inch above the surface. If it is too close, you’ll damage the nozzle. Too far and the cut won’t be clean. Keep the flame focused just ahead of the cutting line to maintain heat.
Beginner Mistakes to Avoid
New users often run into problems that affect cut quality and safety. These mistakes are common but easy to fix with the right habits. Here’s what to watch out for.
Incorrect Flame Adjustment
The flame must be set to a neutral condition—not too much oxygen, not too much fuel. A flame that’s too “rich” (too much fuel) burns dirty and leaves slag. One that’s too “lean” (too much oxygen) may overheat the metal and wear out the tip.
To adjust it right, start with the fuel, then slowly add oxygen until the flame is sharp and quiet. A properly tuned flame gives stable heat and cleaner cuts.
Cutting Too Fast or Too Slow
Speed matters. If you move too fast, the flame won’t fully cut through the steel. You’ll get an incomplete cut or a jagged edge. Move too slow, and the cut will widen, with lots of slag and heat distortion.
Watch the sparks. They should flow straight down through the cut. If they shoot back or scatter, adjust your speed.
Skipping Preheat or Misaligning Torch
Skipping preheat is a big mistake. The metal must reach the right temperature before cutting. If it’s too cold, the oxygen won’t react with the steel properly, and the cut won’t start cleanly.
Torch alignment is just as critical. Keep the tip perpendicular for straight cuts. For bevels, hold the angle steady. If the torch wobbles or tilts, the cut edge will be rough or uneven. Take your time to line it up before starting.
Conclusion
Oxy fuel cutting is a reliable method for cutting thick carbon steel. It uses a mix of fuel gas and oxygen to heat and burn through metal. This process is best for mild steel and works well in many industrial settings. It’s cost-effective, easy to set up, and ideal for both manual and machine cutting. By using the right torch, gas, and technique, you can get clean cuts with minimal waste.
Need help choosing the right cutting method or sourcing precision-cut metal parts? Contact our team to get expert support and a fast quote for your next project.
Hey, I'm Kevin Lee

For the past 10 years, I’ve been immersed in various forms of sheet metal fabrication, sharing cool insights here from my experiences across diverse workshops.
Get in touch
Kevin Lee
I have over ten years of professional experience in sheet metal fabrication, specializing in laser cutting, bending, welding, and surface treatment techniques. As the Technical Director at Shengen, I am committed to solving complex manufacturing challenges and driving innovation and quality in each project.
Related Resource

Fingerprint Resistant Stainless Steel: How It Works,and How to Choose


