When metal parts come off the production line, they often have sharp edges, small burrs, or surface scratches. These flaws can make assembly harder and affect how the part looks. Many manufacturers look for quick and reliable ways to fix these problems. Linishing is one method that helps smooth the surface and keeps production on track.
Linishing may seem simple, but there are essential details behind each step. Stay with me as we explore how linishing works, the equipment used, and how it can benefit your projects.
What Is Linishing in Manufacturing?
Linishing is a surface finishing method used to smooth and polish metal parts. It removes burrs, scratches, or weld marks using abrasive tools like belts or discs, making the surface cleaner and more even. It’s often done after cutting, welding, or shaping to prepare the part for painting, coating, or assembly.
The process works by applying friction to the metal. A belt, disc, or pad with an abrasive surface moves across the part, wearing down rough spots and flaws. This removes a small amount of material and leaves the surface smoother. The result depends on several factors, including the grit size of the abrasive, how much pressure is used, and the tool’s speed.
Standard Tools and Equipment Used
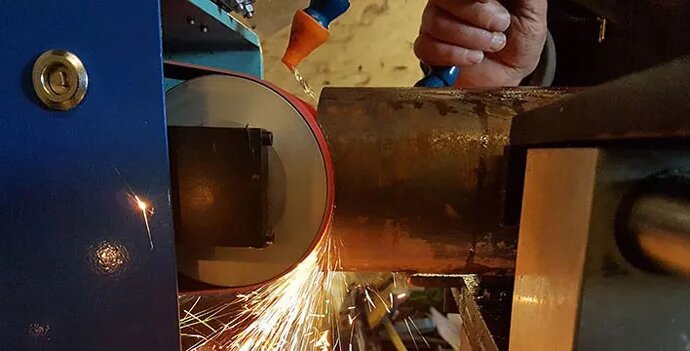
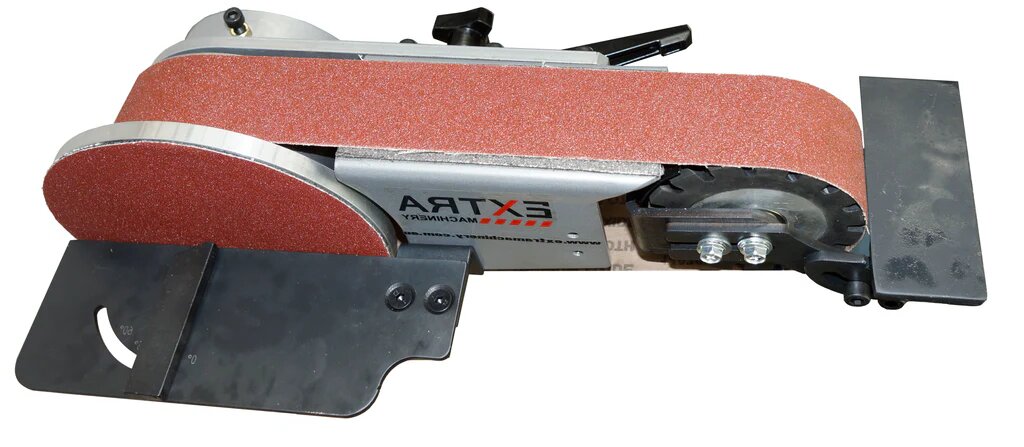
Linishing tools come in several forms. The most common is the linishing belt machine. It uses a continuous loop of abrasive material to grind and smooth metal surfaces. These belts come in different grit levels, from coarse to fine.
Disc linishers use rotating abrasive discs. They work well on flat or slightly curved surfaces. Handheld linishers help reach tight spots or work on small batches. They give the operator more control.
Some machines include adjustable tables or rollers, which help guide the part during the process. Many setups also have dust extraction systems, which remove metal particles from the air, keeping the workspace cleaner and safer.
Shops may also use linishing attachments on angle grinders or bench grinders. These are cost-effective options for basic finishing work.
Types of Linishing Techniques
Different linishing techniques depend on the required part size, shape, and surface finish. Each method has its own speed, control, or finish quality advantages.
Belt Linishing
Belt linishing uses a fast-moving abrasive belt stretched over rollers. It is ideal for straight edges, flat surfaces, and basic shaping. This method works quickly and removes more material in less time. It is commonly used in general fabrication, automotive parts, and metal furniture.
Disc Linishing
Disc finishing uses a circular abrasive disc mounted on a rotating wheel. It suits flat surfaces and works well for edge smoothing or finishing smaller parts. Operators can hold the part by hand or use a table for better control. It gives a smooth, even finish and is often used for cosmetic improvements.
Wide Belt Linishing
Wide belt finishing uses a broad abrasive belt that can handle large surface areas. It is often used for sheet metal, panels, or flat parts in bulk. The wide belt gives consistent results across the entire surface. This technique is common in fabricating and producing stainless steel, appliances, and elevator panels.
Robotic and CNC Linishing
Robotic or CNC linishing uses programmable machines to automate the process. These systems can repeat the same motion with precision. They are ideal for large batches, complex shapes, or tight tolerance needs. These systems reduce labor costs, improve consistency, and handle hard-to-reach surfaces.
Linishing Process Step by Step
Each step in the linishing process plays a key role in achieving a smooth and consistent surface. Below is a simple breakdown of how the process works from start to finish.
Step 1: Selecting the Right Abrasive Belt/Disc
The first step is choosing the right abrasive. Coarse grits (like 40–60) remove material fast. Finer grits (like 180–400) are used for smoother finishes. The grit choice will guide the material type, thickness, and desired surface finish.
Step 2: Securing the Workpiece
Next, the part must be secured. This keeps it from moving during the process. For small parts, clamps or jigs are used. Larger sheets can rest flat on a worktable. A stable setup is key to achieving an even finish.
Step 3: Adjust Settings
The operator then adjusts machine settings, including belt speed, pressure, and table height. Speed and pressure affect how much material is removed. Too much pressure can overheat or gouge the surface. Settings are fine-tuned based on the part and finish needed.
Step 4: Linishing Begins
The abrasive belt or disc contacts the surface. The operator moves the part or tool evenly across the area. Each pass removes scratches, weld marks, or uneven spots. The motion must stay steady to avoid lines or burns.
Step 5: Final Finishing
In the last step, a finer grit is used for the final pass. This gives the surface a smooth and uniform look. If needed, polishing or coating can follow. The part is cleaned and checked for surface quality before moving to the next stage.
Benefits of Linishing
Linishing improves both the function and appearance of metal parts. It prepares surfaces for the next step in production and helps meet design or quality standards.
Improved Surface Appearance
Linishing gives metal a clean, uniform finish. It removes weld marks, oxidation, and tool scratches. This is helpful for visible parts, such as panels or enclosures.
Enhanced Adhesion for Coatings
Smooth and even surfaces help paints, primers, or coatings stick better. Linishing removes contaminants and rough spots that could cause peeling or bubbling, improving the lifespan and appearance of the final coating.
Removal of Burrs, Scratches, and Imperfections
Linishing removes burrs left from cutting or punching. It also clears away deep scratches and dents. This reduces the risk of cuts during handling and keeps parts within tolerance.
Preparation for Welding or Painting
Clean surfaces are critical for strong welds and even paint. Linishing removes oxides and rough edges that interfere with these processes. It helps ensure stronger bonds and better visual results.
Key Considerations Before Linishing
Certain factors must be checked before linishing to protect the part and ensure a smooth process. These points affect finish quality, safety, and productivity.
Material Thickness and Tolerance
Linishing removes material from the surface. Thin parts or components with tight tolerances need extra care. Too much pressure or repeated passes can reduce thickness beyond spec. Always check the drawing and leave room for finishing.
Heat Generation and Surface Damage
Friction from linishing generates heat. This can warp thin parts or discolor the surface. Excessive heat may also affect temper or hardness in treated metals. To control temperature, use the right speed and cooling if needed.
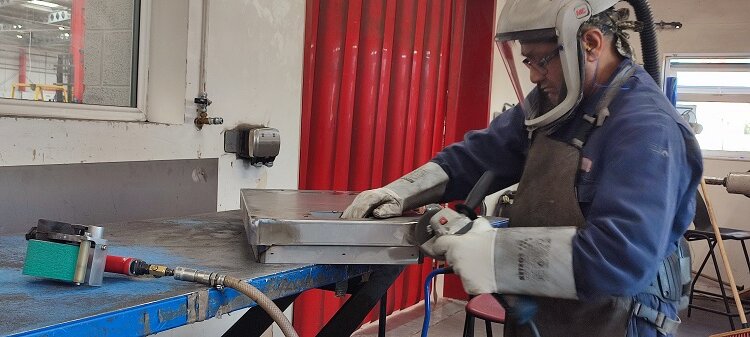
Dust Extraction and Safety Measures
Linishing creates fine dust and metal particles. These can be harmful if inhaled or left on work surfaces. Use dust collectors or vacuums to keep the area clean. To avoid injury or exposure, operators should wear masks, gloves, and safety glasses.
Alternatives to Linishing
While linishing is effective, other finishing methods may suit different needs. The choice depends on material type, finish level, and part design.
Grinding
Grinding removes more material than linishing. It uses rigid wheels, not belts or discs. This method is suitable for shaping, leveling welds, or fixing surface flaws. Grinding is more aggressive and less focused on appearance.
Polishing
Polishing creates a smooth, mirror-like surface using fine abrasives and soft pads. It is ideal for cosmetic parts or components that need low friction. Polishing comes after linishing when a high gloss is needed.
Sanding
Sanding is similar to linishing but usually done by hand or with orbital tools. It works well on wood, plastic, or painted metal. Sanding is slower and more suited for detail work or small batches.
When to Choose One Over the Other?
Choose linishing when you need a smooth, matte, or brushed finish on metal. Use grinding for heavy removal or reshaping. Pick polishing for high-shine results. Sanding fits small jobs or non-metal materials. The choice depends on part type, finish goal, and budget.
Conclusion
Linishing is a surface finishing process that smooths and refines metal parts using abrasive belts or discs. It removes weld marks, burrs, scratches, and prepares parts for painting, coating, or assembly. Linishing works well for both small parts and large panels and fits manual or automated workflows.
Are you looking for precision metal parts with clean, smooth finishes? Contact us today to learn how our finishing capabilities can support your next project.
Hey, I'm Kevin Lee

For the past 10 years, I’ve been immersed in various forms of sheet metal fabrication, sharing cool insights here from my experiences across diverse workshops.
Get in touch
Kevin Lee
I have over ten years of professional experience in sheet metal fabrication, specializing in laser cutting, bending, welding, and surface treatment techniques. As the Technical Director at Shengen, I am committed to solving complex manufacturing challenges and driving innovation and quality in each project.
Related Resource

Fingerprint Resistant Stainless Steel: How It Works,and How to Choose


